

Typography heroes can look really great on their own. All you need is a strong color palette and high-impact typography to make it pop.
But if you’re wanting to give your typography hero section more of a wow-factor, just a few special effects and animations will go a long way.
In this tutorial, we’ll show you how to use the Spotlight Hero Header template to add a variety of engaging effects to your typographic hero design.
Table of Contents:
- Step 1: Delete layers you don’t need
- Step 2: Edit the slide background color
- Step 3: Choose and apply your accent color
- Step 4: Edit the copy
- Step 5: Customize your fonts
- Step 6: Edit the headline hover animation
- Step 7: Customize the reveal animation
- Step 8: Customize the fluid effects
How to create a typography hero section with special effects
There are a number of special effects already built into this typography hero section— the initial reveal animation, cursor spotlight, rotating text, and fluid effects. You can keep them all as they are, remove some of them, or customize as much or as little of them as you want.
In the following tutorial, we’ll show you how to make some basic changes to this template in order to put a unique spin on it for your digital agency.
Here are some Slider Revolution resources to get you started if you’ve never used the plugin before:
Step 1: Delete layers you don’t need
Because there aren’t any images in this hero section design, you have a bit more leeway in terms of how much text you add to your design. If you’d like to keep your text to a minimum, go in and trim out the layers you don’t need before you get started.
The fastest way to do this is to locate the layers and grouped layers in the timeline editor at the bottom. For example, we’re going to delete the following:
- Row-1 (the logo and header links)
- Quote Mark
- Date
If you hold down the Ctrl or command key, you can select all of these layers at once. Then use your Backspace or delete key to remove them.
When you’re done, save your changes.
Learn more:
Step 2: Edit the slide background color
If you’d like to modify the black background color in this template, go to “Slide Options” and “Background”. Open the color selection module to choose either a color preset or to enter a custom HEX code.
Note: This color doesn’t need to remain a shade of black. You can make this hero section as bright and colorful as you like so long as it fits with your branding and the contrast between the text and background is strong.
Learn more:
Step 3: Choose and apply your accent color
The template has a duotone color palette — the black in the background and the gray accent that colors everything else. With the exception of the fluid effects, we’ll do something similar with this redesign.
However, we do need to edit the color so that it better matches our firebrand concept.
This accent color appears all over the place in this template. We’ll apply the color to each spot in this step before moving on.
First, go to “Module Options” and “Skin”. Set the Highlight to your accent color.
Note: In doing this, you’ll be able to apply the Highlight color to any aspect of this template with a single click. What’s more, if you ever need to change the color, all you need to do is edit the color under “Skin” and it will automatically change every element connected to it.
Now let’s go through and apply the accent color.
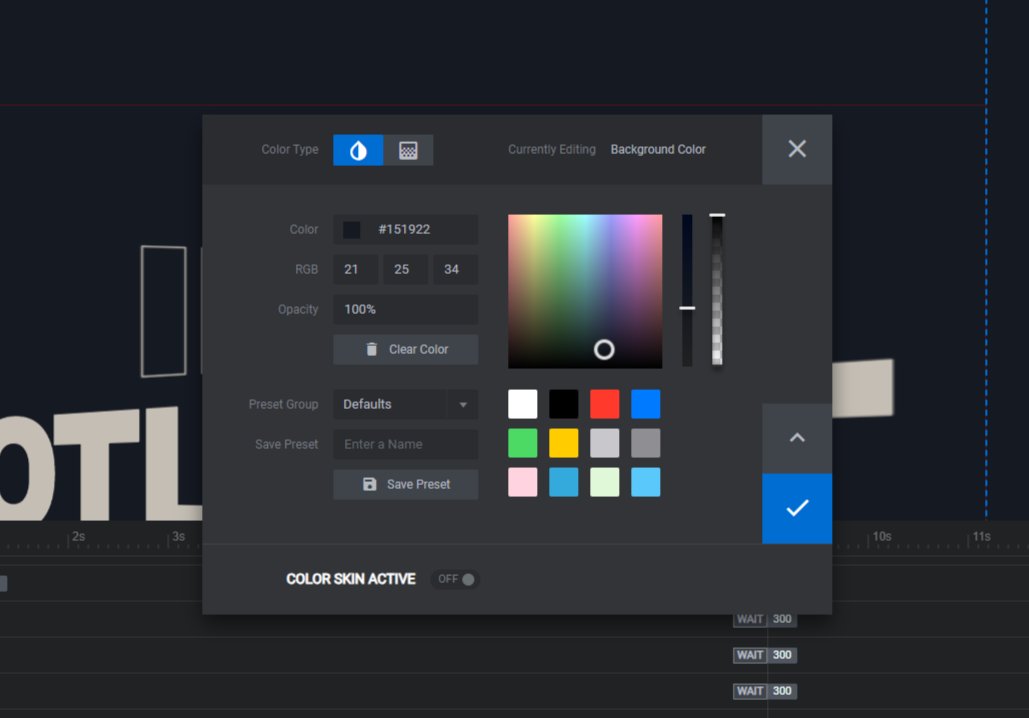
First, go to “Module Options”, “Layout”, and “Module Background”. Open the color selection dialogue.
At the bottom, toggle on the COLOR SKIN ACTIVE setting. Highlight will automatically be chosen and will apply your accent color to the background.

While you’re in “Module Options”, go to the “Reveal” settings panel. Switch the color to the accent here as well.
You can now go through and add the accent color to the following text and shape layers:
- Circle Cursor (under “Content”)
- Normal Text (under “Style”)
- Big Text (under “Adv Style” and “Text Stroke”)
- Big Text 2 (under “Style”)
- Paragraph (under “Style”)
- Cta Button – normal state (under “Style” and “Font” as well as “Border”)
- Cta Button – hover state (under “Hover”)
Note: In the template, Normal Text, Paragraph, and Cta Button each have differing levels of transparency. So does the border around the button.
In order to apply transparency, you will need to manually assign the accent color to these layers. Otherwise, if you try to modify the transparency level, it’ll change it across the board for all the layers that use the Highlight value.
When you’re done, open the Preview of the hero section. Make sure that all elements (except the main background and fluid effects) have the same color.
Learn more:
Step 4: Edit the copy
The following text layers remain in our hero section:
- Normal Text
- Big Text
- Big Text 2
- Paragraph
- Cta Button
To edit the text within them, go to “Layer Options” and “Content”. Delete the existing text and replace it with your own.
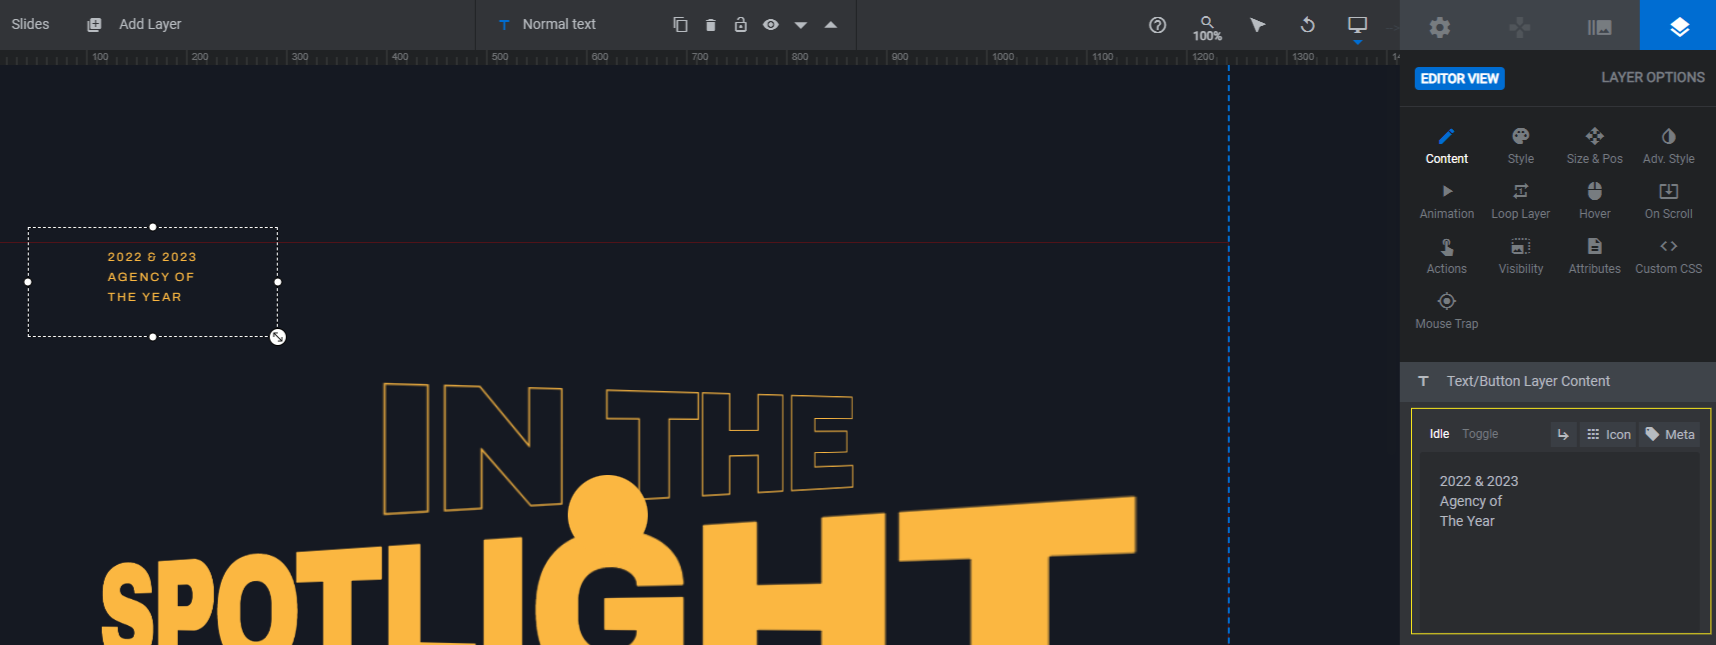
Note: The text in the Normal Text layer does not automatically wrap. In order to force text to the next line, hit the Enter or return key. You can also hit the return icon above the text editing box. This will insert a hard break wherever your cursor is.
Learn more:
Step 5: Customize your fonts
To update the fonts and styling of your text layers, use the “Style” panel.
The one exception is the Big Text layer. If you want to modify the appearance of the lettering, you may also need to use the text stroke settings under “Adv Style”.
In addition to updating the fonts, weights, and spacing, you can adjust settings related to size, alignment, and margins from the “Layer Options” panel.
Note: If you make changes to size, margins, or placement of these text layers, you’ll want to do some responsive editing to ensure that everything looks okay on smaller screens.
The responsive editing screens are under the dropdown in the top toolbar.
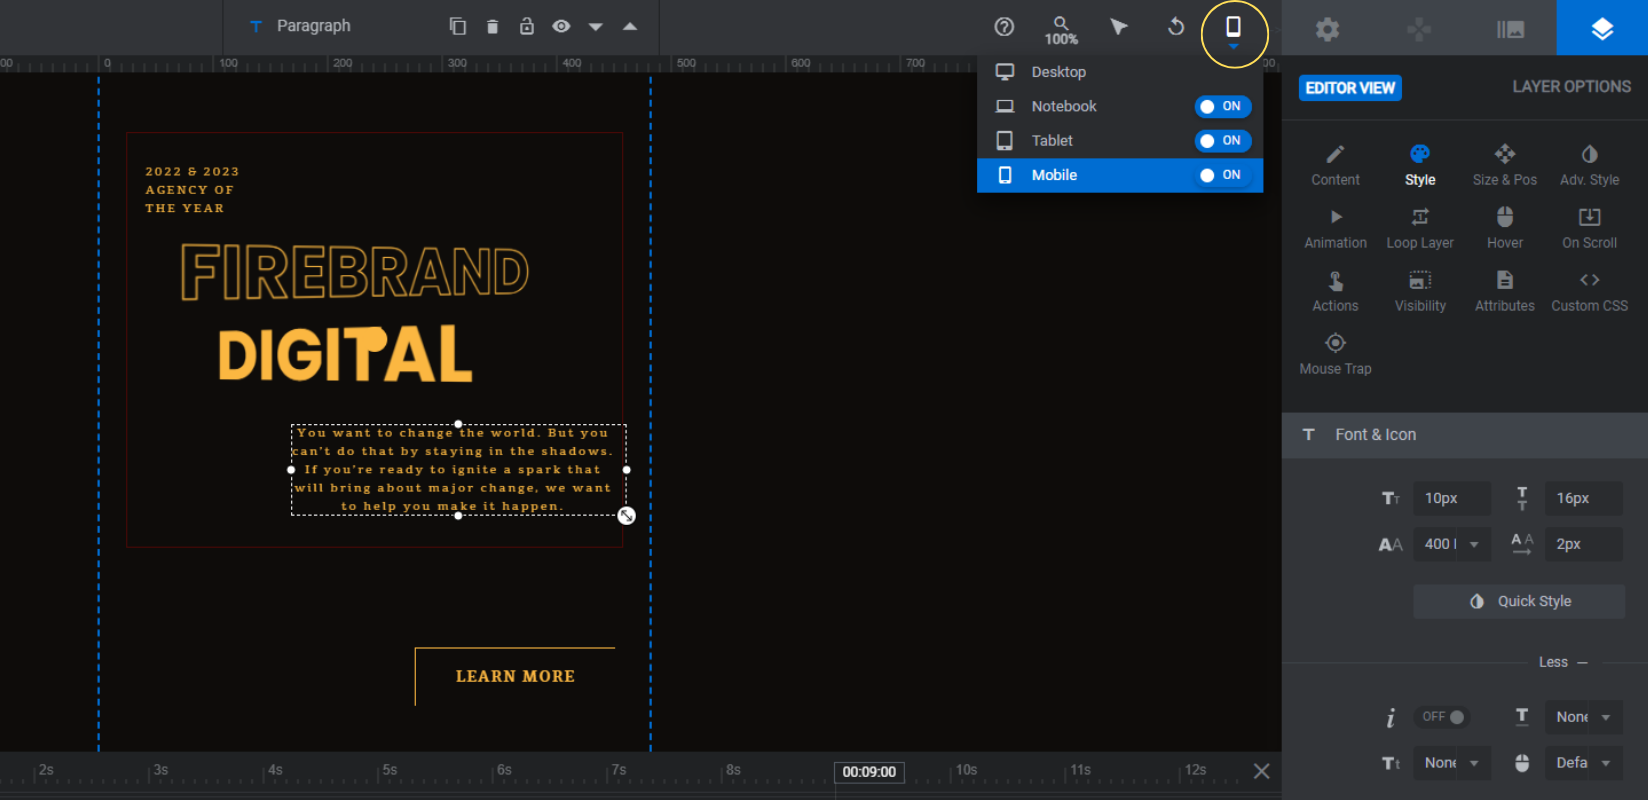
Switch to the device you want to work on. Make your changes under “Layer Options”. Any work you do within these views will apply only to the responsive variant you’re working on.
When you’re done, return to the Desktop view.
Learn more:
Step 6: Edit the headline hover animation
As you move your cursor around the typography hero section, you’ll notice that the Big Text and Big Text 2 layers move around. These settings are controlled under the “Animation” tab.
There are two keyframes to focus on if you want to modify these settings.
In > Anim To controls the appearance of the layer when it loads on the screen and the user isn’t hovering over the Detection Area.
hover controls the appearance of the layer when the user’s mouse enters the Detection Area.
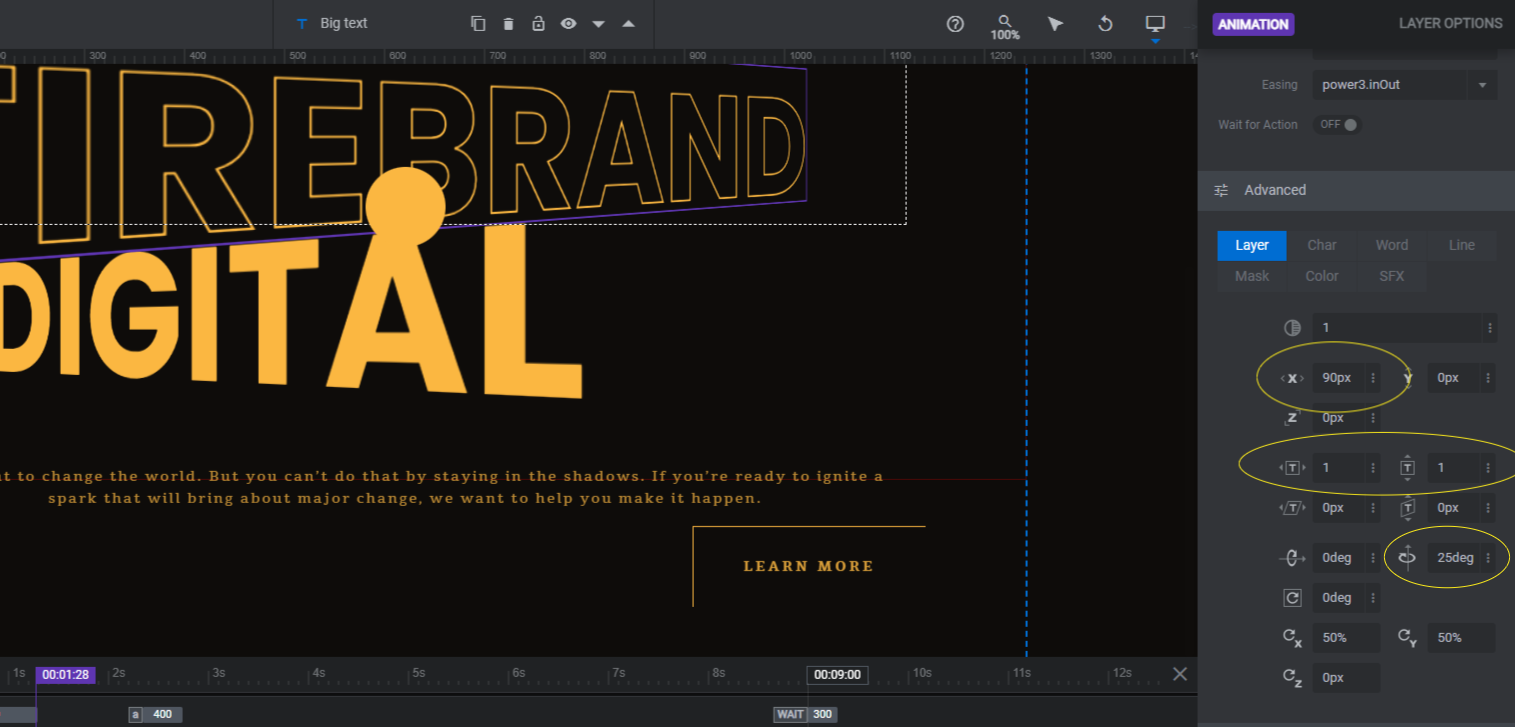
There are a few settings under the “Advanced” section that have been configured to create the current effect:
- The <X> setting shifts the position of the layer to the left or right in the canvas.
- The T (non italicized) setting with arrows around it scales the layer’s size up or down.
- The rotation setting swings the text around the Y axis.
Go in and modify these settings for the Big Text layers in both their Anim To and hover states.

Open the Preview and put your animation to the test. Once you’re happy with how it looks, save your changes.
Learn more:
Step 7: Customize the reveal animation
Now that you’re done with the text layers, you can focus on the remaining animations.
The first one we’re going to look at is the “Reveal” setting under “Module Options”. This is the effect that makes it look like a cover is being peeled away to reveal the hero section.
You’ve already modified the color of it to match your slide. You can also change the type of reveal, the timing, and easing of it. You can even apply an overlay if you’d like (though that’s not needed if you’re using a solid color already).
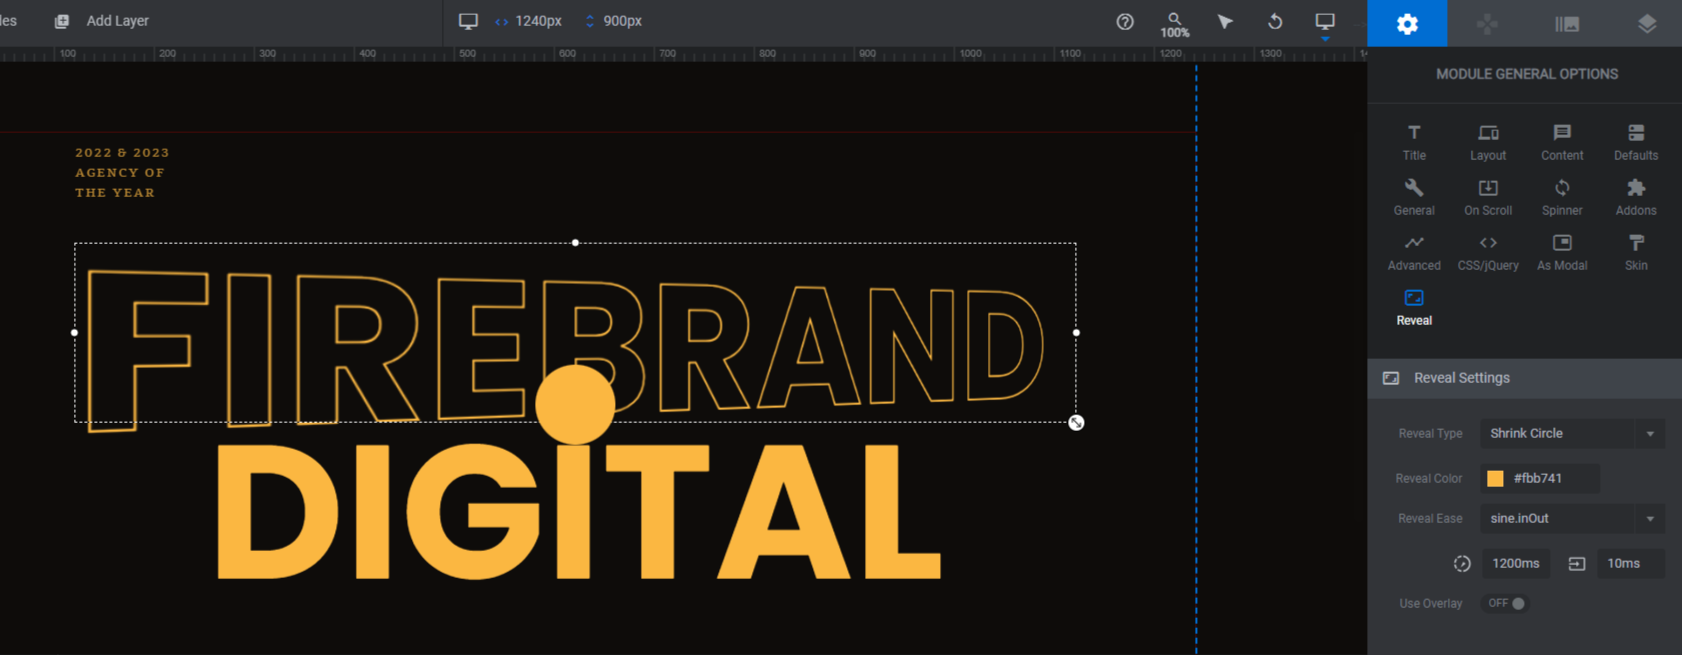
The only change we made to ours was to set the Reveal Type to Shrink Circle. This effect makes it look as though the yellow background shrinks down and becomes the circular cursor that starts in the middle of the screen.
Learn more:
Step 8: Customize the fluid effects
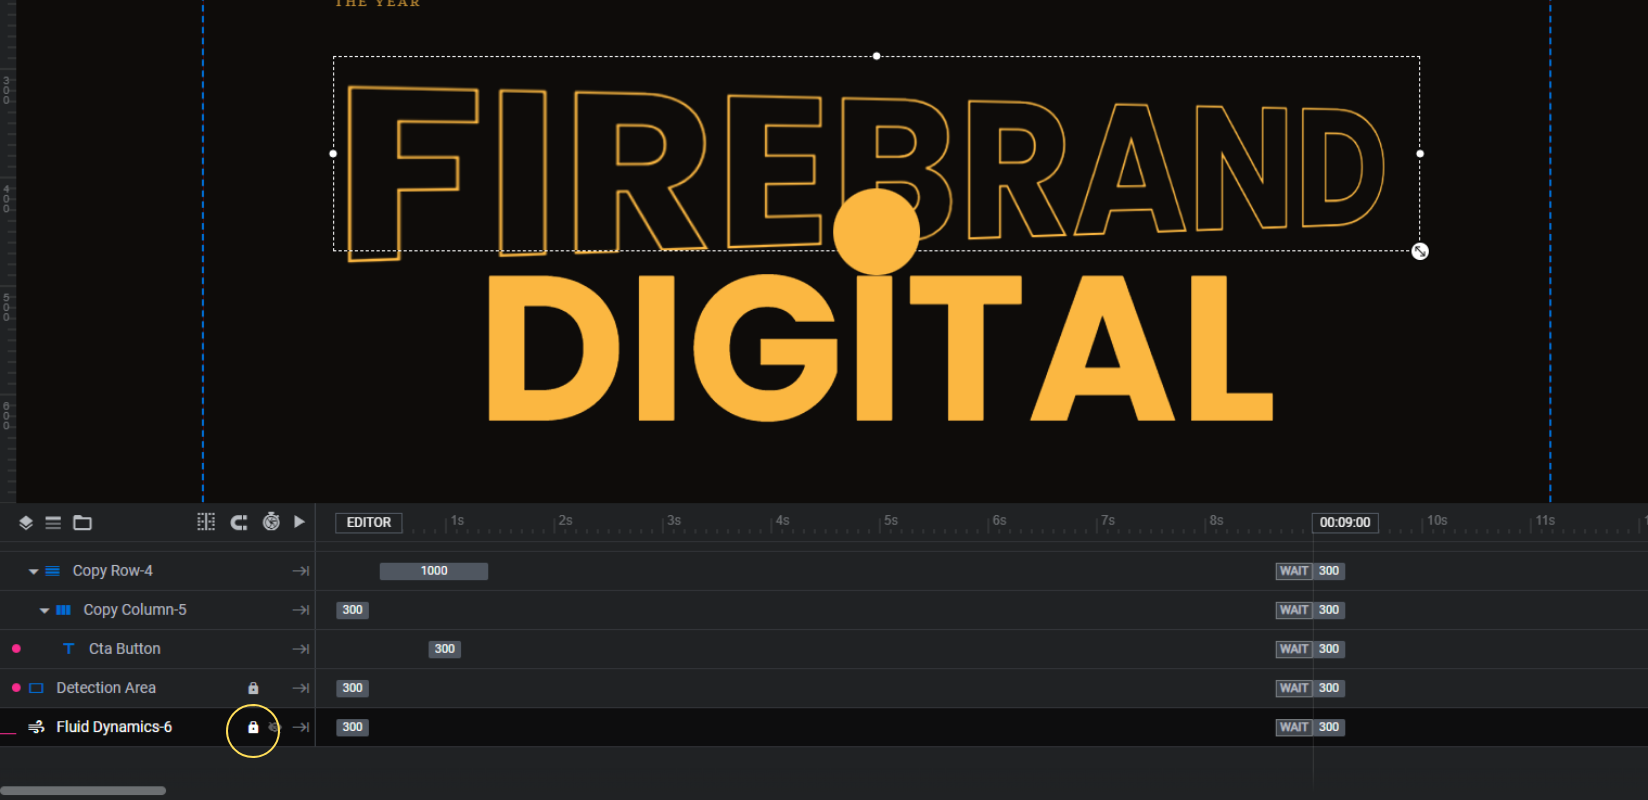
The last layer to edit is Fluid Dynamics-6. This is the fluid effect that appears when the user’s cursor is outside of the Detection Area.
To edit it, you have to first unlock it. Go to the timeline editor at the bottom and hover over the layer. Click the lock icon to open it up for editing.
Next, go to “Layer Options” and “Fluid Dynamics” to customize the settings.
Under Main, you can control things like mouse power, the size of the fluid effects, and the resolution.
If you want to make the fluid effects appear automatically when the hero section loads, go to the Simulation tab and choose one of the settings. Otherwise, it will only appear when the cursor moves.
And the Color panel is where you can choose which color or colors appear in the fluid animation.
Note: You can choose your own colors or set it to Colorfull and it’ll display a wide range of colors. The template uses the same two colors used throughout the template design. You can choose to use others, if you’d like. It all depends on the theme of your design and website.
You won’t be able to see the fluid dynamic effects play out in the canvas. So when you’re all done, Preview your work once more.
When the hero section is good to go, save your changes. Then either copy the shortcode under “Module Options” or use the Slider Revolution page builder widget to embed the section into your home page.
Learn more:
Bring your typographic hero design to life with animations
Typography heroes are a popular choice with digital agencies these days. If you want to make your own text-only design even more potent and memorable, consider adding various animations to your hero section with the Spotlight Hero Header with Fluid Effect.

