
Your site doesn’t have to sell physical goods in order to take advantage of a carousel layout. Carousels are a great way to show off experiential products, advertise sale prices, announce upcoming events, and more.
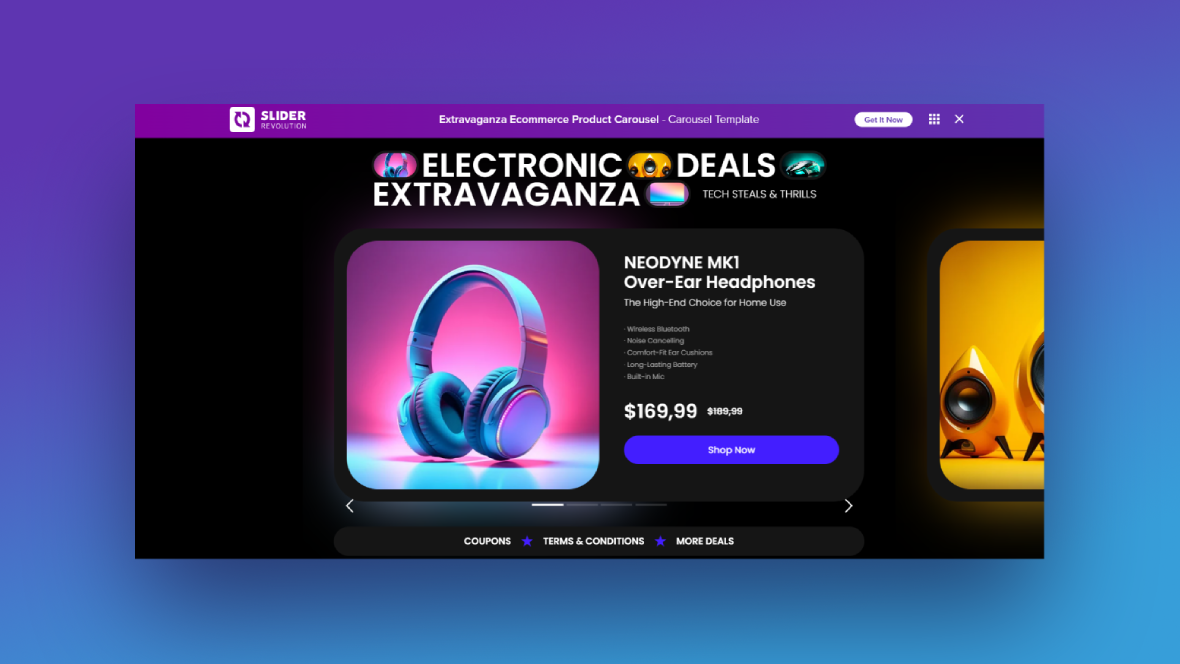
In this tutorial, we’ll show you how to create a beautiful product carousel design to sell different types of lodging for a hospitality business. We’ll use the Extravaganza eCommerce Product Carousel template as our starting point.
Table of Contents:
- Step 1: Install the module template
- Step 2: Update the background colors
- Step 3: Upload the product images
- Step 4: Edit the text layers
- Step 5: Update the buttons
- Step 6: Modify the carousel settings
- Step 7: Adjust the navigation settings
- Step 8: Customize the global layers
How to create an eye-popping product carousel design
Whether you want to advertise discounts on certain items or want to present different options side-by-side for consideration, a product carousel design is a creative way to do it.
In this tutorial, we’re going to show you how to transform this template into one for a glamping resort.
Here’s an introduction to the Slider Revolution editor and modules if this is your first time using the plugin:
Step 1: Install the module template
On the Slider Revolution home screen in WordPress, go to “New Module from Template”. Do a search for “Extravaganza Ecommerce Product Carousel” and you’ll find that there are two different templates.
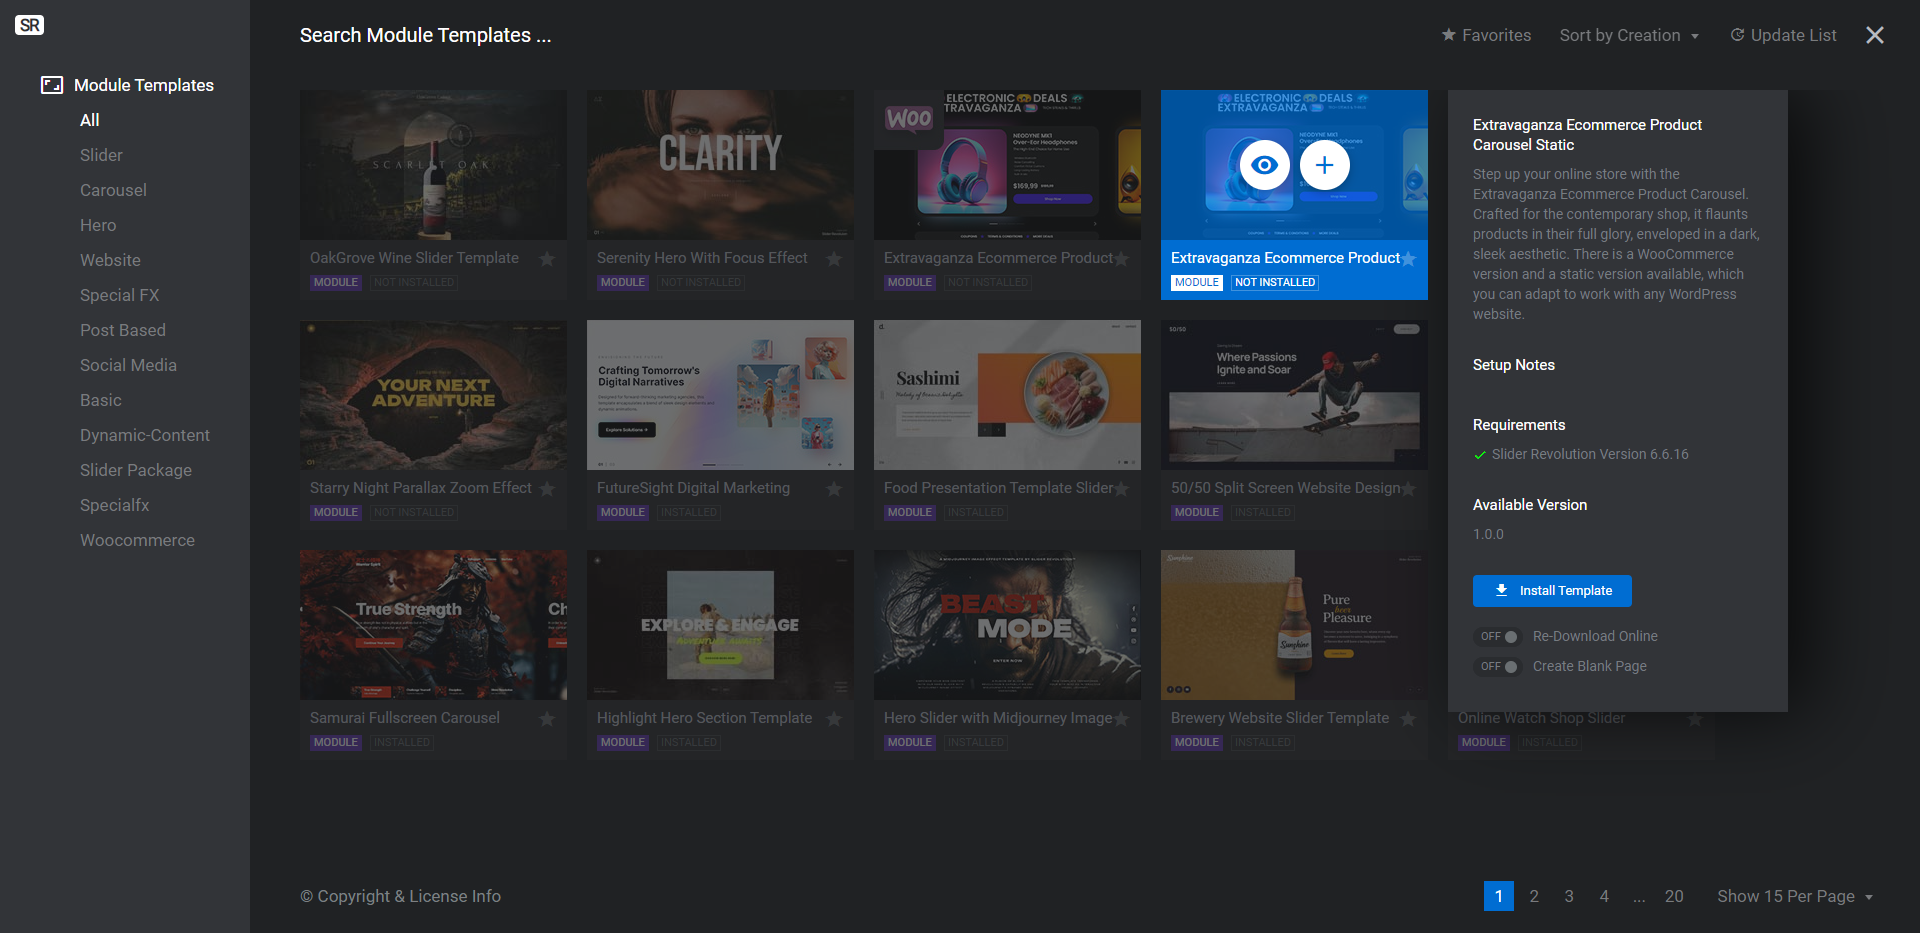
Static allows you to piece together custom products and details for each of the slides. Woo, on the other hand, will import details and imagery from your WooCommerce products.
Which one you install depends on what your plan is for the products in the carousel. We’ll be using the Static version of the template in this tutorial so that we can hand-select the products that go in it.
Learn more:
Step 2: Update the background colors
There are two background colors to be updated.
The main background color behind the carousel can be found under “Module Options”, “Layout”, and “Module Background”.
The background behind each item in the carousel is a layer called Content-Row. To edit this one, you’ll go to “Layer Options” and “Style”. You’ll have to update this for each slide.
To make changes to these background settings, click the color block next to BG Color. Then either select a preset color in the bottom-right or enter a custom HEX code into the Color field.
Note: You’ll want there to be some distinction between the colors you choose for the module and item blocks. This allows the products to stand out and the blocks they’re contained within to feel like they’re moving.
We’ve kept the black shading in the background because of the nighttime theme of our photos. Yours does not need to remain a dark-themed carousel if it doesn’t fit with your brand or product styling.
Learn more:
Step 3: Upload the product images
There are two spots where the product image needs to be uploaded.
Image-Shape is the product photo you see in the foreground. Blur-Image makes the carousel image look like it’s backlit. This layer also uses the product image, but has a filter applied to it so that it becomes blurred.
The images used in this carousel design are 550px by 520px. Export yours using the same dimensions so you can keep this carousel as lightweight as possible.
When you’re ready, locate the image layers. Then go to “Layer Options” and “Style” to swap them out.
Repeat this process for each slide.
Learn more:
Step 4: Edit the text layers
There are nine text layers in each slide:
- Title is the product name.
- Subtitle is the tagline.
- List-Item represents a feature or benefit of the product. There are five of these.
- Price is the current price.
- Price-Old is the crossed-out previous price.
If you don’t need any of these layers or want to trim back the number of list items, select the layers in the canvas or timeline. Hold down Ctrl or command to select multiple layers at once. Then hit Backspace or delete to remove them.
For our new design, for instance, we don’t need Price-Old since we’re not using the carousel to advertise deals. Whatever you do delete (if anything), be sure to remove the same layers in each slide.
To modify the remaining text layers, start by editing what the text says in each. Go to “Content” to do this.
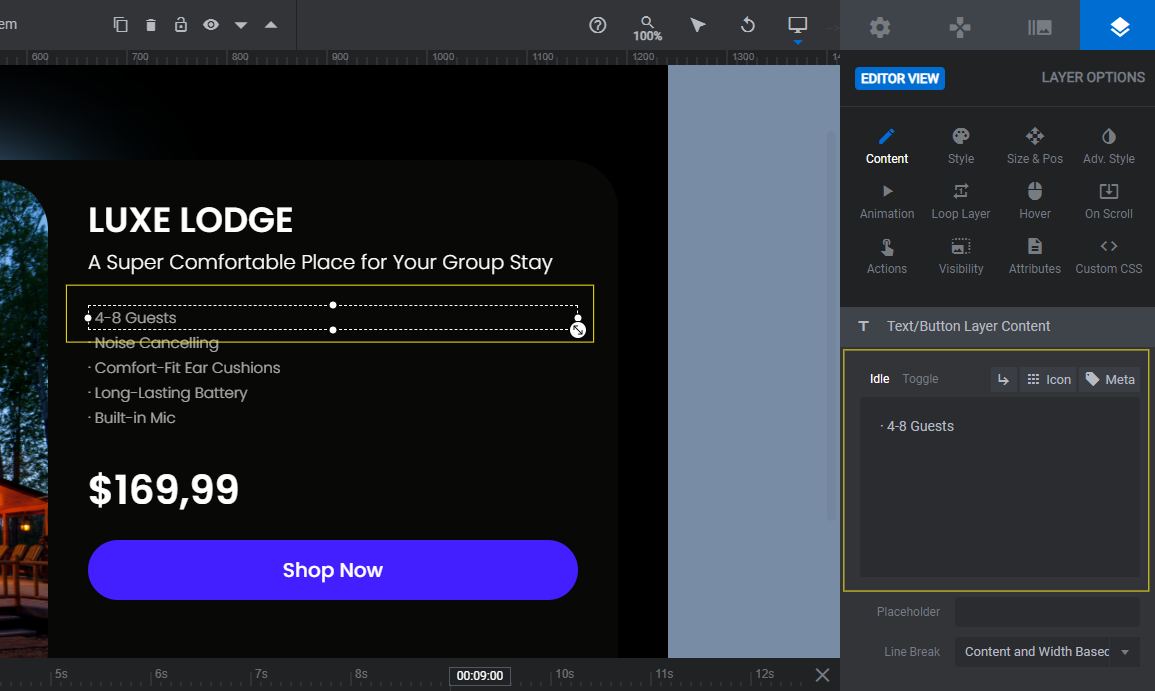
Next, go to the “Style” panel. You can change the font, color, size, weight, spacing, and more from this panel.
Apply the same stylistic changes to the other slides for consistency. Save your changes between each slide.
Learn more:
Step 5: Update the buttons
To edit the text and font for the Buy-Button layer in each slide, repeat the process from Step 4.
Note: If you’d like to add an icon inside the button as we’ve done, you can do this within the “Content” editor. After you’ve rewritten the text, click the Icon tab above the block. Search for your icon. Then click it to insert it. You can modify or delete the icon from the content block. It will look something like this:
<i class=”fa-calendar”></i>

In addition to editing the text, you’ll also need to update the colors of the button — for both the normal and hover states. The button’s normal background setting is under “Style” and the hover background setting is under “Hover”.
The last thing to edit when it comes to the buttons is the link. You’ll find this setting in the “Actions” panel.
There’s currently no action configured. Since each slide is dedicated to a different product, you’ll want to add a Simple Link to each. Select the option from the right side of the pop-up. Then enter the details for the link.
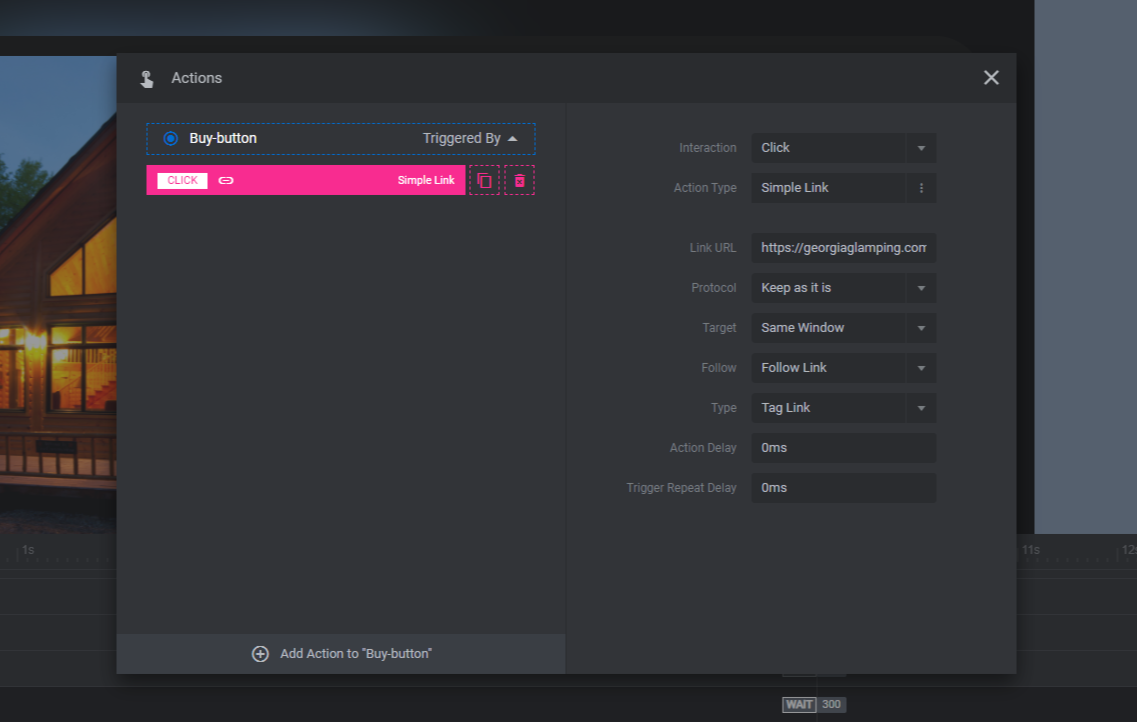
Close the pop-up when you’re done.
Repeat this process for each slide.
Learn more:
Step 6: Modify the carousel settings
There really isn’t much you’ll need to modify for the product carousel design. However, one thing you might want to do is change it to 2D or 3D.
To make your modifications, go to “Module Options” and “Carousel”. Scroll down to the section called Effects.
You can:
- Make the carousel 2D or 3D.
- Modify the spin or skew angle.
- Add a fade effect.
For a physical product carousel, you might want to leave things as is, especially if the imagery is as flashy as what’s used in the template. However, because we’re selling experiential products and we’re scaling back the design a bit, a realistic 3D effect works well.
Learn more:
Step 7: Adjust the navigation settings
In addition to users being able to swipe through the carousel, they have the option to use the bullets and arrows at the bottom of the screen.
You’ll find these settings under “Navigation Options”. If you’d like to make modifications to any of them, look for the respective navigation type: Arrows and Bullets.
You can do things like:
- Change the style.
- Update the color.
- Modify the size and spacing.
If you’d like, you can even disable any of the pre-selected navigation options. For instance, we’re going to turn off the Arrows and modify the Bullets style.
When you’re done, save your changes.
Learn more:
Step 8: Customize the global layers
There are two rows of global layers left to edit. To access them, go to “Slides” in the top toolbar and select Global Layers.
The top row contains the headline. The bottom row contains supplemental links.
We’re going to remove the bottom row entirely. We want the main focus to be on the products and calls-to-action in our carousel design.
To delete the row, click on Copy Row-36 in the timeline editor. Then hit Backspace or delete to remove the row and all the components within it.
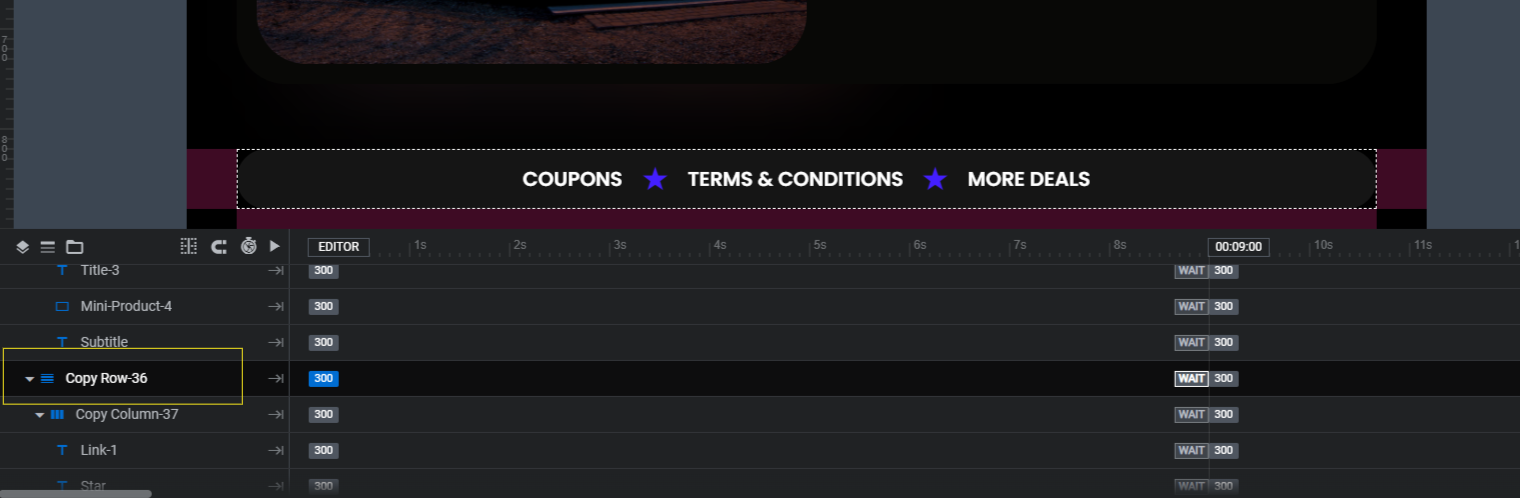
All that remains now is the header row. It’s made up of three Title layers, one Subtitle layer, and four Mini-Product images.
This design works great for tech products, when announcing big blowout sales, and for other flashier announcements. However, we want to tame this a bit for our glamping resort.
To accomplish this, we’ll start by deleting Title-2, Title-3, and all of the Mini-Product layers. Then we’ll edit the remaining Title and Subtitle to briefly describe what the content in this carousel is all about.
When you’re finished, preview your work. When the carousel is ready to go, you can embed it onto your ecommerce site using the shortcode under “Module Options” or with the Slider Revolution widget in your page builder.
Learn more:
Design a product carousel that captures the attention of customers
A carousel is an effective tool in web design. As we’ve seen in this tutorial, you can use it to offer products or experiences of increasing or decreasing value. But you can also use it to advertise sales, upcoming events, product recommendations, gift guides, and more.
By starting with the Extravaganza eCommerce Product Carousel template, you’ll save yourself a ton of time building one of these product carousel designs yourself. And in just an hour or so, you’ll be able to put your own unique spin on it.

