
One of the issues that new businesses face when entering a competitive market like SaaS is how to break through. Take project management solutions. Companies like Basecamp, Monday.com, and ClickUp dominate the space. So how do you get prospective users to stop and take notice of your solution?
In this tutorial, we’re going to show you how to design a hero section with liquid animation effects that make your website stand out from all the rest. We’ll be using the Fluid Dynamics Effect Showcase template to do this.
Table of Contents:
- Step 1: Delete the slides you’re not going to use
- Step 2: Modify the background color
- Step 3: Edit the text
- Step 4: Customize the button
- Step 5: Update the blurred shapes
- Step 6: Customize the fluid dynamics effect
How to add stunning liquid animation effects to your website
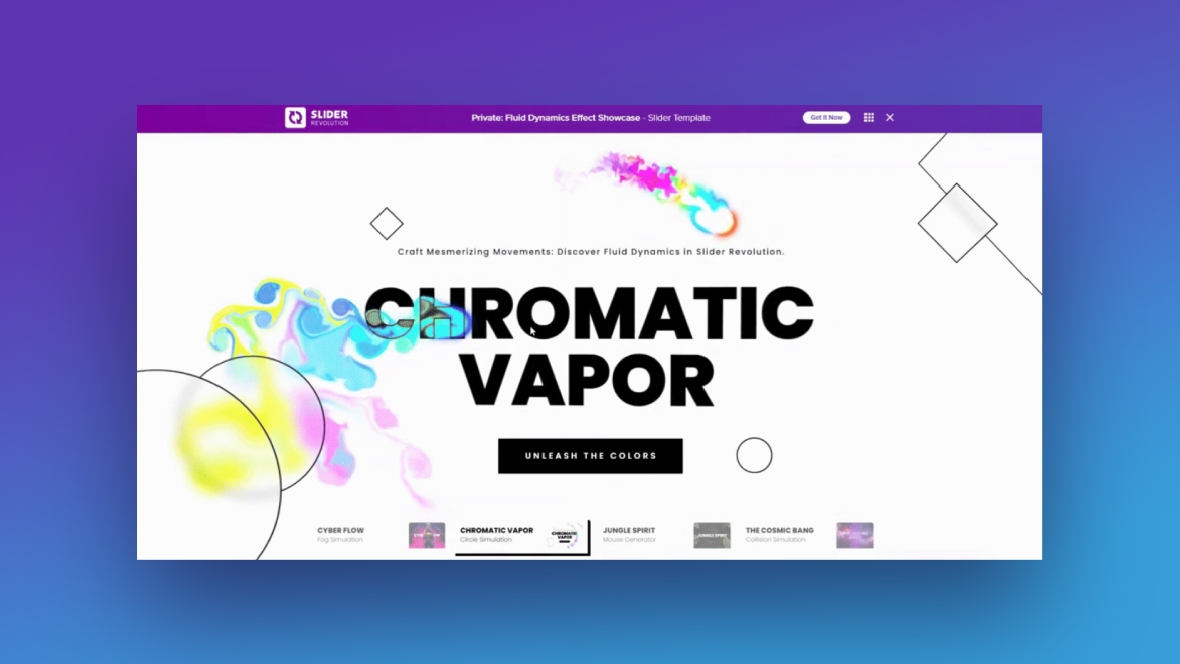
You don’t need to be a professional designer or developer to create awe-inspiring liquid animation effects like these:
With the help of Slider Revolution, the new Fluid Dynamics AddOn, and this template, you can create these special effects with ease. In this tutorial, we’ll demonstrate how to create a striking hero section that’ll stand out from the lookalike designs that most SaaS companies use:
If this is your first time using Slider Revolution, get acquainted with the editor here:
Step 1: Delete the slides you’re not going to use
Each of the slides in this template demonstrate different ways to use the Fluid Dynamics AddOn. Find the liquid animation style you like best and then delete the other slides.
Go up to the toolbar and hover over “Slides”. Click the trash can that appears beside the slides you don’t need in order to delete them.
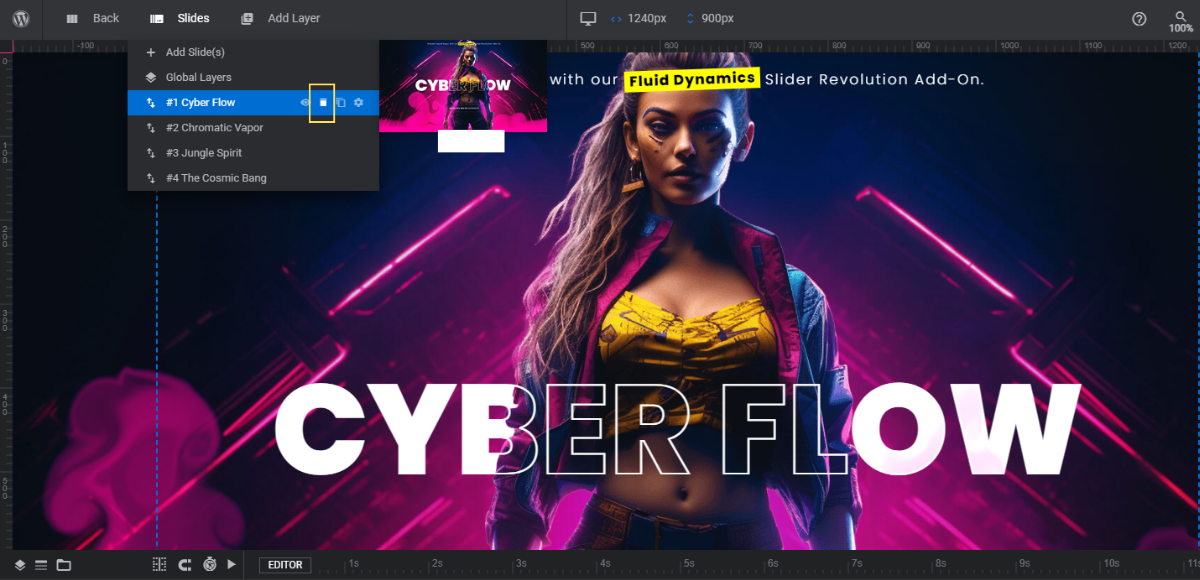
The rest of this tutorial will demonstrate how to edit Slide #2: Chromatic Vapor. However, you can use the general steps and tips to edit the other slides as well.
Learn more:
Step 2: Modify the background color
If you look at the websites of other project management SaaS companies, you’ll notice they look eerily similar. Solid white backgrounds. Electric purple highlights. And they usually use a font like Poppins.
To shake things up, we need to make our hero section design look unlike what they’re doing. It starts with the background color.
To update the background color, go to “Slides Options” and “Background”. Click on the color block next to BG Color and apply your new background color.
We’re going with black, but you can use all sorts of dark or vibrant colors here.
Note: If you keep the white background or use a color other than black, you’ll also have to update the module background. Go to “Module Options” and “Layout”. Then scroll down to “Module Background” to apply the same background color as the slide. This will give your hero section a seamless appearance as it loads.
Learn more:
Step 3: Edit the text
There are two lines of text, but three text layers to edit.
- Small-Title is the small tagline at the top.
- Top-Text is the outlined version of the headline.
- Bottom-Text is the solid version of the headline.
Note: It’s the transparent interior of Top-Text as well as the strategic layering done in the timeline editor that allows the fluid effects to appear as though they’re flowing through the lettering. So when editing the text layers, be sure to keep both of the headline layers to maintain this effect.
To change what the text reads in each layer, go to “Layer Options” and “Content”. Edit the existing text in the block.

Next, go to the “Style” panel. From here, you can change the font and also edit the text color, weight, size, spacing, and more.
In order to change the color of the Top-Text layer, go to “Adv Style” and modify the Text Stroke color.
Learn more:
Step 4: Customize the button
You’ll edit the Button layer much in the same way you edited the text. Use “Content” to update the text and “Style” to customize the font.
To modify the background color of the button or the border around the button, scroll down the “Style” panel to locate those settings.
You can also edit the button’s appearance whenever someone hovers over it. Go to “Hover” and scroll down to the “Style” section to make basic changes to the button in its hover state.
You can also use the settings under “Animation” to transform the button further. For instance, you can make it expand, shrink, rotate, and so on.
Currently, the button is configured to go to the next slide. Since this is no longer a slider, we need to update the link.
Go to the “Actions” panel. Click the trash can icon beside the Next Slide action. Then select a new action from the list on the right.
Use Simple Link to direct visitors to a new page for information, signing up, etc. Use Scroll Below Slider or Scroll to ID if you want the click to scroll them to a different section on the home page.
When you finish creating the new link, close the pop-up to save your changes.
Learn more:
Step 5: Update the blurred shapes
There are six hollow shapes in this hero section:
- Blur-Circle
- Blur-Circle-2
- Blur-Circle-3
- Blur-Box
- Blur-Box-2
- Blur-Box-3
They’ve all been created in the same manner. They have a transparent interior and a 2px border. They also have a setting enabled that makes the liquid effect floating behind them appear blurred. This has been enabled under “Animation” and “Layer Back-Drop Filter”, in case you’re interested in modifying it.
We’re going to keep our edits simple. We’ll update the border color under “Style” so they show up against the black background. We’re also going to make the border slightly thinner so the liquid animation effects get most of the attention.
If you want to change the composition of the shapes, go to “Size & Pos”. You can alter their size, position, and rotate from this panel.
Note that if you do this, you’ll have to perform a responsive check to ensure that your edited shapes look okay on smaller screens. You can access the responsive editor from the right side of the top toolbar.
Learn more:
Step 6: Customize the fluid dynamics effect
To edit the colorful and interactive liquid effect, locate the layer called Fluid-Dynamics in the timeline editor. Then go to the “Fluid Dynamics” panel.
There are three tabs you can use to customize your settings. Start with Main. Here are some settings you may want to configure:
- Mouse Setup is what adds the liquid effect to the user’s cursor morvement. Otherwise, all visitors will see is the simulation you choose.
- Parameter Setup gives you control over the curling motion of the effect.
- Lifetime Setup controls the appearance of the liquid effect as it passes over the screen and how long it lasts for.
Next, go to Simulation. You can select a different style of simulation here.
Currently, there’s a slow-motion Circle that moves around the headline. You can keep this effect and modify its duration, power, radius, and more down below. Or you can try out a different simulation. We’ve used Bounce to create our new effect
Lastly, go to the Color tab.
You can keep the Colorful setting and allow a vast array of colors to pour through your liquid effect. Another option is to disable this setting and select between one and three colors instead.
You can see changes made to the fluid dynamics layer in the canvas on the left. However, it’s also a good idea to open the Preview and see how it looks on the frontend.
When you’re satisfied with what you’ve done, save your changes. Then embed the hero section onto your home page using the shortcode (which you’ll find under “Module Options”) or the Slider Revolution page builder widget.
Learn more:
Create a magical looking hero section with fluid dynamic effects
Take a look around at the websites of your competition. Are they all using the same tired design? If you want your product and brand to shine through the sea of lookalikes, then you need a website design that stands out.
With the Fluid Dynamics Effect Showcase, you have your pick of four uniquely eye-catching liquid animation effects. Find one that you like and then put your own unique spin on the hero section design with creative coloring, fonts, special effects, and more.

