
Product presentations are a great way to introduce customers to new products and their top features and benefits. While it’s common to place visually stunning product presentations on the home page or product page, that’s not the only use for them on an ecommerce website.
In this tutorial, we’re going to demonstrate how to create a product presentation for your blog with the help of the Chocolate Bar Product Presentation template.
Table of Contents:
- Step 1: Delete the extra slide
- Step 2: Update the slide background colors
- Step 3: Update the center piece’s colors
- Step 4: Remove the navigation arrows
- Step 5: Upload your product images
- Step 6: Edit the foreground copy
- Step 7: Edit the background copy
- Step 8: Customize the button
- Step 9: Update the bullets navigation
- Step 10: Customize the global layers
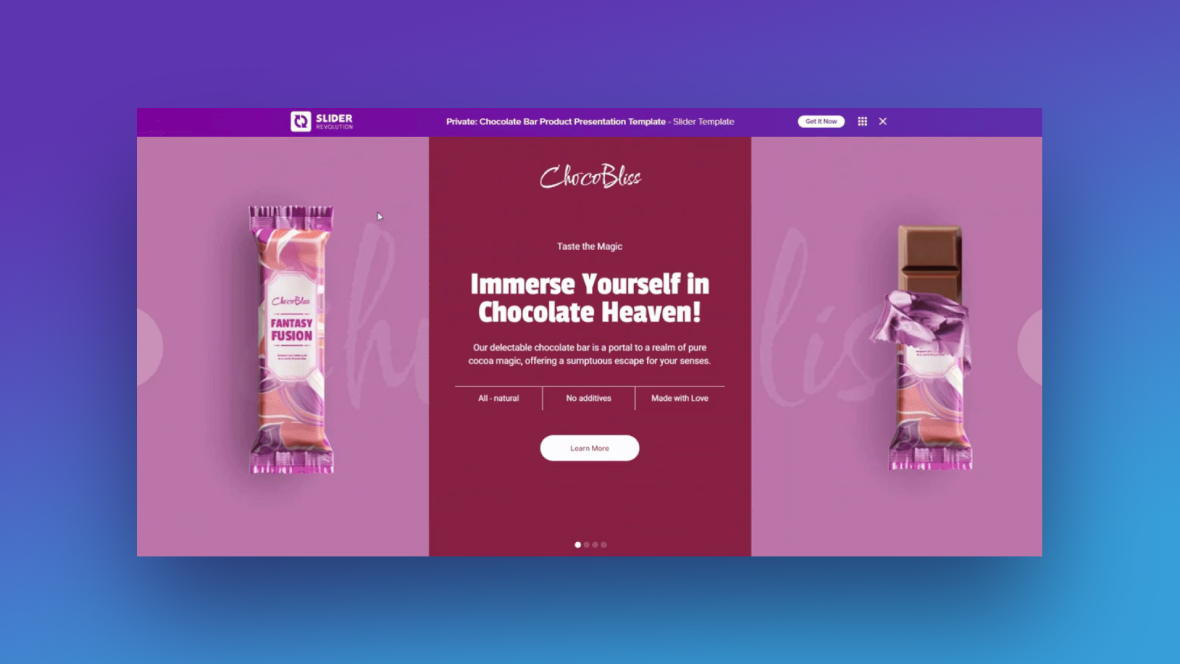
How to design a beautiful product presentation slider
When you build an ecommerce site, your product presentations play an important role in selling your goods. That’s why having a visually stimulating design such as this one is important:
That said, sometimes one of the most effective ways to sell your products is to not actively sell them. In this tutorial, we’re going to repurpose this template for a blog post on a liquor store’s website called “3 Creative Cocktails for Your Midnight Toast”.
The product presentation will still show off different products available in the store. However, the goal of the presentation is to give customers tips and recipes for crafting their own cocktails.
First time using Slider Revolution? Start with these overviews first:
Step 1: Delete the extra slide
There are four slides in this product presentation slider. We only need three.
If you’d like to delete any of the slides as well, go to “Slides” in the top toolbar. Then click the trash can icon that appears next to Slide #4 when you hover over it.
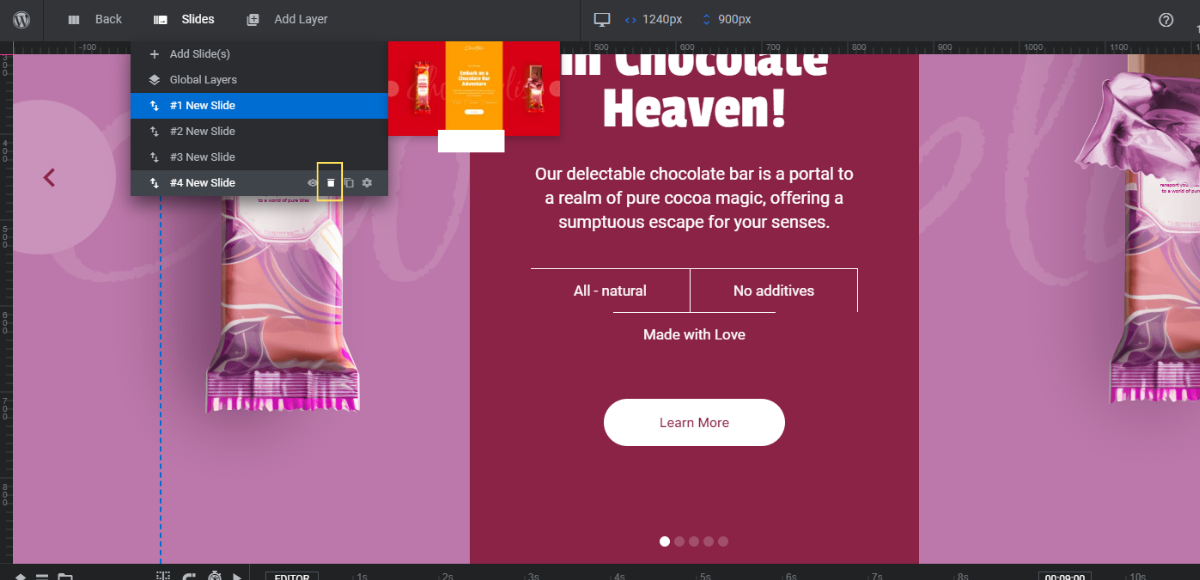
Alternatively, if you need more slides, click the duplicate/copy icon to the right of the trash can to create new ones.
Learn more:
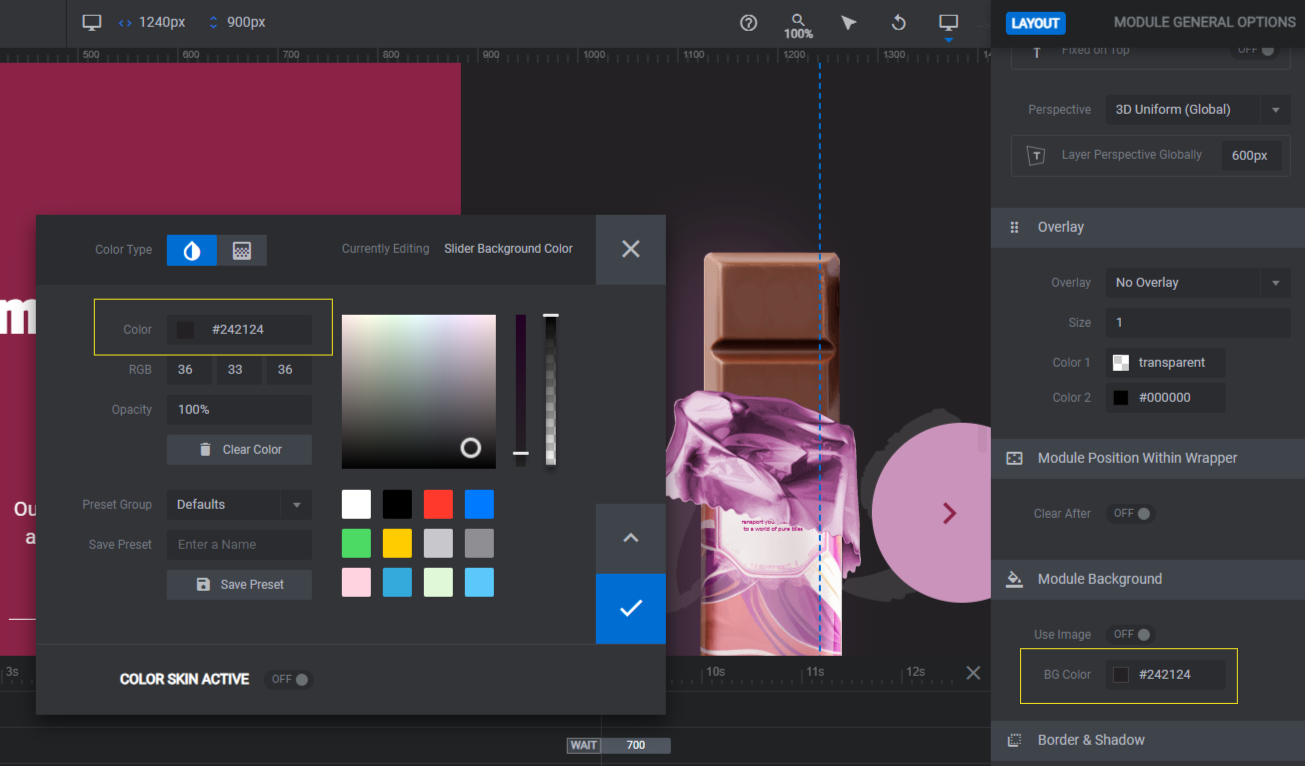
Step 2: Update the slide background colors
Each product’s slide has a unique background color. To edit it, go to “Slide Options” and “Background”. Click the color block to open the editor.
You can choose from a presets in the bottom-right corner or enter a custom HEX code in the Color field.

Before you move onto the next step, it’s a good idea to edit the background color of the module. While your visitors will only see it for a fraction of a second as the slider loads, setting it to match the color of the first slide (or even your cover image) will create a more seamless user experience.
You can do this by going to “Module Options”, “Layout”, and scrolling down to the “Module Background” section.
When you’re done, save your changes.
Learn more:
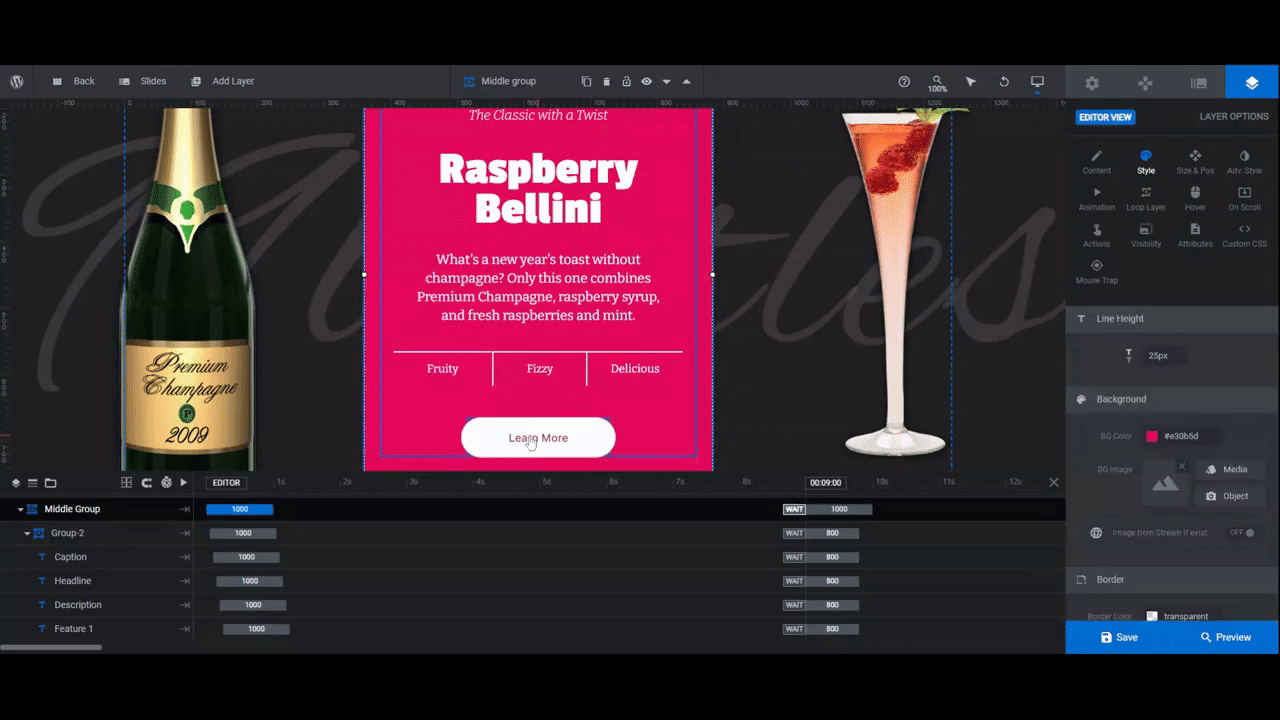
Step 3: Update the center piece’s colors
The color strip that goes down the center of each slide is a layer called Middle Group. To edit the color of each, select the layer from the canvas or timeline. Then go to “Style” and “Background” to modify the color.
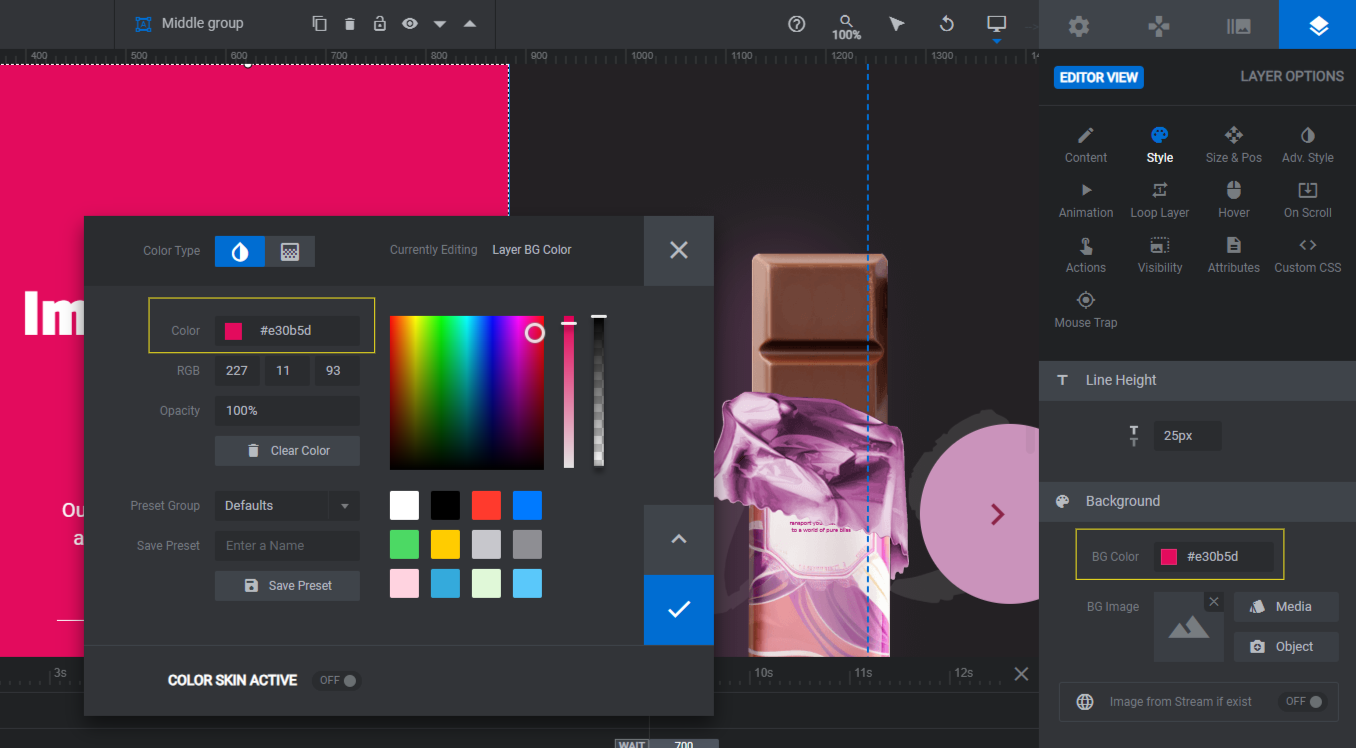
Do this for each slide and then save your changes.
Learn more:
Step 4: Remove the navigation arrows
We’re going to give our products a bit more room to breathe by removing the arrows navigation on the left and right sides of the screen. To do the same, hold down the Ctrl or command key. Then click on the following layers in the timeline editor:
- Arrow-Right
- Arrow-Left
- Circle-Right
- Circle – Left
Hit the Backspace or delete key and this will remove these components entirely.
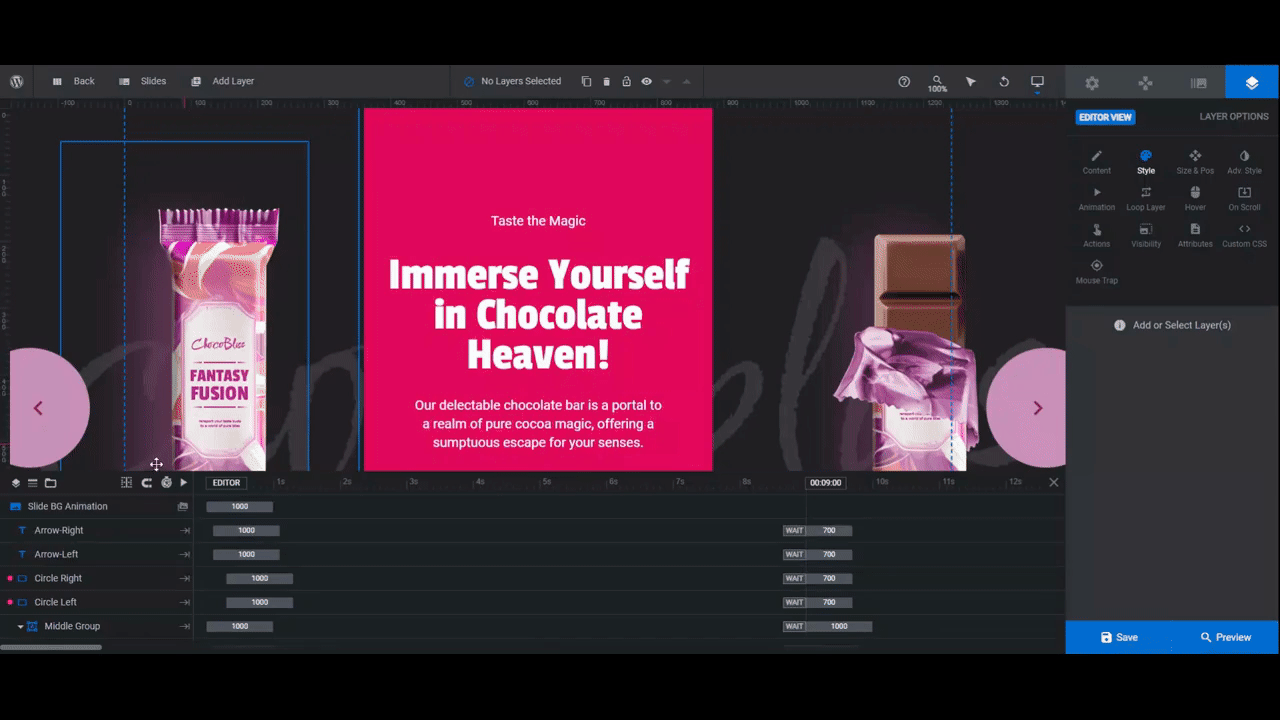
Repeat this for each slide.
Learn more:
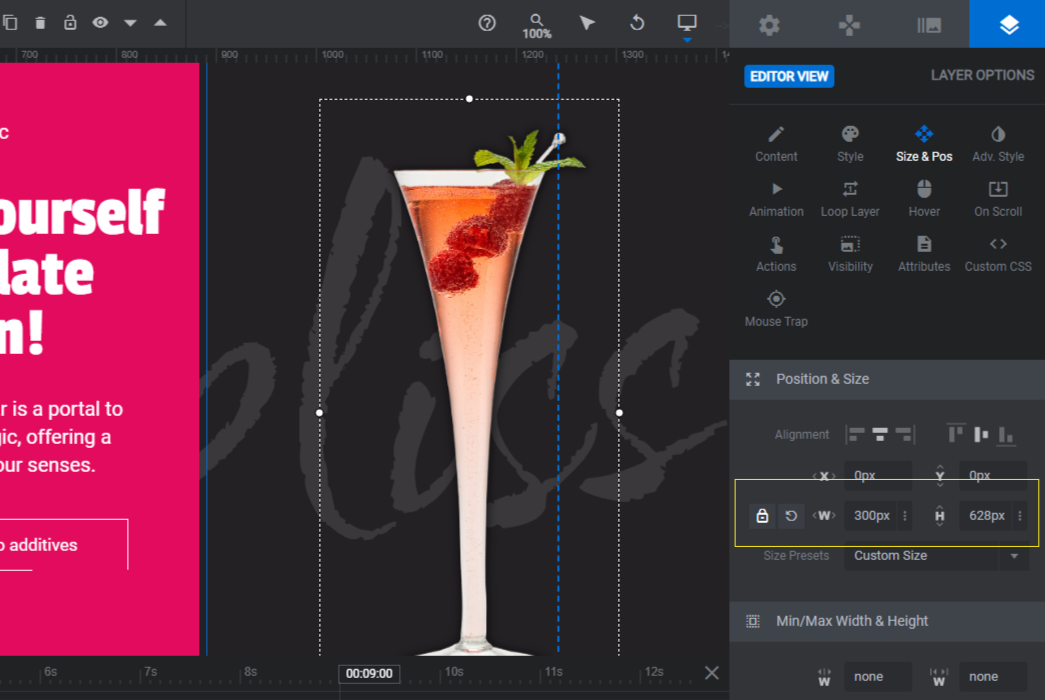
Step 5: Upload your product images
In the template’s product presentation, we see wrapped and unwrapped chocolate bars. You can lay out your presentation in a similar manner. You can also use it to show different sides of your product.
Since we’re using this presentation to summarize our blog post’s tips, we need to do something different. So we’re going to place a photo of our liquor product on one side and then a photo of the recommended martini on the other.
When sizing your images, try to get them as close to the originals as possible. That way, you can minimize the amount of editing needed in Slider Revolution.
Pro tip: Your images should have a transparent background. That said, if they don’t have a built-in shadow, we’d recommend adding one as it’ll give your design some depth. You can do this using any type of design software.
The (wrapped) Chocolate image is 370px by 798px.
The (unwrapped) Open Chocolate image is 370px by 774px.
To replace the existing images, select them in the canvas or timeline. Then go to “Content” to upload your new ones.
If you need to resize either of the images, use the settings under “Size & Pos” to do so. Edit the value in the W field to change the width of your image. The H (height) will scale along with it.
Note: While your new image sizes should scale up or down accordingly on smaller devices, responsive edits may still be necessary. You can review and make any necessary modifications by opening the responsive variant switcher in the top toolbar.
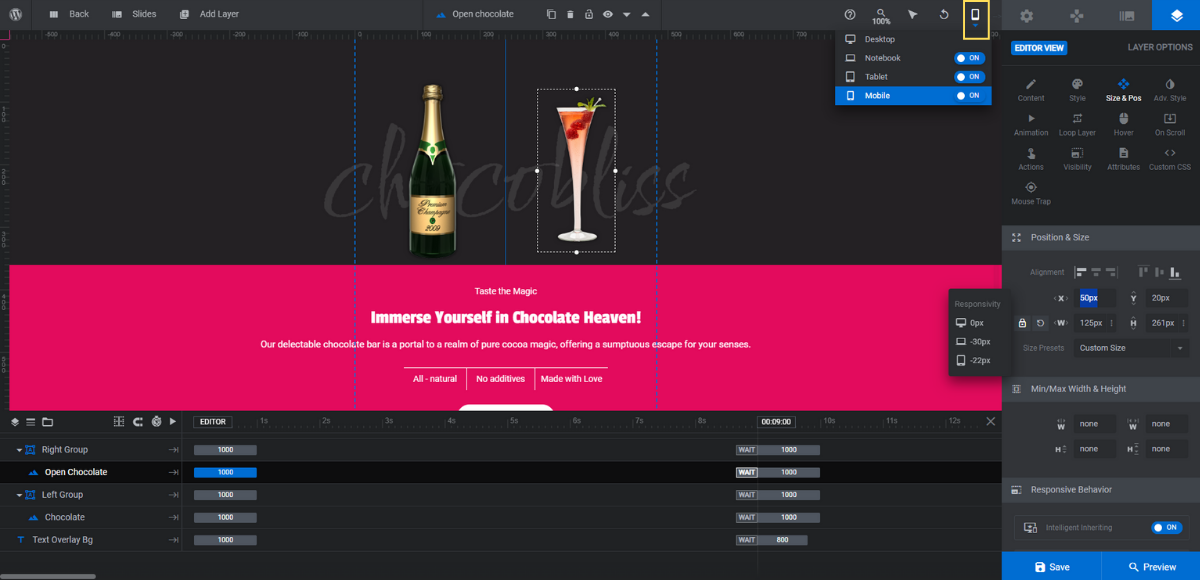
When making changes from these views, they’ll only apply to the device you’re working on. So you won’t have to worry about the work you did in the main Desktop screen being overridden.
When you’re done editing your images, save your changes.
Learn more:
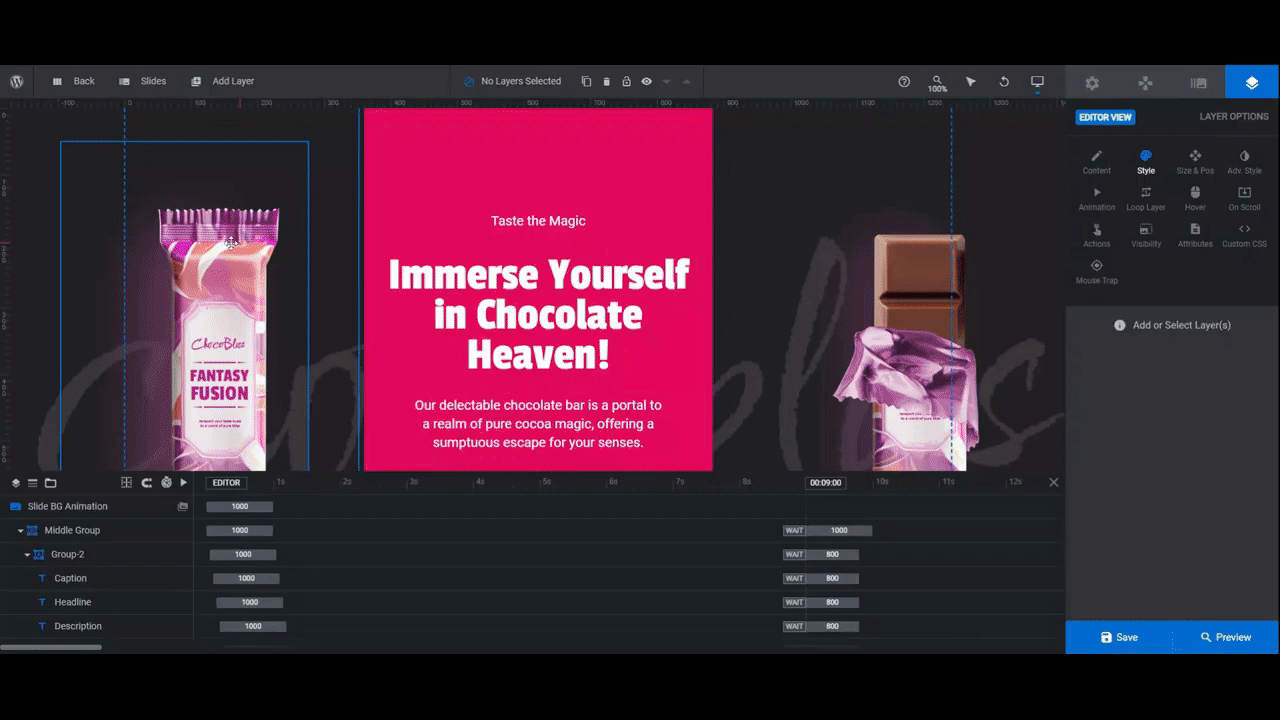
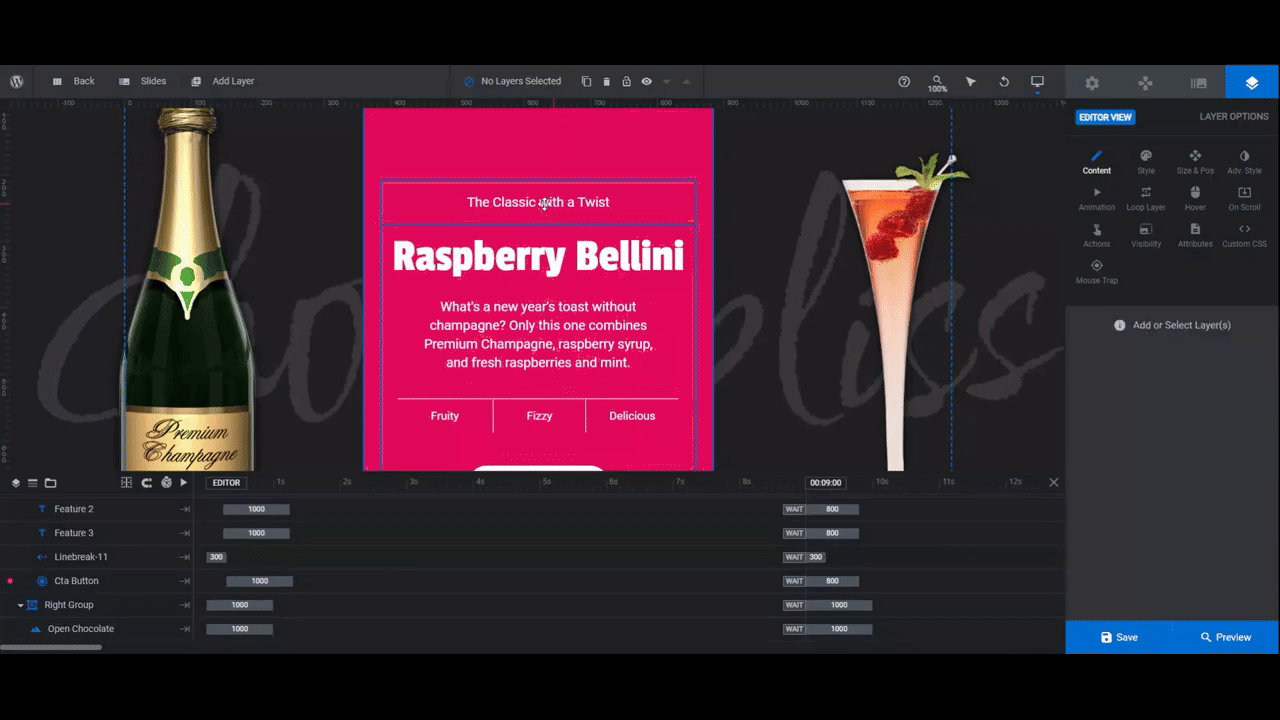
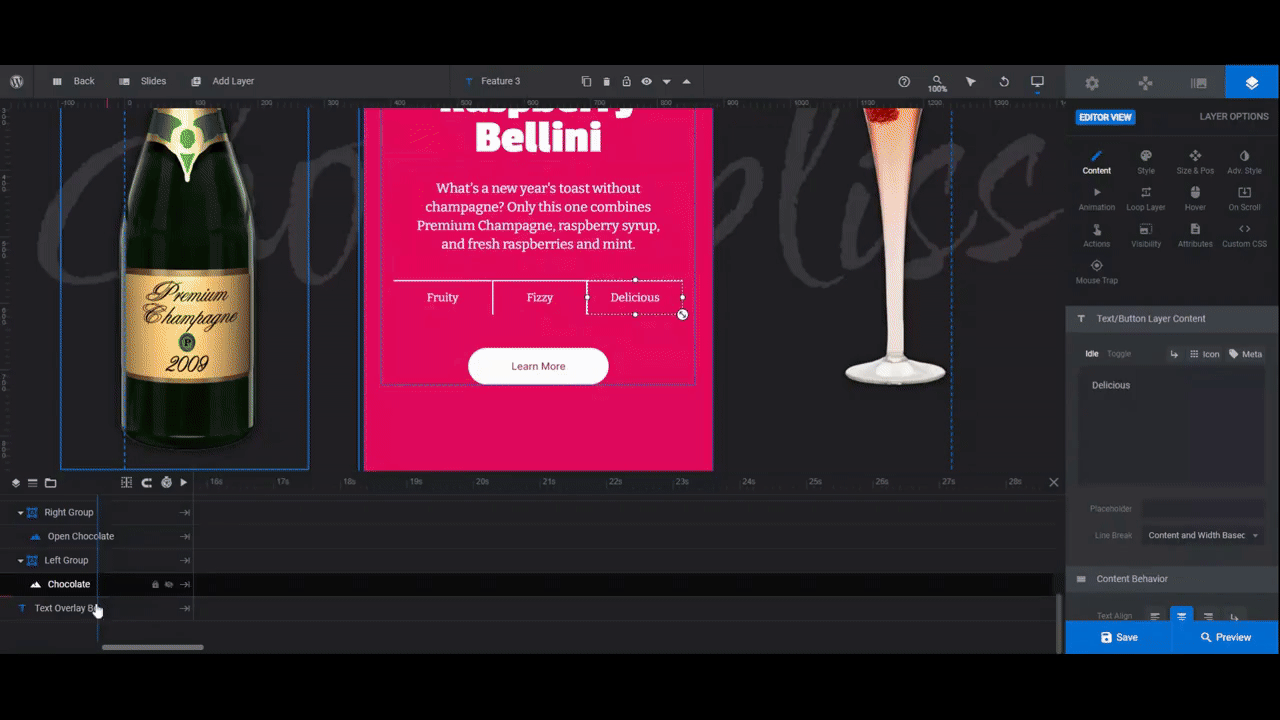
Step 6: Edit the foreground copy
There are six text layers to edit in this step:
- Caption
- Headline
- Description
- Feature 1
- Feature 2
- Feature 3
To edit the copy, go to “Content”. From there, you can change what each of the text layers says.

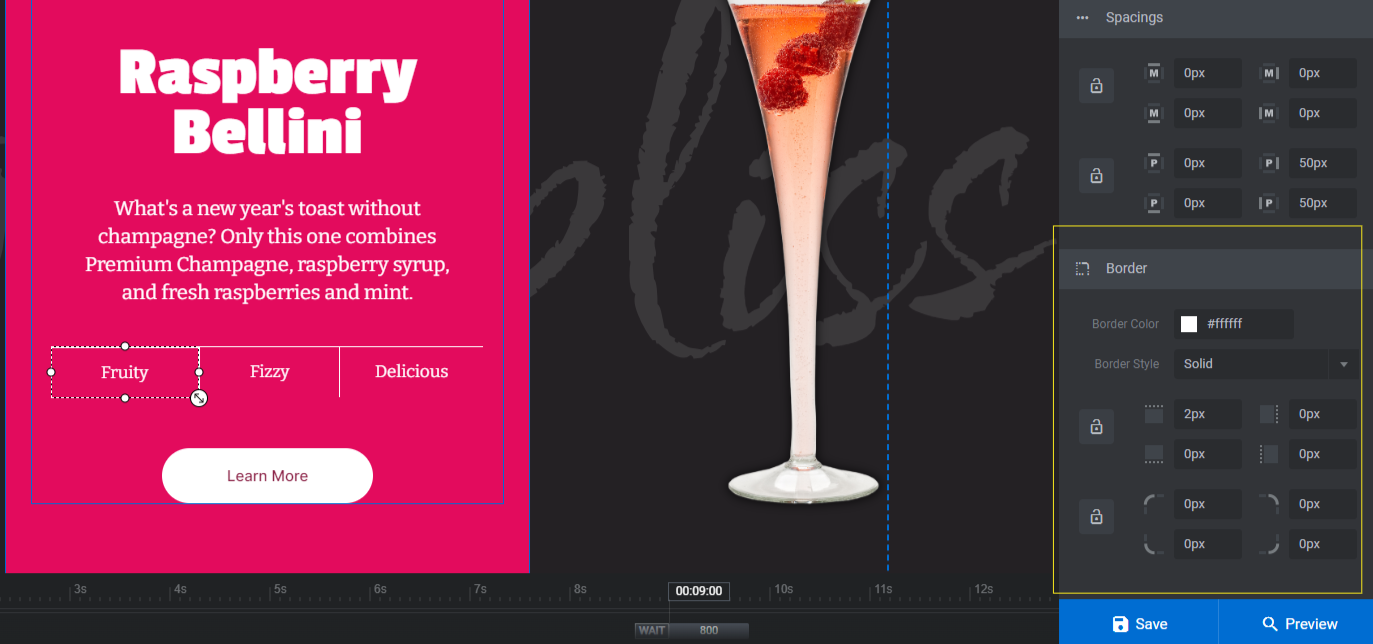
Next, open the “Style” panel. Change the font and make other stylistic changes to the color, weight, spacing, and more.
If you changed the colors or weight of any of these text layers, consider doing the same to the separating lines between the Feature layers. You can also remove or add lines or change the style of them, if you like.
You can do this under “Style” and “Border”.
Once you’re done customizing the text in the first slide. Repeat the process for all the other slides.
Learn more:
Step 7: Edit the background copy
In the backdrop of each slide is the name of the company: “chocobliss”. It’s not just there for branding though. It also adds some texture to the solid background color.
You can follow this pattern and update the Text Overlay Bg layer with the name of your company. You could also add the individual product’s name or a relevant keyword here.
Edit this layer the same way you did the foreground text layers. Go to “Content” to change what it says and “Style” to customize the font, color, etc.
Pro tip: To keep the text looking more like a texture and not distract too much from the main text or product imagery, use a heavily stylized script or brush font.
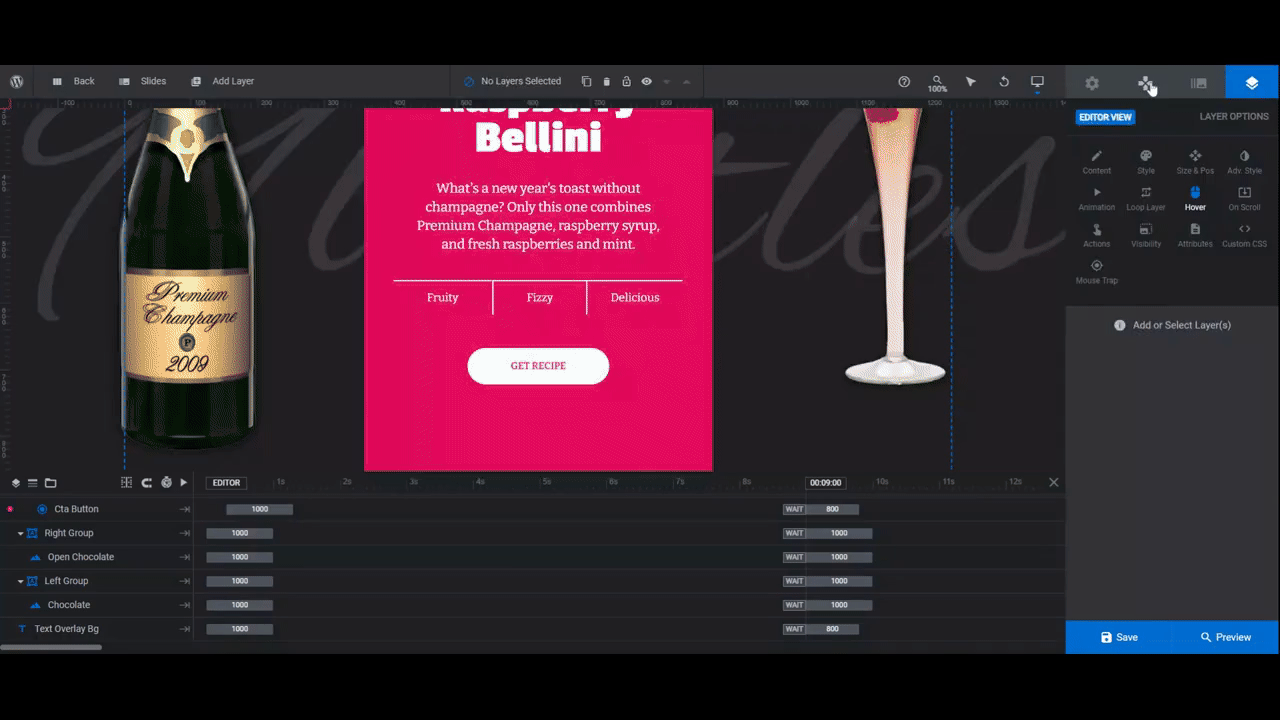
Step 8: Customize the button
Editing the Cta Button layer will be a lot like editing the text around it. There are a few exceptions.
To modify the button color, go to “Style” and “Background” to change the BG Color.
To change the button’s hover state, go to “Hover”. You can make basic stylistic changes as well as advanced transformations from this panel.
Lastly, to edit the button’s link, go to “Actions”. Since this is a product presentation, each slide’s link should be unique to the product (or, in our case, the recipe). Customize the Simple Link and then close the pop-up to save your changes.
Repeat this process for all of the slides.
Learn more:
Step 9: Update the bullets navigation
Since we removed the sidebar arrows, we’re going to increase the visibility of the remaining bullets navigation.
To modify the navigation, go to “Navigation Options” and “Bullets”. You can choose a different style of bullet and then make changes to the color, size, spacing, and more from this panel.
When you’re done, save your changes.
Learn more:
Step 10: Customize the global layers
Lastly, go to “Slides” and open up the Global Layers. This is where the Preload-Background cover image is as well as the Logo that appears at the top of each slide.
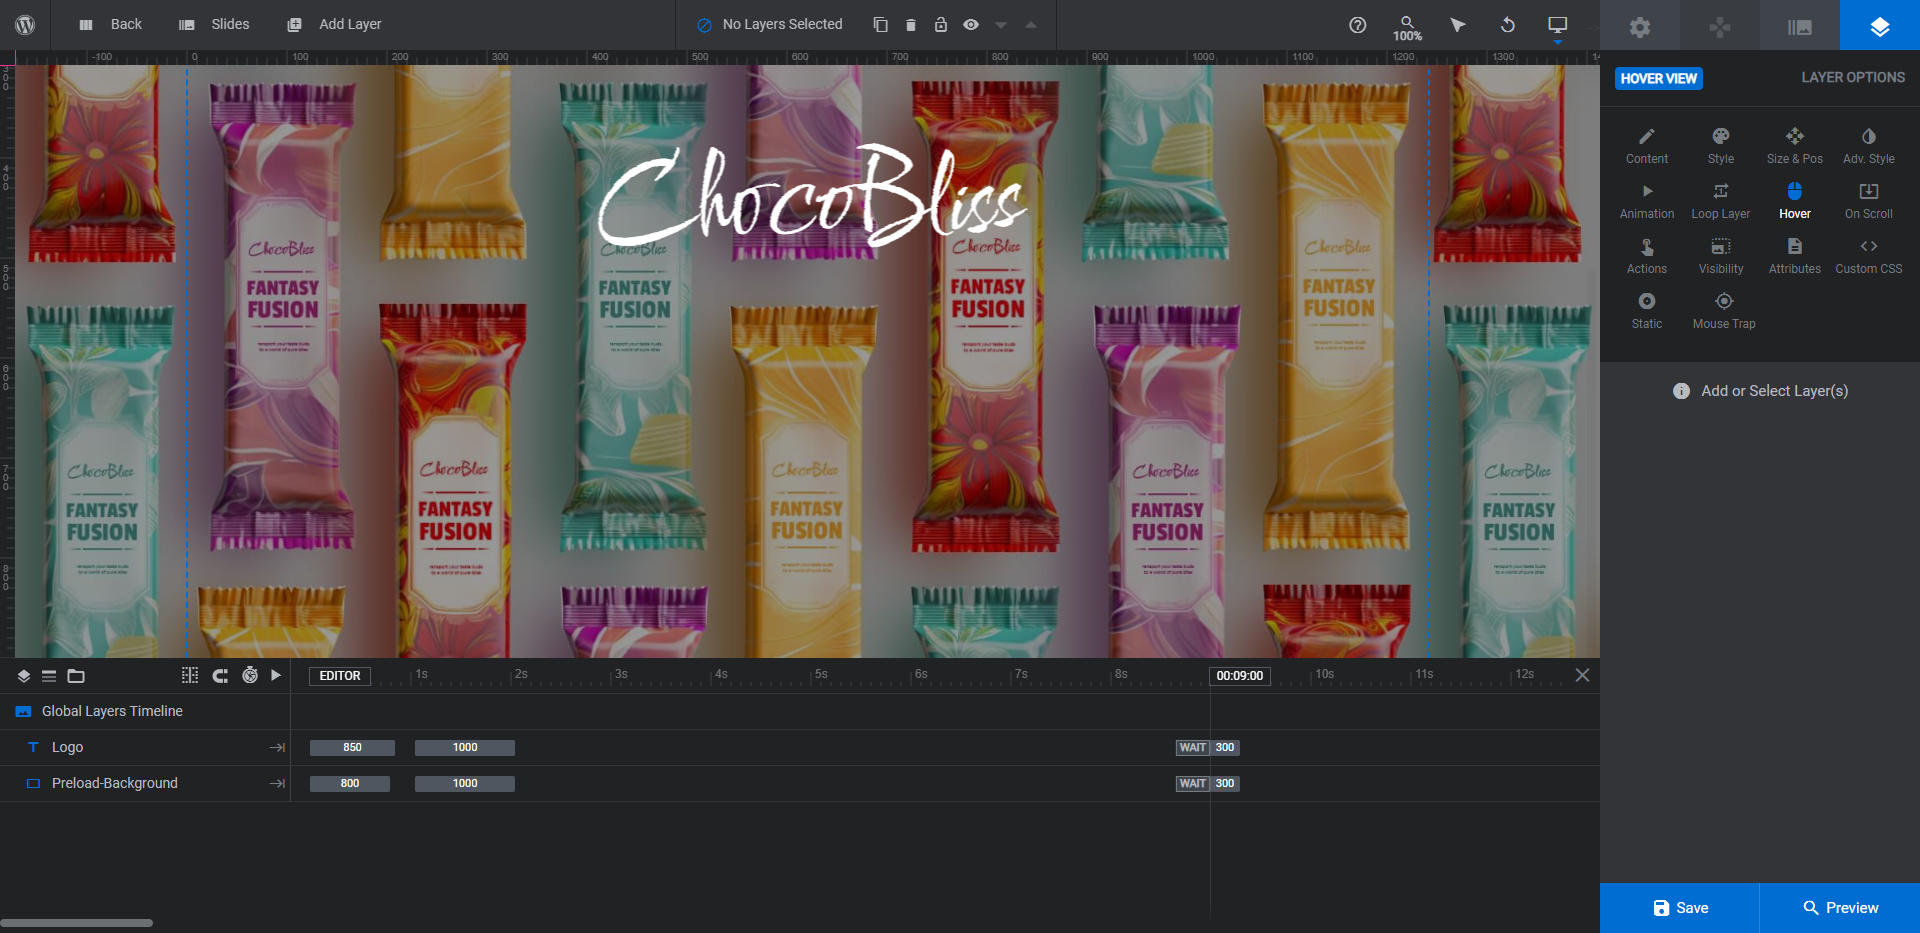
Start with the cover/preload image. It can be a promotional image showing your products or it can be a themed image. When exporting it, make sure the dimensions are at least 1920px by 1080px.
Select the Preload-Background layer and then upload your new image under either “Content” or “Style”.
The Logo is generated using a plain text layer. It’s the same text and font used in the background of each of the slides. So you can edit the text the same way here.
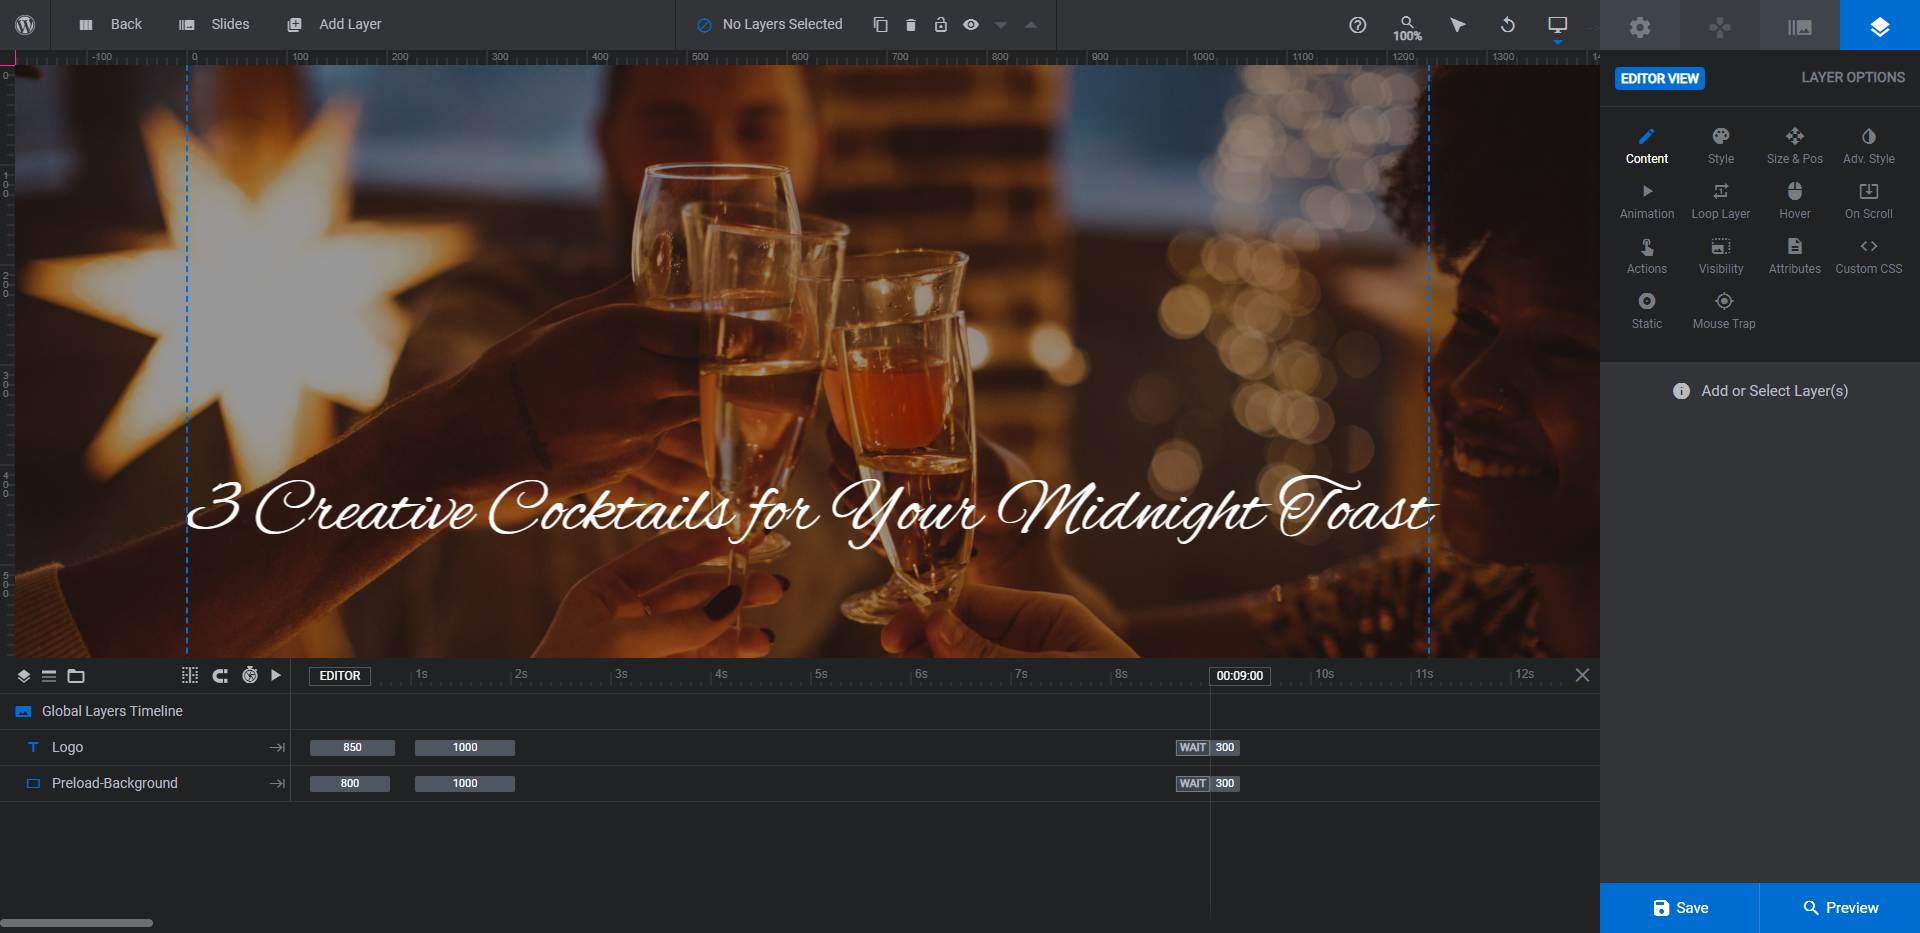
Note: The Logo doesn’t necessarily need to be your logo or company name. For instance, we’ve added the blog post title to this spot in ours.
When you’re done with your edits, save your changes. Then open the Preview.
When you’re happy with how your product presentation turned out, embed it on the page it belongs on (whether that’s the home page, product page, or something else). There are two ways to do this. Either copy the embed shortcode from “Module Options” and add it to the page. Or use the Slider Revolution widget to do it inside your page builder.
Learn more:
Putting a twist on the product presentation slider
Product presentations are useful components on websites. They give you the chance to succinctly sum up the features and/or benefits of your newest or top products for customers.
There are other uses for a product presentation slider as we’ve demonstrated in this tutorial. So whether you’d like to introduce visitors to new products, share recipes with customers, or something else, the Chocolate Bar Product Presentation Template will make it easy to design one of your own.

