

There are many different ways to show off the top products or categories on your home page. If you want this part of your page to really stand out from other ecommerce websites, consider using a fullscreen carousel.
In this tutorial, we’ll show you how to quickly build a custom product carousel with a panorama background and particle effects. You’ll need to install the Samurai Fullscreen Carousel template.
Table of Contents:
- Step 1: Create your background images
- Step 2: Upload your images
- Step 3: Edit the text
- Step 4: Edit the buttons
- Step 5: Customize the cluster particle effect
- Step 6: Customize the navigation
- Step 7: Adjust the header row
How to design a beautiful custom product carousel
When you envision a carousel, what do you see? Each segment of the carousel likely has defined boundaries. But that’s not the only way to design a carousel as you can see from the Samurai Fullscreen Carousel template.
In this tutorial, we’re going to show you how to repurpose this template for a nutritional supplements company. We’ll give you tips on how to create your own panorama background and then demonstrate how to edit the other components of the design.
If you need a Slider Revolution refresher before you begin, check these guides out:
Step 1: Create your background images
When you step inside the template in Slider Revolution, you’ll notice that each segment of the carousel has its own slide. However, when you look at it on the front end, the carousel has one long, contiguous background behind the samurais.
To create this, you have a number of options.
Option #1: Use a background image
One option is to find or create a panorama image to place your product images against. You’ll create the image — background and products — in your photo editing software or design tool.
The full image would need to be 5200px by 1024px. You’d then cut it up into four equal parts measuring 1300px by 1024px.
Option #2: Use color or gradients
Another option is to use color. You could choose a single color to apply to the entire background. Or you could play around with gradients.
Gradients can get murky in the middle if there’s too big of a distance between colors. Because of this, start by creating a gradient for Slide #1. Then use the end color from Slide #1 to start a new gradient scheme for Slide #2. And so on.
This will allow you to use various colors throughout the design while still making it seem as though they blend continuously throughout the carousel.
Option #3: Create a custom pattern
This is the option we’ve chosen for our design. Since we’re showing off nutritional supplements and powders, we wanted to keep it simple but visually interesting.
One thing to keep in mind if you go this route, be careful with how busy of a pattern you choose. If you’re planning to use the cluster particle effects, too much flare could overwhelm your visitors. So keep your pattern or layout on the tamer side.
Creating your images
Once you’ve settled on a background, add your product images to the carousel segments. When incorporating the images, consider how their placement will impact the design on smaller devices. You’ll have a chance to check this in the next step.
When you’re done, export a 1300px by 1024px image for each slide in the carousel.
Step 2: Upload your images
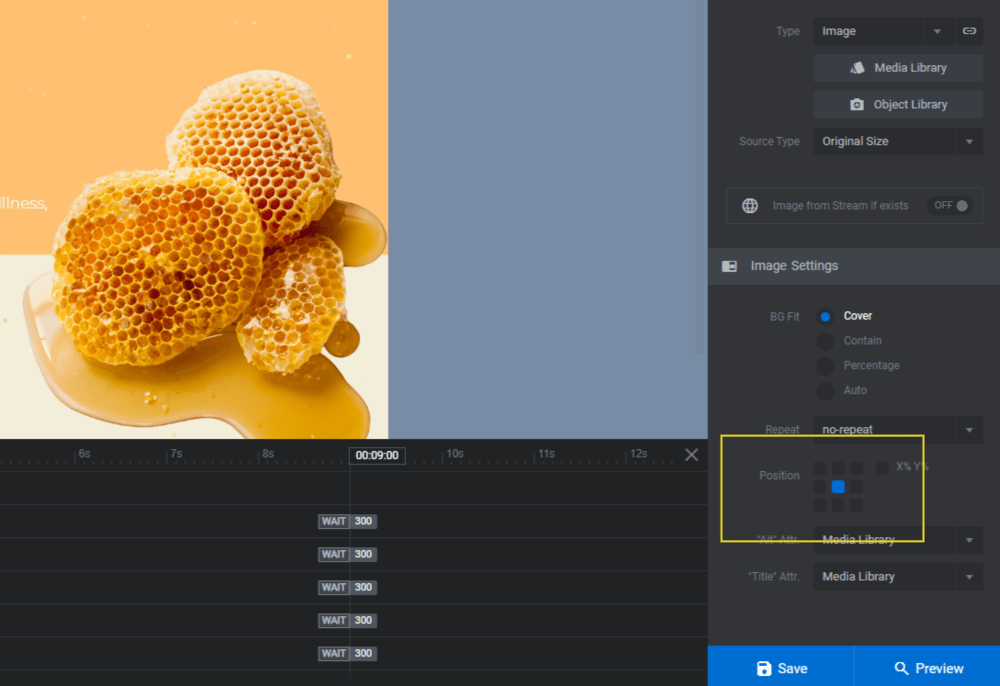
In Slider Revolution, go to “Slide Options” and “Background”. Upload your first image to the Media Library for Slide #1.
Repeat this process for the other slides.
Open the Preview to make sure your panorama seamlessly flows from start to finish in the carousel.
Note: The seamless background panorama will only appear on desktop. In order to fit on tablet and mobile screens, part of your background images will be resized and the edges cropped.
So checking the responsive preview is important to ensure that your products appear the way you want them to in the carousel. If they don’t, use the responsive variant switcher in the editor to make your modifications.
The fix might be as simple as changing the position of your background image. You’ll find this setting under “Slide Options”, “Background, “Image Settings”, and Position.
When you’re satisfied with how the images turned out, move to the next step.
Learn more:
- Changing Template Background Colors and Images
- Checking to Ensure Modified Content Is Still Responsive
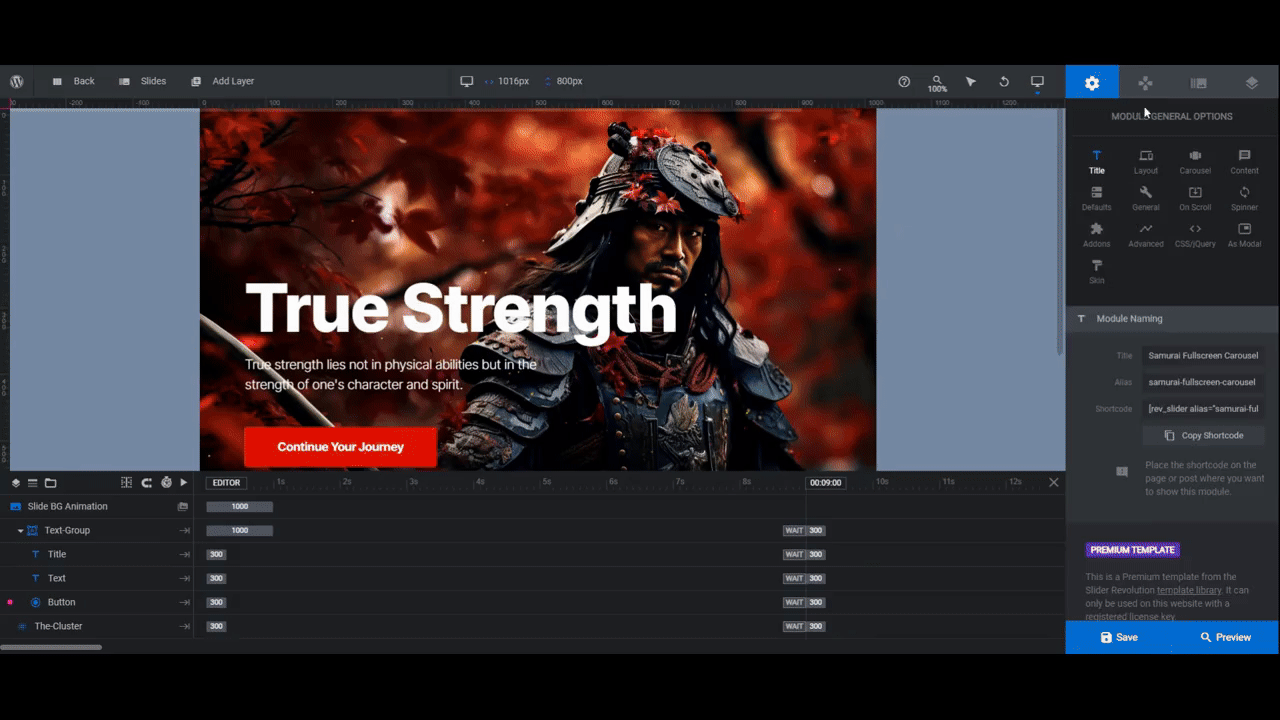
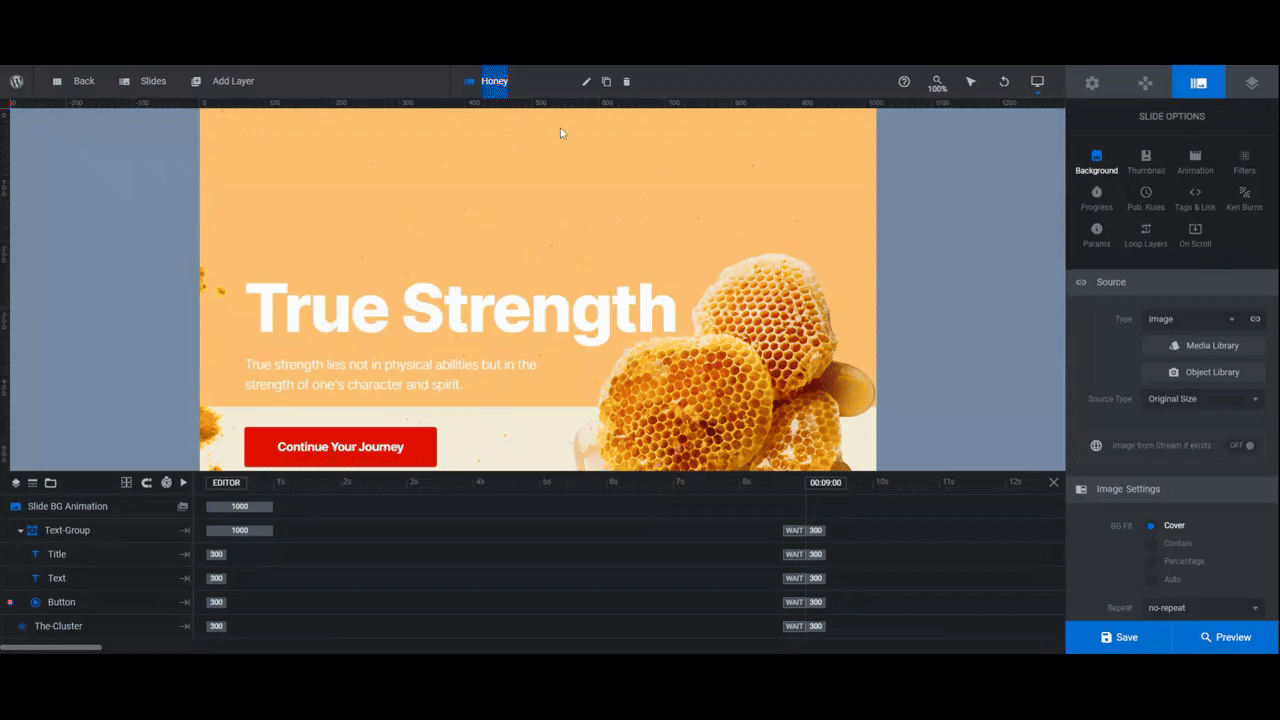
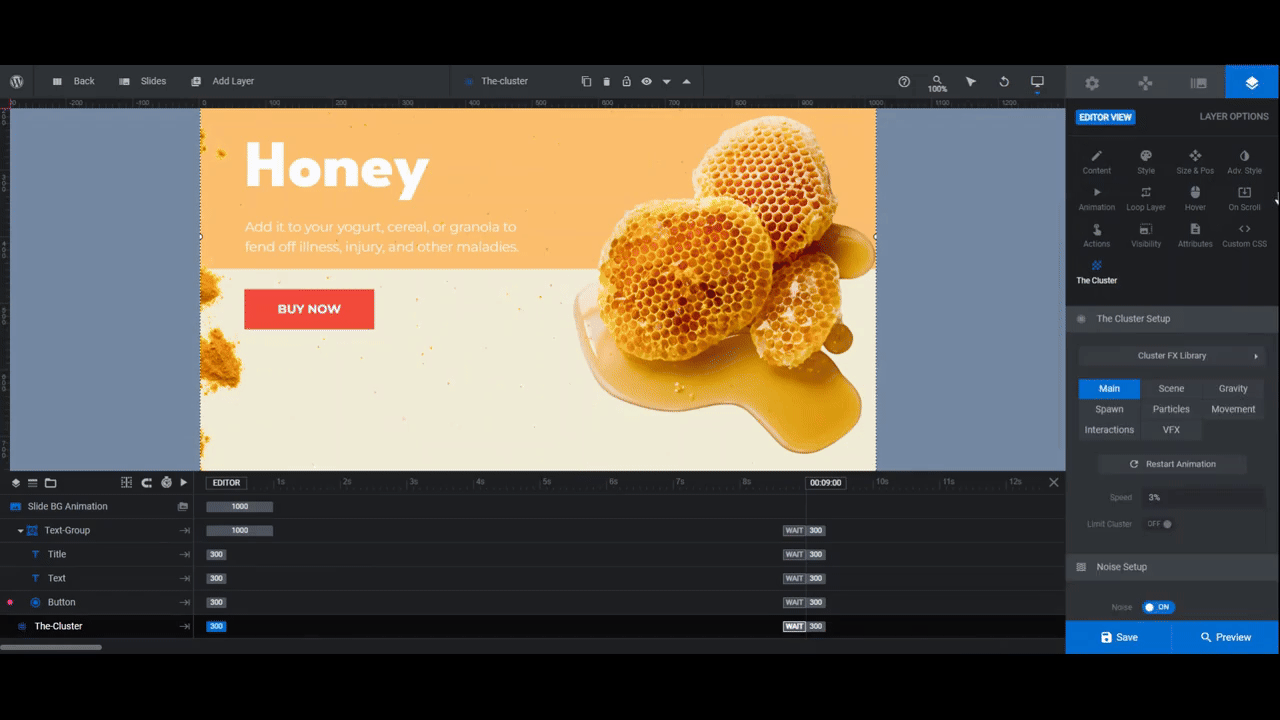
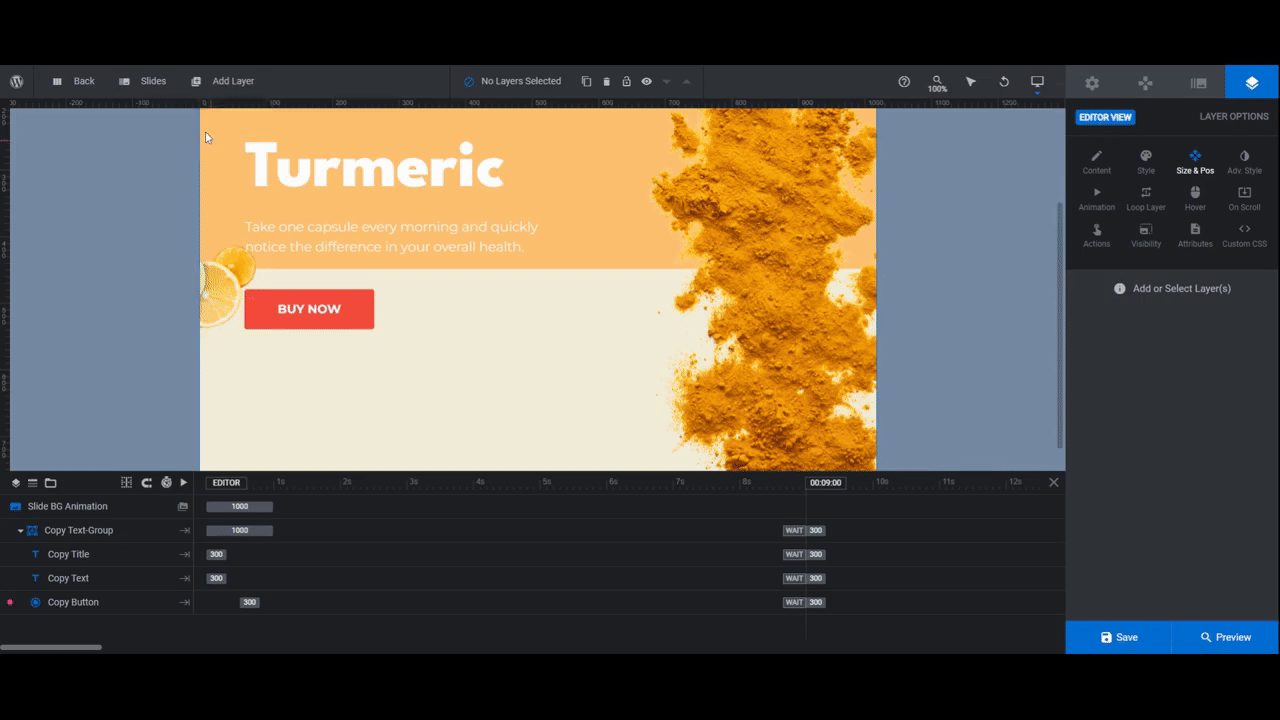
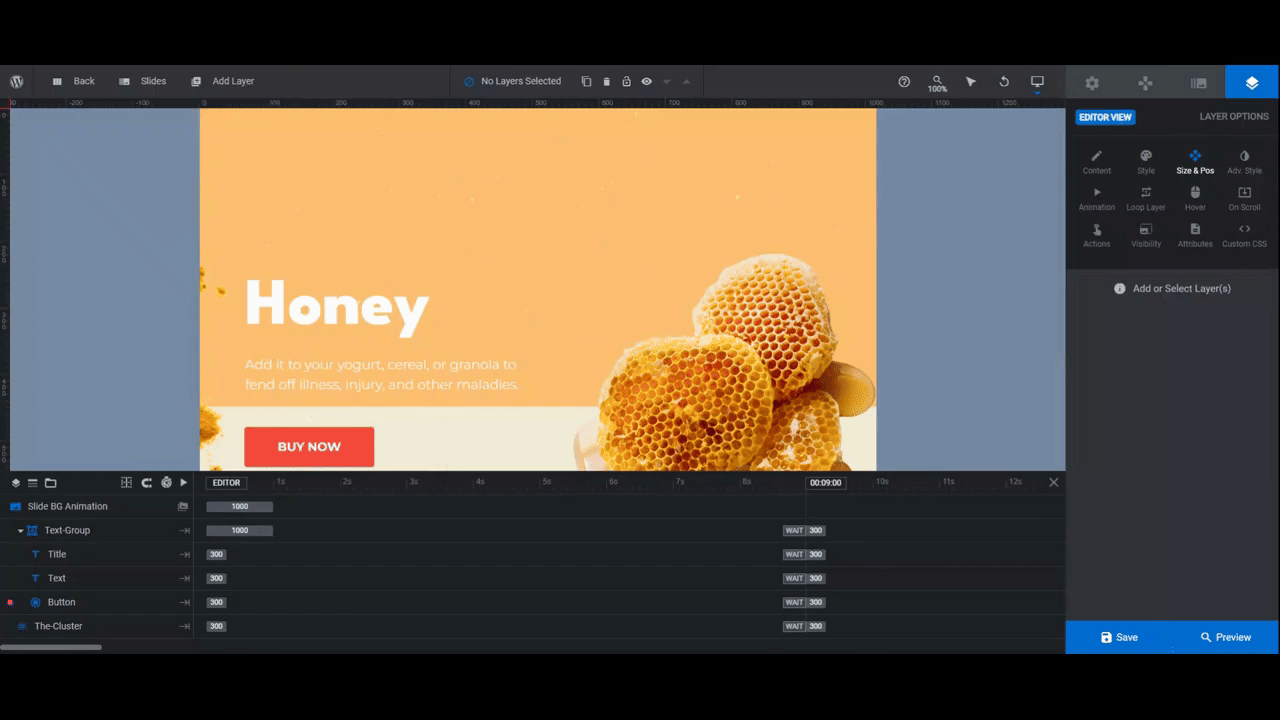
Step 3: Edit the text
There are two layers of copy in this product carousel: Title and Text.
To replace the text within each, select the individual layers. Go to “Layer Options” and “Content” and change the text in the block. Then use “Style” to modify the font, color, size, weight, and to make other stylistic changes as needed.
Note: Slide #4 in the template was designed as a call-to-action. So the Text layer doesn’t automatically wrap the way it does in the other slides. If you’d like to make this layer act the same way the others do, go to “Size & Pos” and set the W (width) value to 50%.

When you’re done, save your changes.
Learn more:
Step 4: Edit the buttons
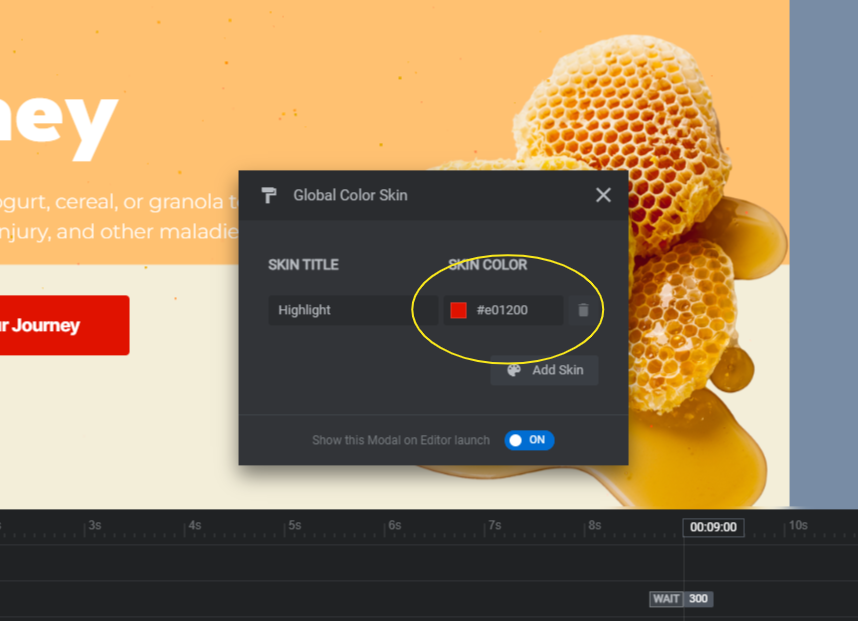
When you first opened this template, you probably noticed the Global Skin Color modal was open. To reopen it, go to “Module Options” and “Skin”.
The red Highlight color makes it easy to update all of the button colors in this carousel (as well as the color of the navigation tabs and the header highlights). Just change the color here and it instantly updates all of the components associated with it.
Click on the HEX code and the color selection dialogue will open. Input your new color’s HEX code and save your changes.
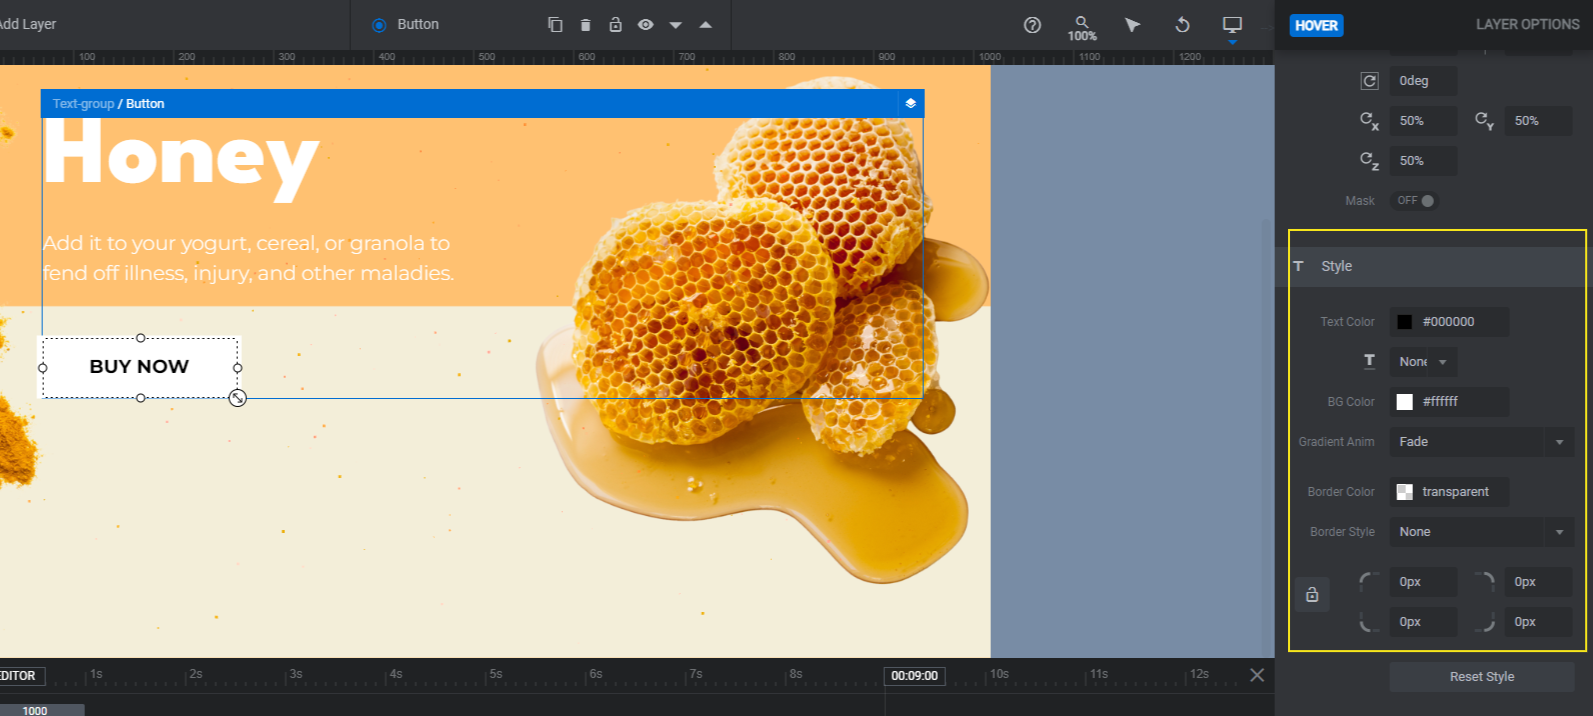
Now you can go back to the layers and edit the Button in each slide. Use “Content” to change the text in the button and “Style” to update the font, colors, and more.
You may want to update the hover effects as well. Go to “Hover” and scroll down to “Style”. You can modify the button’s text and background color, among other things.
The last thing to customize is the action.
The template was initially set up as a linear carousel. When clicked, each button scrolls to the next slide. Because we’ve converted this into a product carousel, we want the buttons to direct users to the corresponding product pages.
Go to “Actions”. Click the trash can icon next to the Next Slide action to delete it. Select Simple Link from the list on the right. Then input the relevant details for your product page and link.
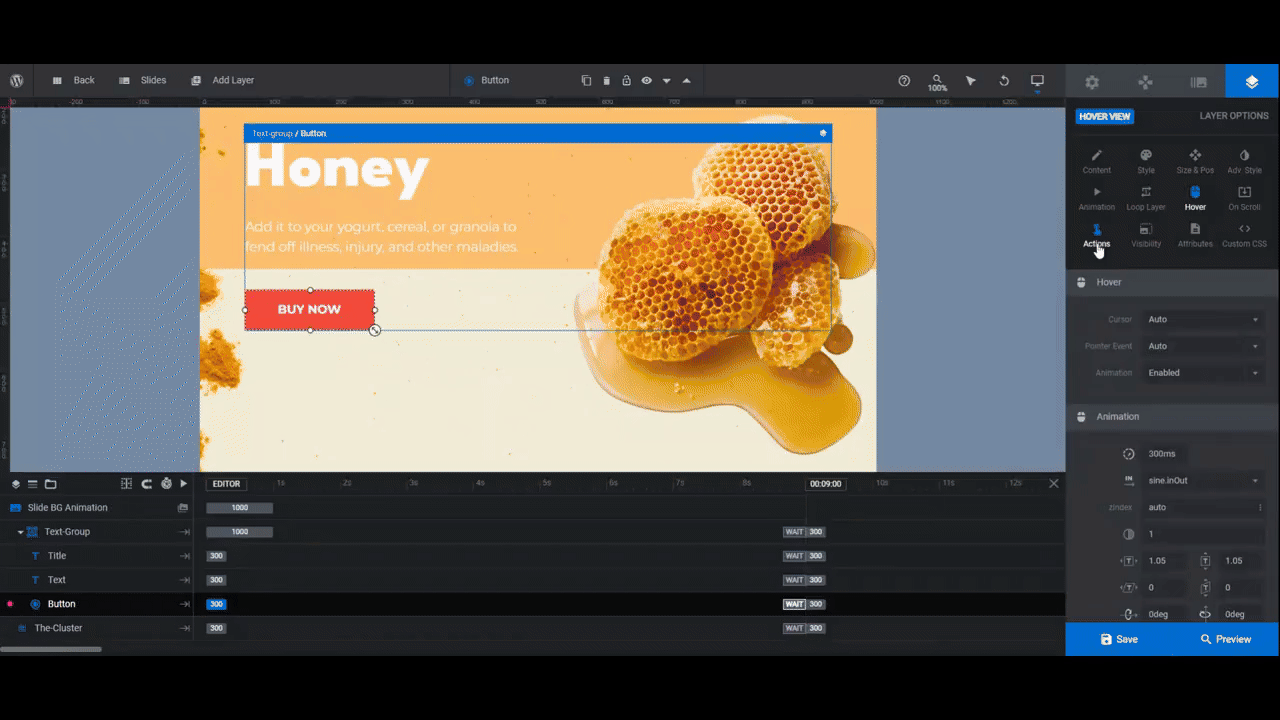
Do this for each slide and save your changes when you’re done.
Learn more:
Step 5: Customize the cluster particle effect
In the template, the cluster particle effect is very subtle. You can choose to stick with a similar theme, making slight adjustments to the current settings, or you can create your own effect.
To modify this special effect, locate The-Cluster layer in each slide. Then go to “The Cluster” settings panel on the right.
Start by opening the Cluster FX Library Default Presets. Click on each to preview them in the canvas on the left.
Once you’ve found the one you want to use, scroll down and configure the settings.
- Main enables you to adjust the speed and noise.
- Scene controls where the center of the cluster is. You can also add a visual helper for users.
- Gravity allows you to add different gravity points.
- Spawn lets you set the number of particles along with their directionality.
- Particles is where you set the size, shape, and color of the particles.
- Movement allows you to configure the particles’ motion.
- Interactions enables you to make your cluster particle interactive.
- VFX gives you the ability to configure bokeh settings.
When you’re done, implement the same changes from slide to slide. Slide #4 doesn’t have The-Cluster layer in it, so you’ll have to create one if you want it.
Go to “Add Layer” in the top toolbar and select TheCluster. Go to “Size & Pos” and set the Size Presets to Cover.
Now you can go in and customize it as you did the others.
Learn more:
Step 6: Customize the navigation
There are two types of navigation enabled. There’s the Progress bar at the top that shows users how long before the slide rotates and the Tabs at the bottom that shows which slide they’re on.
We’re going to keep the progress bar as is. However, we’re going to remove the Tabs in order to simplify the design. They look great on the darker samurai forest imagery, but are a bit too much for our colorful landscape.
To turn off the tabs, go to “Navigation Options” and “Tabs”. Switch the toggle to the OFF position.
Then go to “Bullets” and switch the toggle to the ON position. Click the dropdown next to Bullets Style to peruse the different bullet navigation options. Select the one you want, then use the settings down below to customize it.
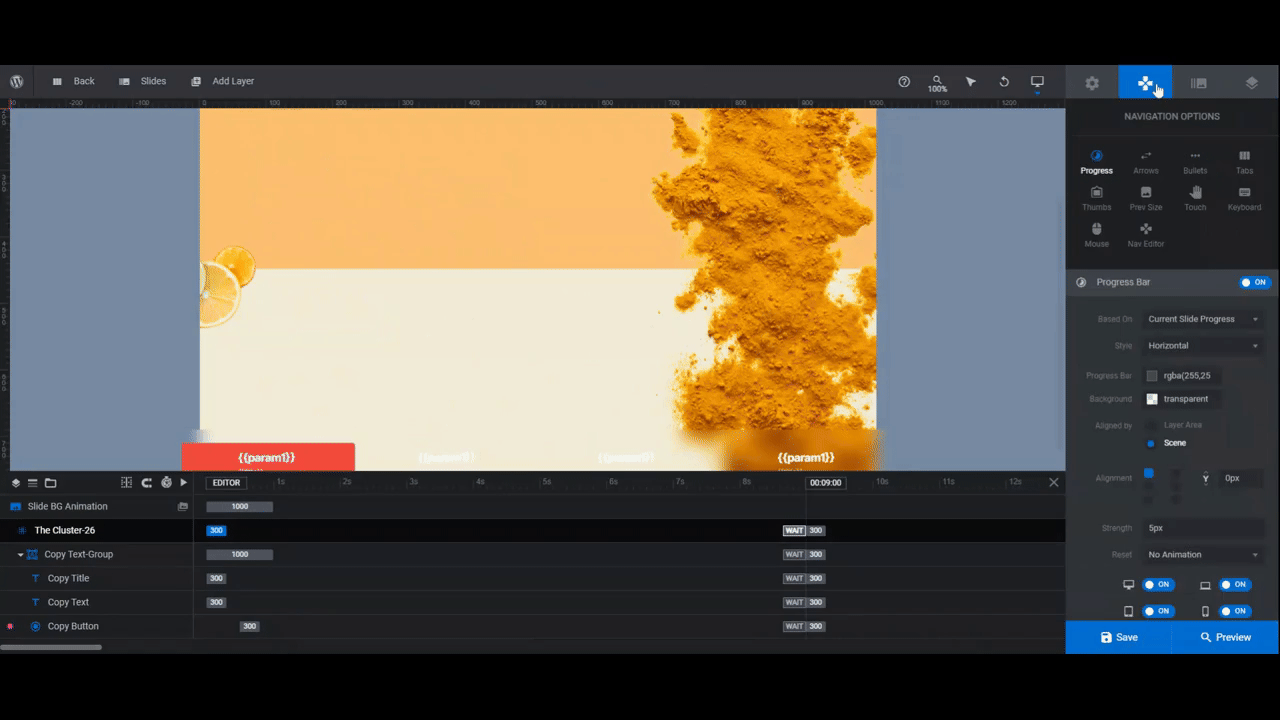
Preview your changes to make sure you like the look and functionality of your new navigation. When you’re done, save your changes.
Learn more:
Step 7: Adjust the header row
The last thing to do is modify the built-in header. You’ll find this if you go to “Slides” and “Global Layers”.
Similar to the issue with the tabs navigation, the header is a bit too much for our new design. One option is to delete it entirely. To do this, locate the group in the timeline editor called Menu. Hit Backspace or delete and it will remove the entire header.
The other option is to keep the existing elements, but modify them to match the new style of your website. They’re all text layers, so you can edit them the way you did the text inside the carousel.
Learn more:
Make your product carousel pop with an unusual and unexpected design
One of the problems with sliders and carousels is that users have pretty much seen it all these days. If they’ve seen one, they’ve seen them all. But what happens when you give your product carousel the fullscreen treatment and add an eye-catching particle effect to it? They’re going to stop and take notice.
The effect might look complicated to reproduce on the frontend, but with the help of Samurai Fullscreen Carousel template, you can create your own in a couple hours.

