
You don’t necessarily need multi-screen sliders or carousels in order to tell a captivating story about your brand or project. A single hero image can be just as impactful. The trick is to find the perfect combination of high-powered typography, beautiful imagery, and showstopping special effects.
In this tutorial, we’re going to show you how to edit the Beyond the Void Parallax Hero template to create a hero image design your visitors won’t soon forget.
Table of Contents:
- Step 1: Update the background images
- Step 2: Delete floating rocks
- Step 3: Upload your subject’s photo
- Step 4: Edit the text
- Step 5: Updating the cluster effects
- Step 6: Customize the button’s special effects
- Step 7: Update the flash colors
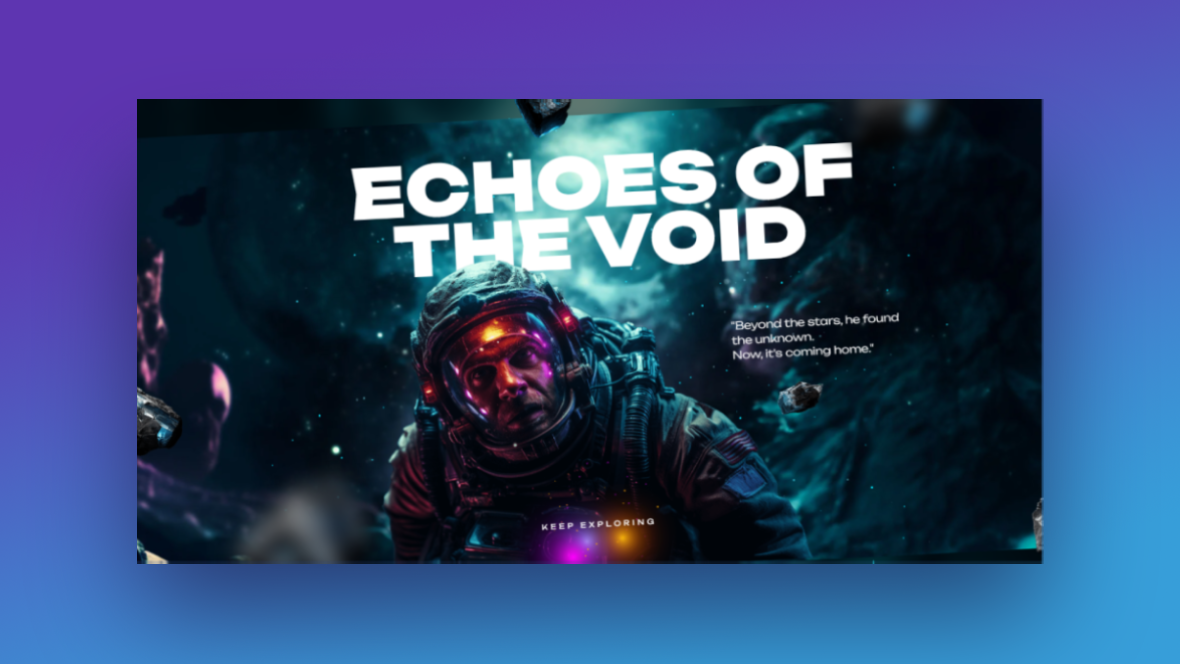
How to create a showstopping hero image design for your project
Your hero image design is a lot like the promotional poster for a blockbuster movie. You don’t have a ton of space to work with, but with the right design choices, you can make it as intriguing and memorable as this template:
In the following tutorial, we’re going to repurpose this template for our podcaster and her new show:
Read through these quick-start references first if you’re new to Slider Revolution:
Step 1: Update the background images
If you look closely at this hero image design, you’ll notice that the background image appears to be on a slant. To create this effect, we need to add the same photo to different parts of Slider Revolution.
Note: To use the same background layout as the template, export your image as 2464px by 928px.
First, go to “Slide Options” and “Background”. Upload your image to the Media Library.
Then, click on the Scene-Bg layer in the timeline editor at the bottom. Upload the same image under “Content” or “Style”.
By the way, the image in the slide’s background is blurred by a layer called Blur-Overlay. Make sure to keep this layer as is so it preserves the off-kilter look of the background.
Learn more:
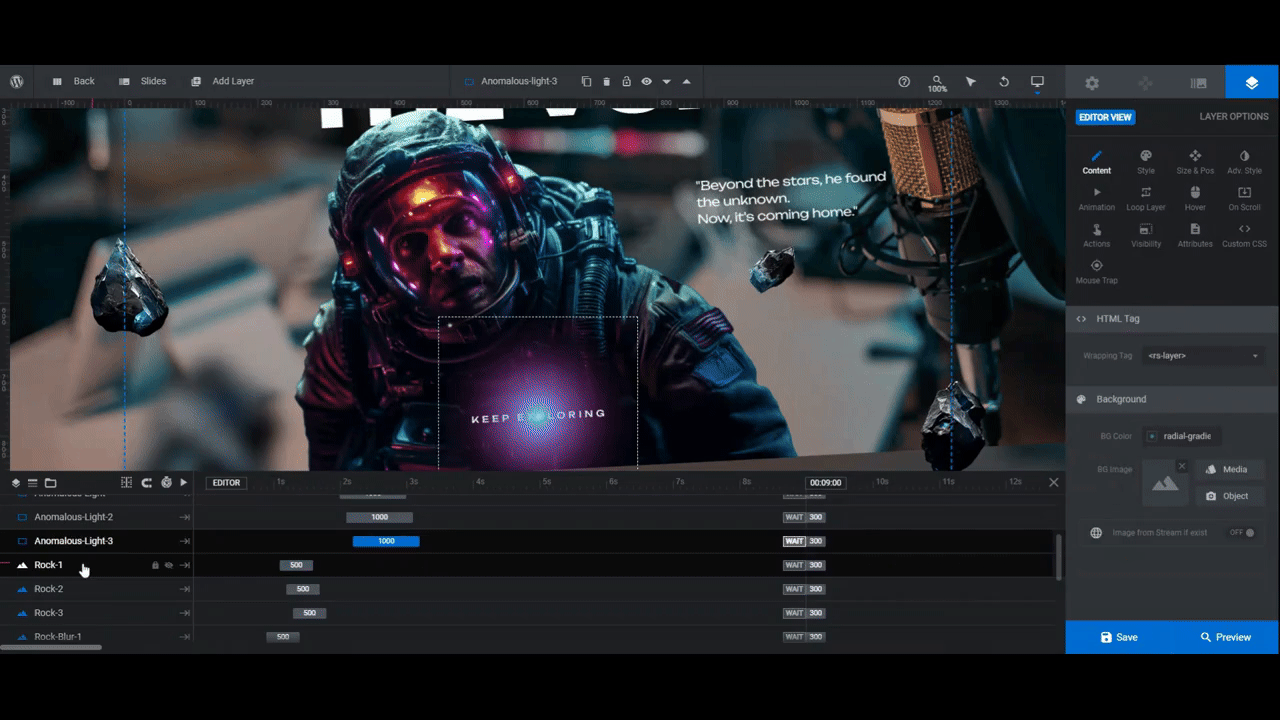
Step 2: Delete floating rocks
There are six Rock layers in this template — 4 regular floating rocks and two blurred shapes. If we were creating a more illustrative or atmospheric design, we could repurpose these layers. However, for our podcast studio backdrop, they’re not needed.
If you want to keep these layers, upload your own images. If you want to delete any or all of them, hold down the Ctrl or command key, select the ones you want to get rid of in the timeline editor, and then hit Backspace or delete.
Save your changes when you’re done.
Learn more:
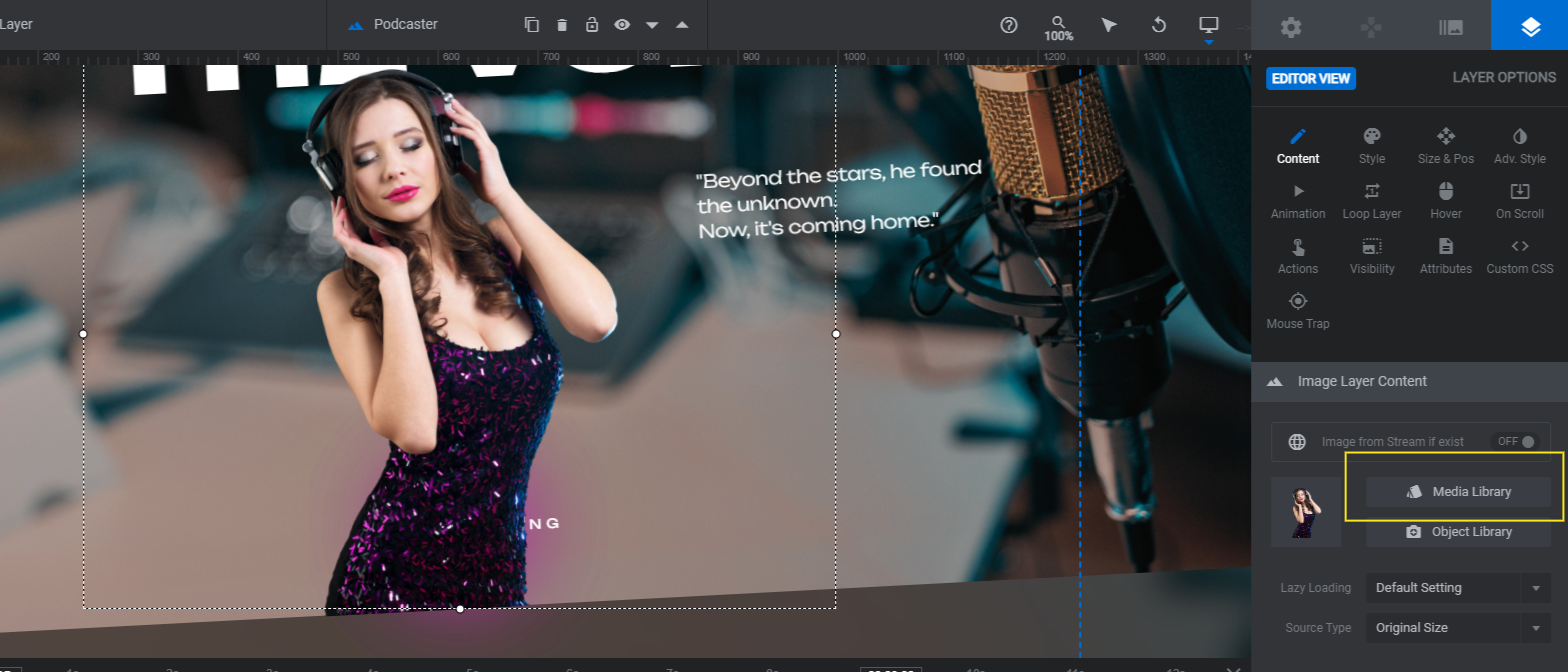
Step 3: Upload your subject’s photo
The star in this hero image is going to be our podcaster. To replace the astronaut with your own star or subject, export an image of them that’s 1037px by 757px and has a transparent background.
Then go to “Layer Options” and “Content” to upload it into the Astronaut layer.
If you need to adjust the size or placement of the image, go to the “Size & Pos” panel.
- Use Alignment to move the image to the left, center, or right of the canvas.
- Use X to move it right or left and Y to move it up or down.
- Use W to change the width and H to change the height.
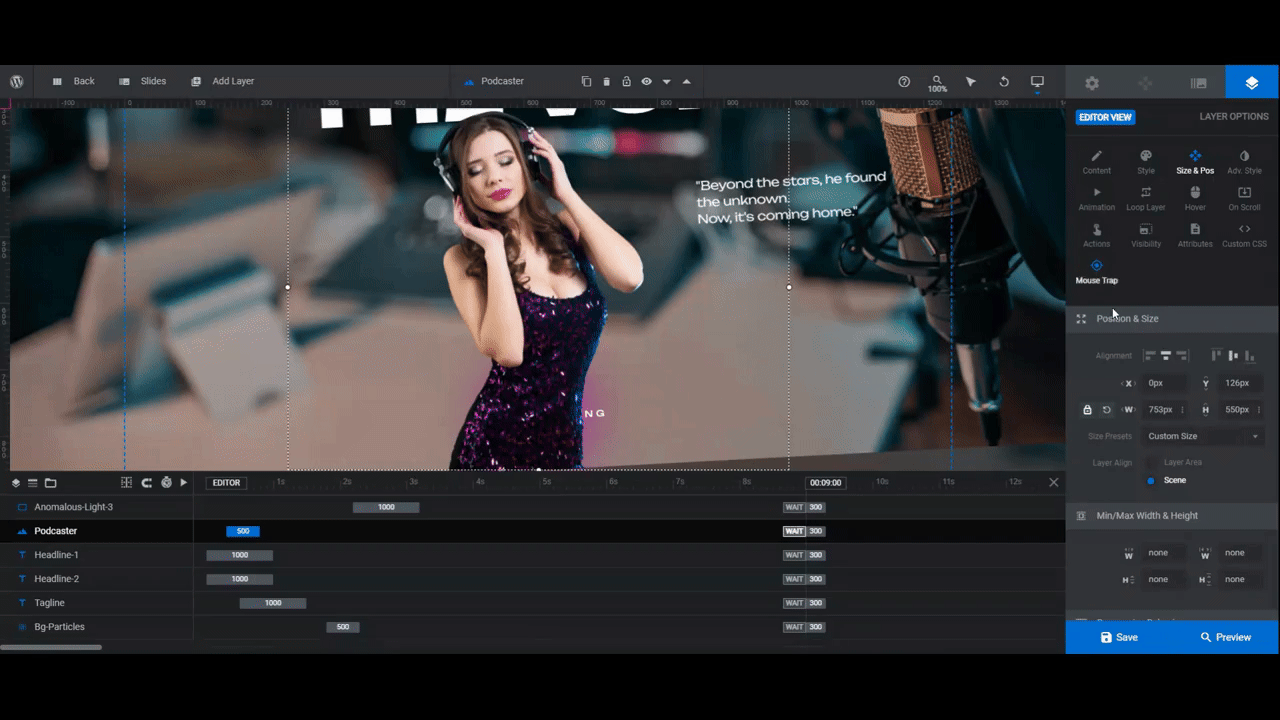
Once you have the sizing and positioning fixed on desktop, use the responsive variant switcher in the top toolbar to check that the image looks okay on smaller screens.
Any edits you make from these views will apply only to the corresponding responsive variant.
Learn more:
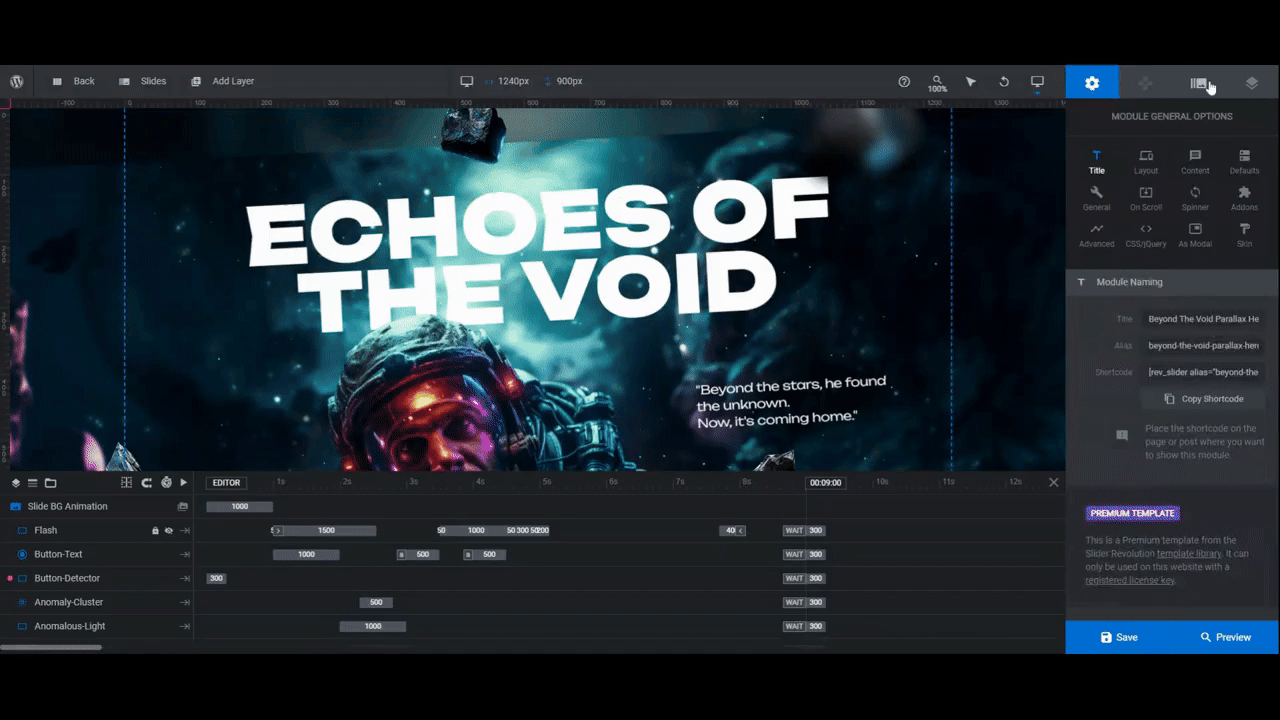
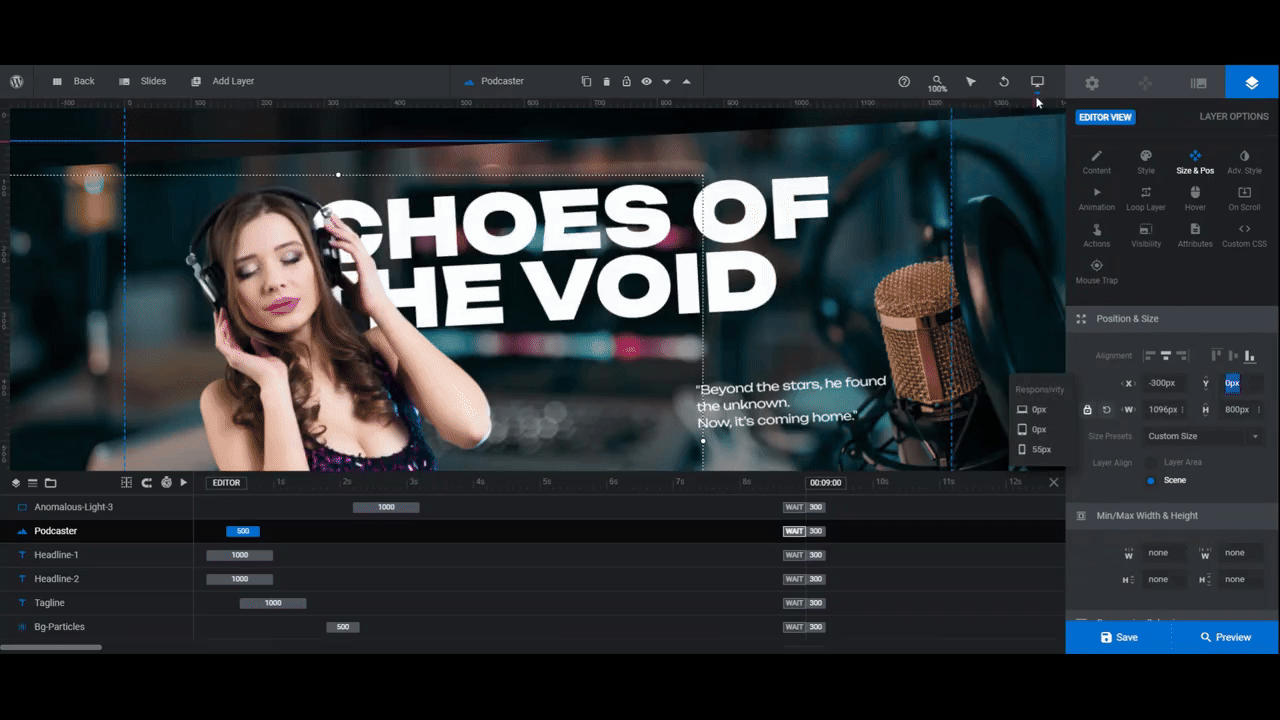
Step 4: Edit the text
There are three text layers to edit as well as a button:
- Headline-1 is the first line of the headline.
- Headline-2 is the second line.
- Tagline is the quote over on the right-hand side. This can also just be a subheadline or description.
- Button-Text is the text link at the bottom.
Let’s start by editing the copy in each. To do this, select the layers in the canvas or timeline. Then go to “Content” to replace the text in the block.
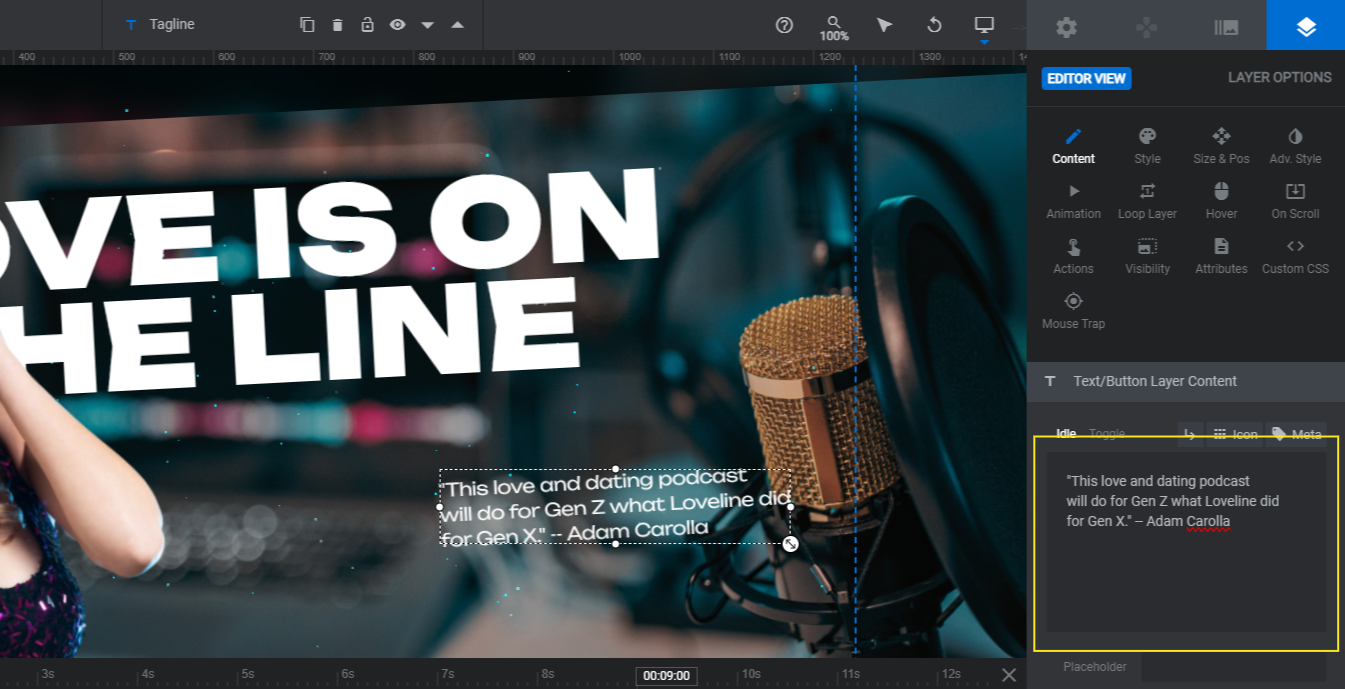
Note: To force the text in the Tagline to wrap, either hit the Enter or return key or click the return key icon above the block. This will insert <br /> at the breaking point.
To change the fonts and general styling of these text layers, go to the “Style” panel.
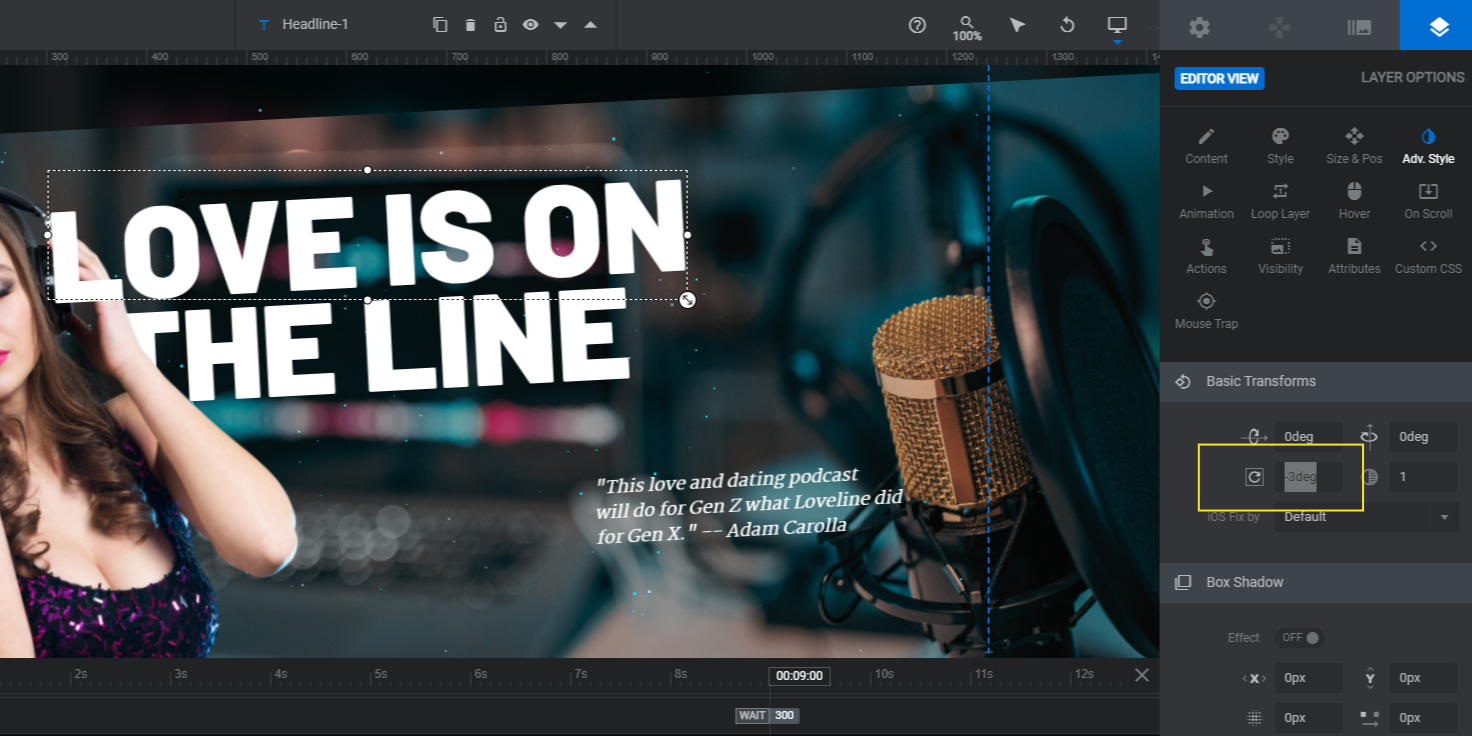
One other thing you might want to adjust is the rotation. Right now, most of the elements in this hero image design are slanted -3 degrees. To remove or change the slant, go to “Adv Style” and adjust the rotation there.
If you have changed the size or position of any of these text layers, do one more responsive check before moving on.
Learn more:
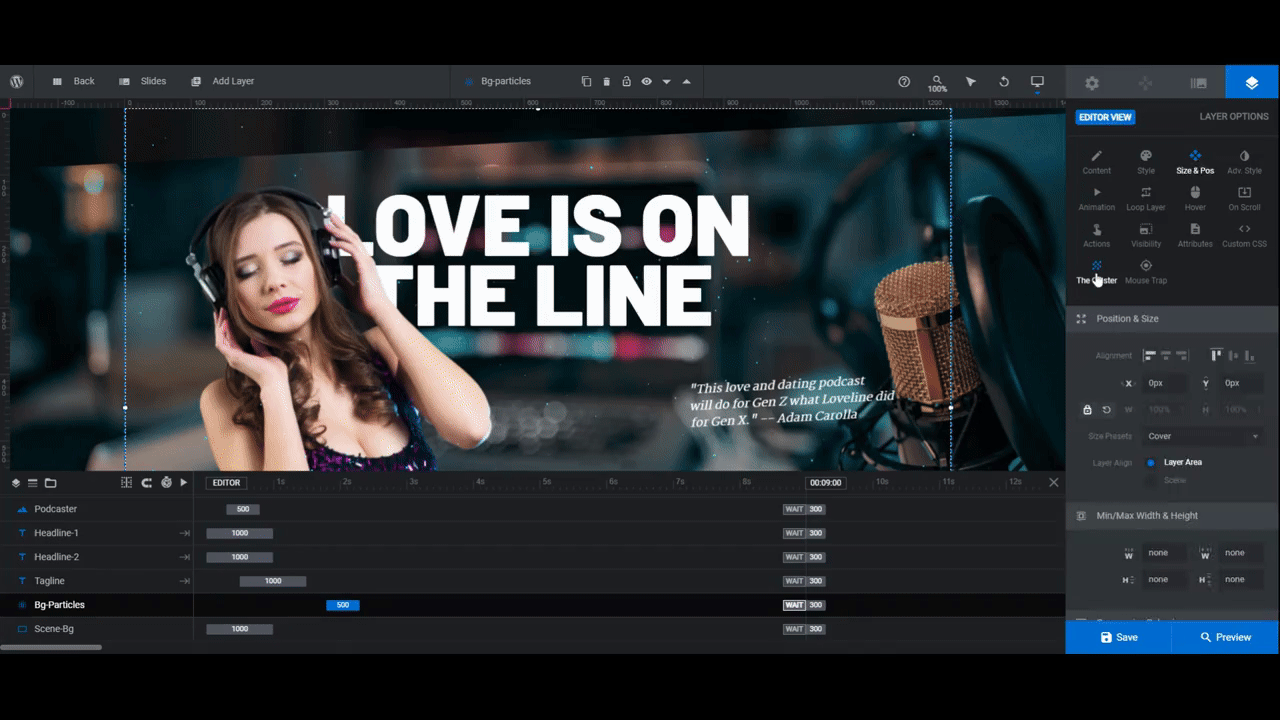
Step 5: Update the cluster effects
There are two particle effects used in this hero image. One uses a Serene effect and fills the background of the hero image. We’ll start with this one.
Select the Bg-Particles in the timeline. Then go to “The Cluster”.
There’s a lot to modify here. For instance, you can edit the shape, size, and color of the particles. You can change the way the particles move, the speed and direction they move in, as well as how they move when a user’s cursor goes near them (if at all).
Note: You can also use a different style of particle clusters. To preview the premade options, click the arrow next to Cluster FX Library to view the defaults.
We’re going to keep our edits to the minimum. All we really want to do is make the colors match the dress of our podcast superstar.
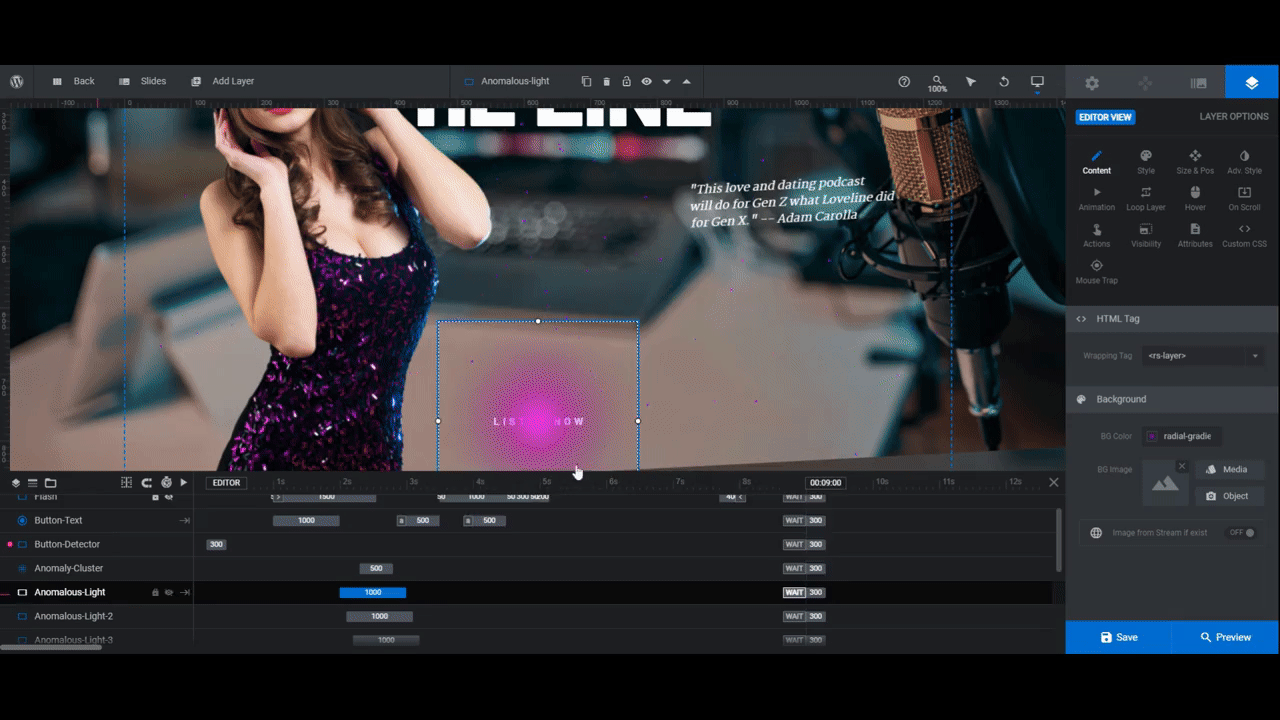
The other particle cluster in this template is called Anomaly-Cluster. This one uses a Spheroid effect and swirls behind and around the button.
Select this layer in the timeline and use the same The Cluster settings to modify the appearance and functionality of the cluster.
Learn more:
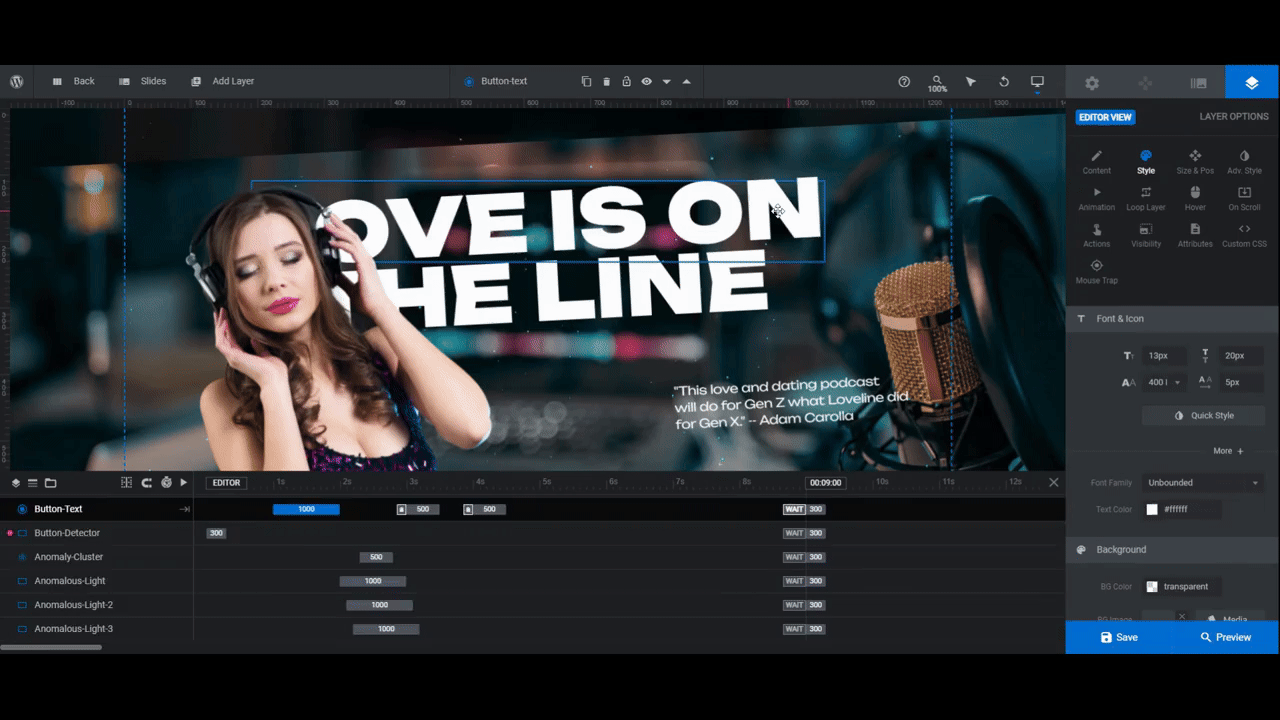
Step 6: Customize the button’s special effects
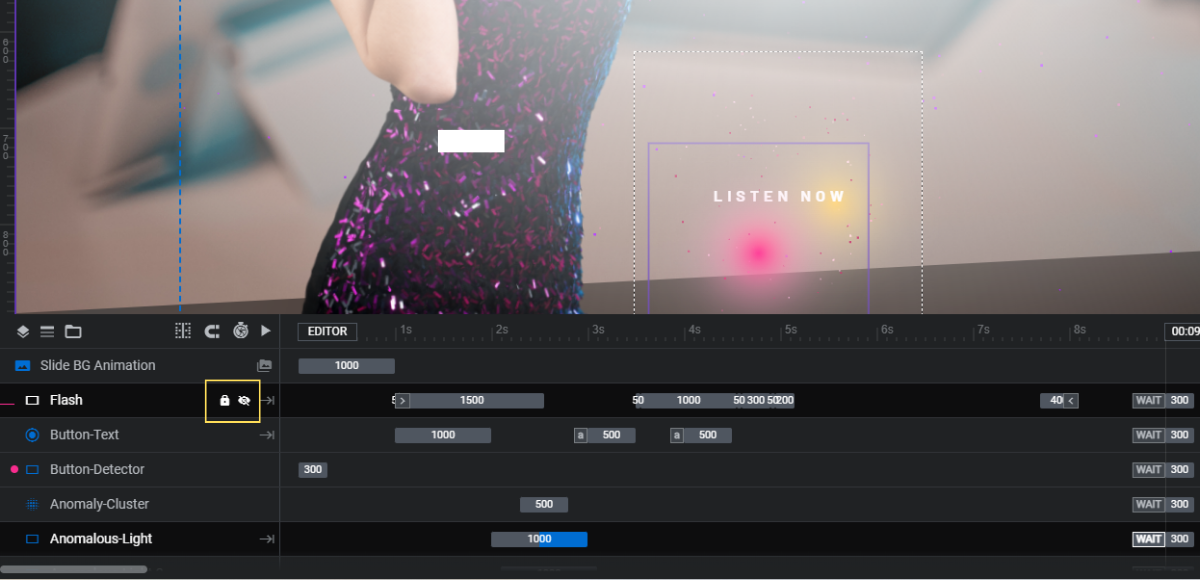
There are three swirling orbs that move around the button along with the particle effects.
Note: If you look at them in the canvas, they appear to be a glowing mass of color behind the button. So after you edit these layers, make sure to preview them on the frontend so you can see how each individual ball of light looks.
To edit these layers, first locate them in the timeline. They’re called Anomalous-Light, Anomalous-Light-2, and Anomalous-Light-3.
The main thing to edit is the gradient color, which you can do from the “Content” or “Style” panels.
Note: If you’d like to play around with the curve of the light orbs, you’ll find this setting under “Loop Layer” and “Effects”
Learn more:
Step 7: Update the flash colors
A flash appears every couple of seconds over the hero image. Each time it reappears, it shines a different color (subtly) on our podcaster and the backdrop.
To maintain this effect but change the colors, start by editing the radial gradient of the Flash layer.
First you’ll need to unlock this layer for editing. Locate it in the timeline editor. Then click both the lock and crossed-out eyeball icons. This will make the layer editable and viewable from the canvas.
Next, go to “Content” or “Style” to modify the gradient.
To modify the changing colors of the flash, go to “Animation”. There are three IN keyframes that need to be edited: In 2, In 3, and In 4.
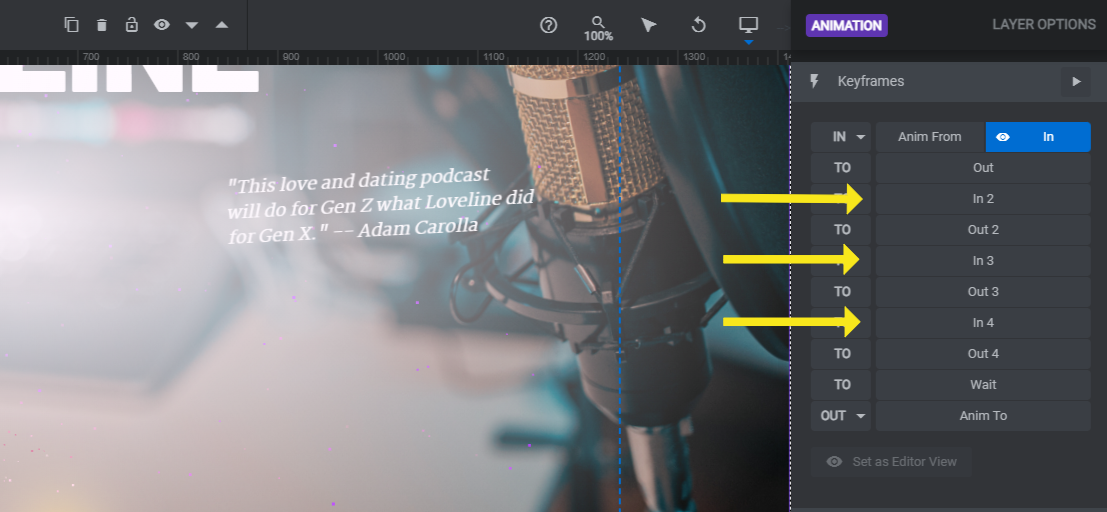
Select them one at a time. Then go down to “Advanced” and click the Color tab. This is where you’ll apply the custom gradient for each.
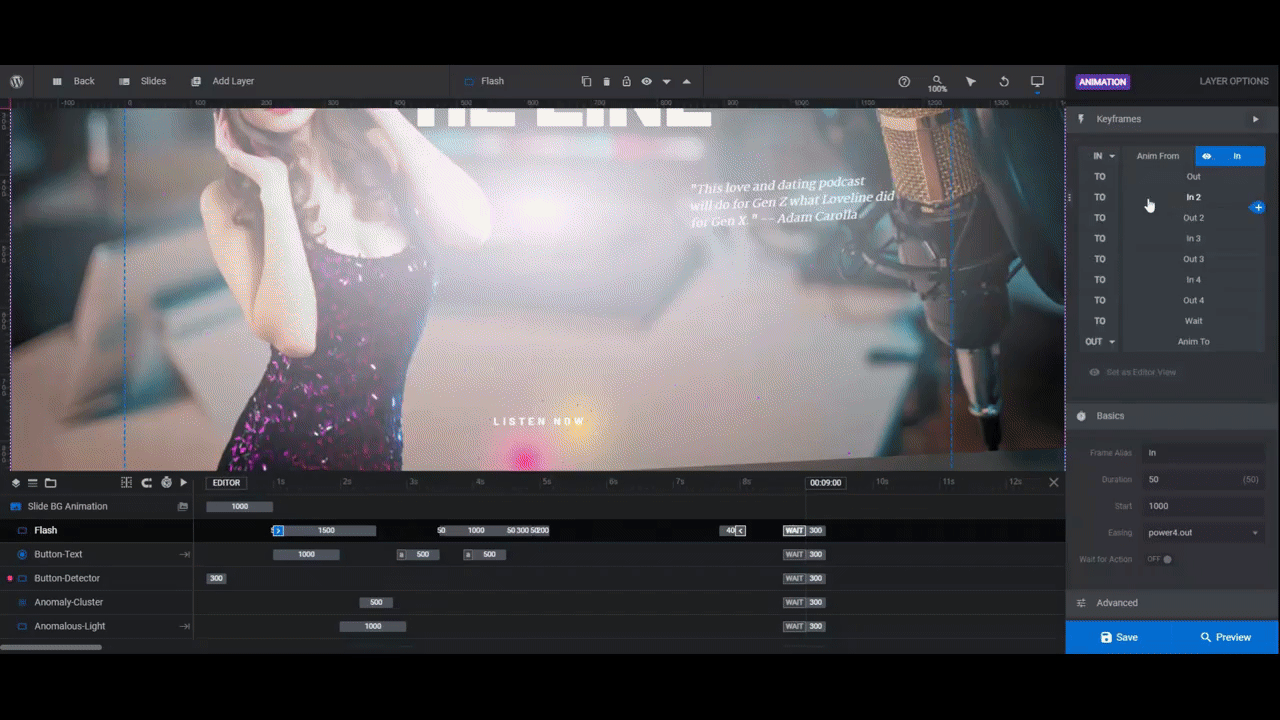
You can also change the timing and duration of each under “Basics” if you’d like.
When you’re finished, open the Preview. When you’re satisfied with what you’ve created, it’s time to embed the hero image on the homepage. You can use the shortcode located under “Module Options” to do this or you can embed it with the Slider Revolution page builder widget.
Learn more:
- The Fundamentals of Animation
- The Two Default Animations “In” and “Out”
- Inserting “TO” Animations Between the “IN” and “OUT” Animations
Leave your visitors wanting more with an impressive hero image design
Although Slider Revolution is commonly associated with sliders and carousels, you can use this plugin to design hero images as well. Not only that, with the help of parallax and special effects, you can create a showstopping hero image design. Start by editing the content in the Beyond the Void Parallax Hero template and then make further customizations as needed.

