
The hero section sets the tone for the rest of your store and the shopper’s experience while they’re there. So you want the design and content to reflect the type of business you’re running as well as the quality of product you’re selling.
One option is to choose pixel-perfect, full-width images or videos to showcase your goods. That’s always effective.
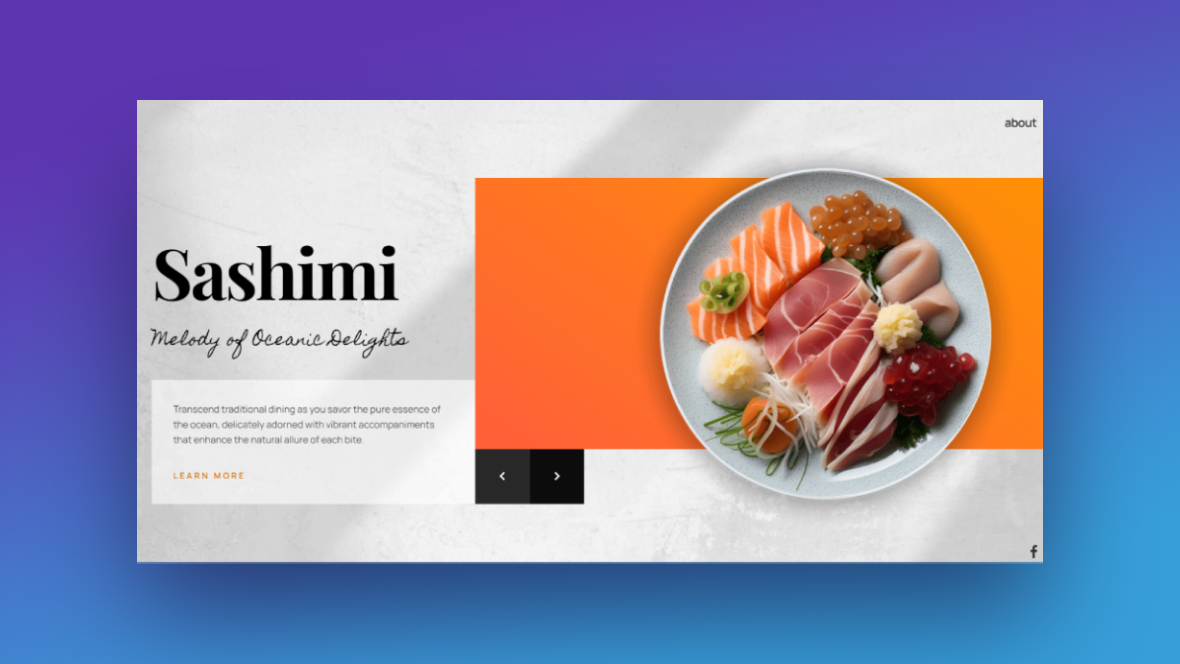
But if you’re looking for a way to make your store stand out, another option is to use a combination of layers to create a classy product slider design for the hero section. In this tutorial, we’ll show you how to do this using the Food Presentation Template Slider.
Table of Contents:
- Step 1: Remove unwanted global layers
- Step 2: Customize the slider backgrounds
- Step 3: Add your product photos
- Step 4: Update the background gradients
- Step 5: Edit the text
- Step 6: Edit the button
How to create a classy product slider design for the home page
Every store offers a unique shopping experience for its users. As such, the hero section should give customers a good feel for what’s to come. This template is a good choice if you want to create a classy slider design to show off your products or product categories on the home page.
Below we’ll show you how to take this restaurant/food presentation template and repurpose it for a home goods store.

Here are some quick-start references to look through if you’re new to Slider Revolution:
Step 1: Remove unwanted global layers
Global layers are useful if you are designing a micro ecommerce site. Instead of using the header and menu elements provided by your theme, you’d use the existing elements in the Global Layers.
However, if you want to use this presentation slider at the top of your home page, for instance, then these elements aren’t necessary.
Note: The only one you might want to keep is Copy-Row-14’s slider count if you have more than five items in your slider. That way, your users won’t start to feel restless as they scroll through, wondering where the end is.
To remove the Global Layers from your slider’s design, first open them up. You’ll find the layers under “Slides” in the top toolbar.

Next, go down to the timeline editor at the bottom. The easiest thing to do is to delete the grouped layers instead of the individual layers one at a time. The groups are called:
- Menu-Button
- Menu
- Row-14
- Copy-Row-14
Hold down the Ctrl or command key and select each of the group names. Then hit Backspace or delete. This will remove all the global layers at once.
Save your changes and then back out to Slide #1.
Learn more:
Step 2: Customize the slider backgrounds
The background of each slide is a different angle of the same textured surface. To replace these images with your own, go to “Slide Options” and “Background”. Click the Media Library button to upload your image.
Repeat this process for all of the slides.
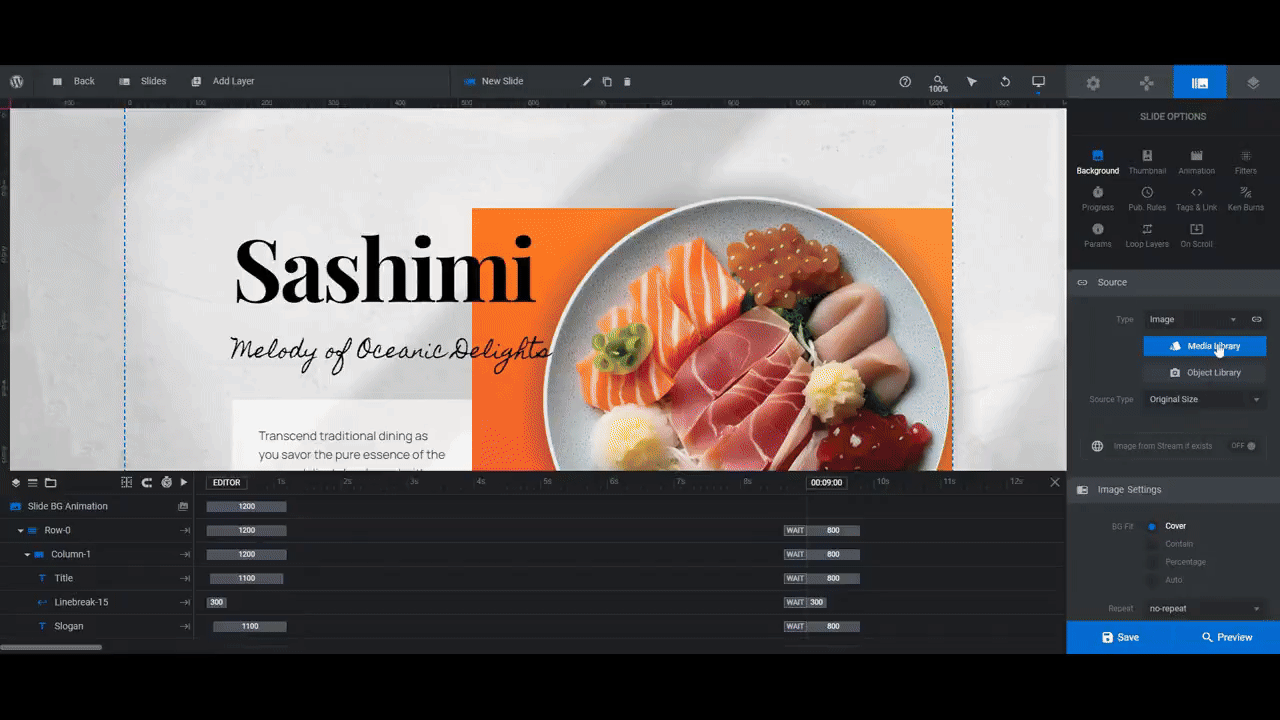
Note: To ensure that your headlines show up well, choose a background that contrasts well against the color of your text. Also, aim to use images that are more subtle textures than descriptive imagery so that they don’t distract from your main product photos.
Learn more:
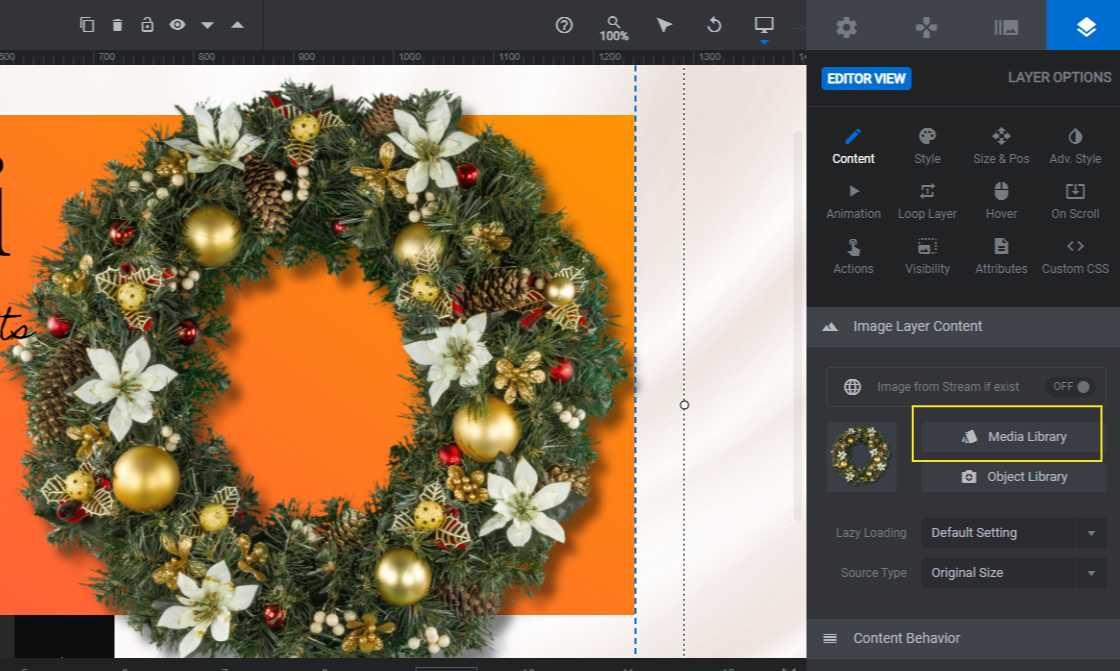
Step 3: Add your product photos
You can use this hero section to show off popular or new products. You can also use it to advertise top categories.
Note: No matter which direction you go, aim to find a single representative image of your product to showcase here. Products that are on the smaller side — like a pillow vs. a bike, for example — will look better in this template design as the allotted space gives customers a close-up view of the details of each product.
Once you’ve decided on your product imagery, export each file as a 750px by 750px square. Also make sure there’s a transparent background around the product.
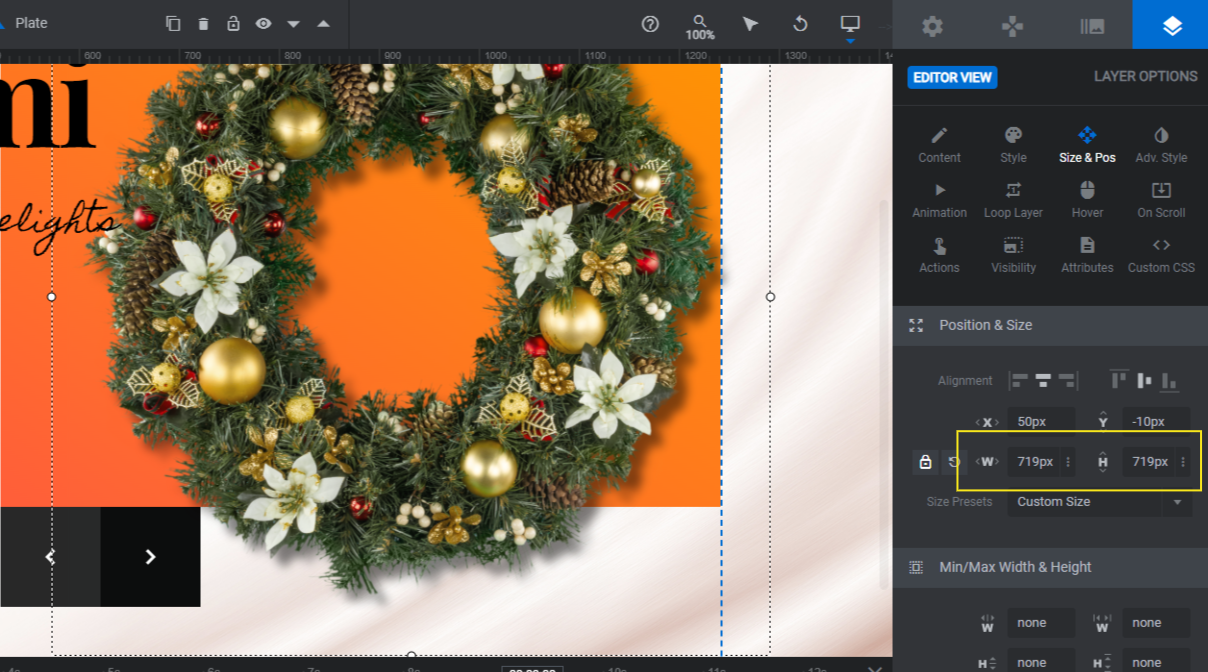
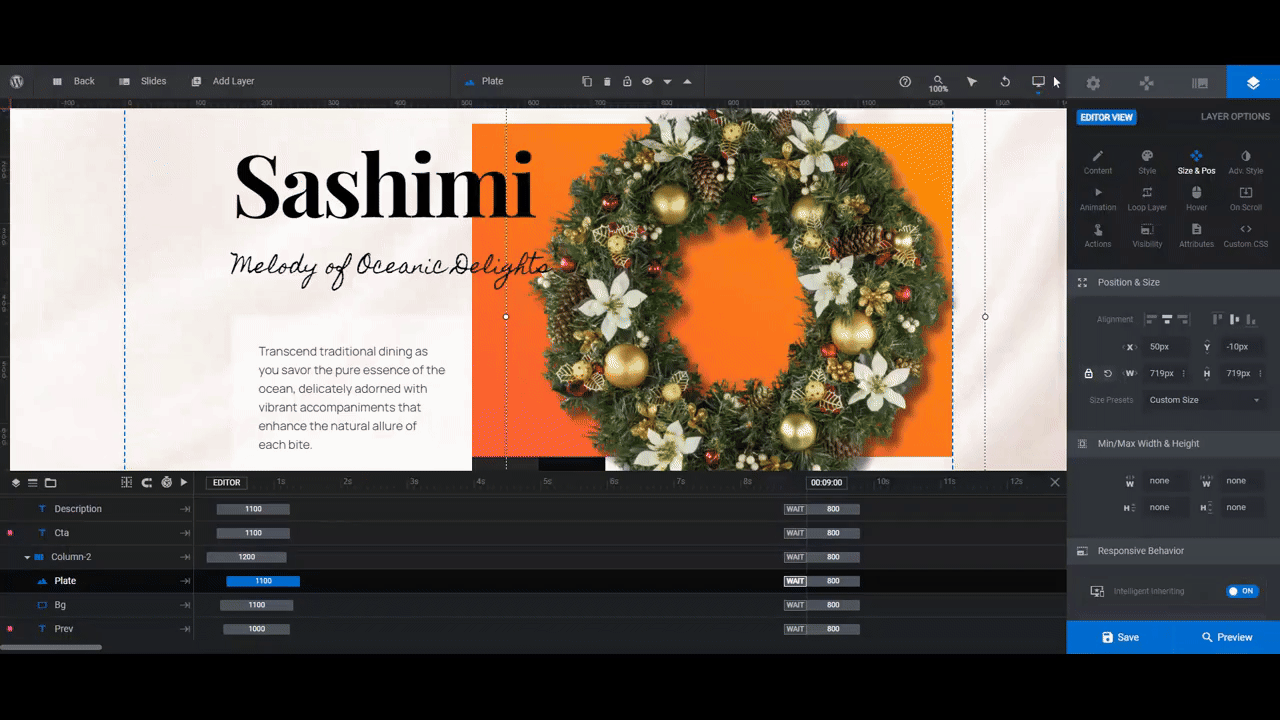
To replace the plate photos with your own, locate the Plate layer in the canvas or timeline. Then go to “Layer Options” and “Content” to upload your new photo to the media library.
The canvas will give you a good idea of what the image looks like on each slide. However, it’s a good idea to open the Preview to double-check since the color block behind the product appears differently on the front end.
If you need to change the size (or position) of your product images, go to “Size & Pos”. From here, you can resize your images using the W (width) and H (height) values.
Whenever you resize or move a layer in any template, you also have to do a responsive check. You can use the responsive variant toggle at the top of the Preview screen to do this. Or you can check it within the editor from the top toolbar.
Toggle between the device views to see how your product images look.
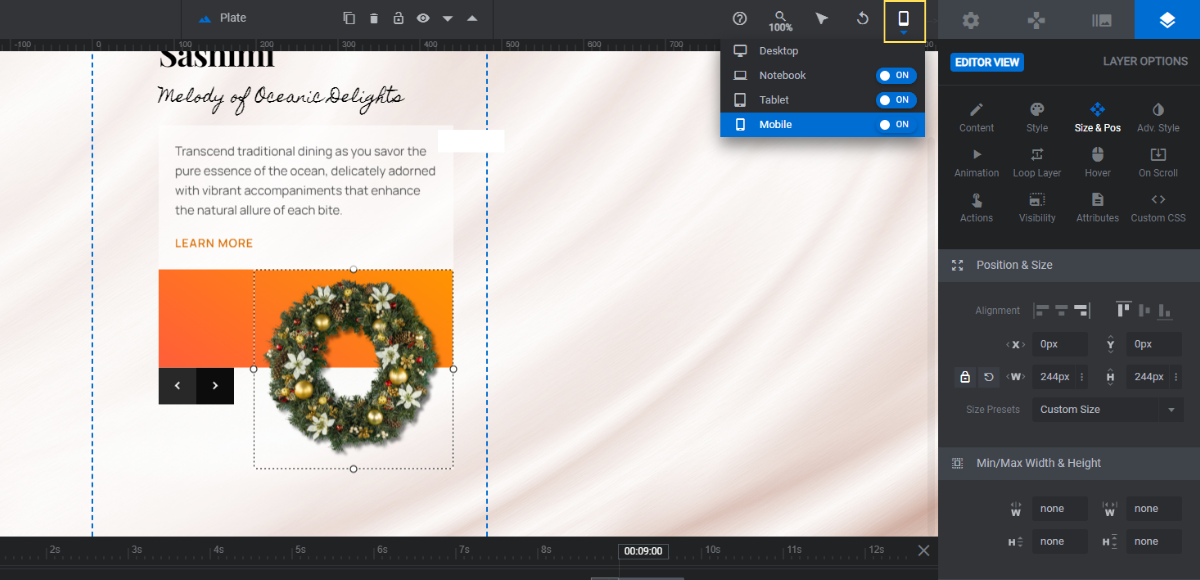
When you make edits in these responsive views, they’ll only apply to the device you’ve selected.
Save your changes when you’re done.
Learn more:
Step 4: Update the background gradients
There is a rectangular color block that sits behind each product. This layer is called Bg.
To update the color gradient, select the layer in the canvas or timeline editor. Then go to “Content” or “Style” and click BG Color to open the color selection module.
In there right now is a gradient. If you’d prefer to apply a solid color, switch the toggle in the top-left area of the module.
To keep the gradient setting, replace the existing colors https://www.sliderrevolution.com/ by selecting them along the color bar. Then enter the custom HEX code into the Color field below.
If you’d prefer, you can make further customizations to the number of colors, the angle as well as the direction of the gradient.
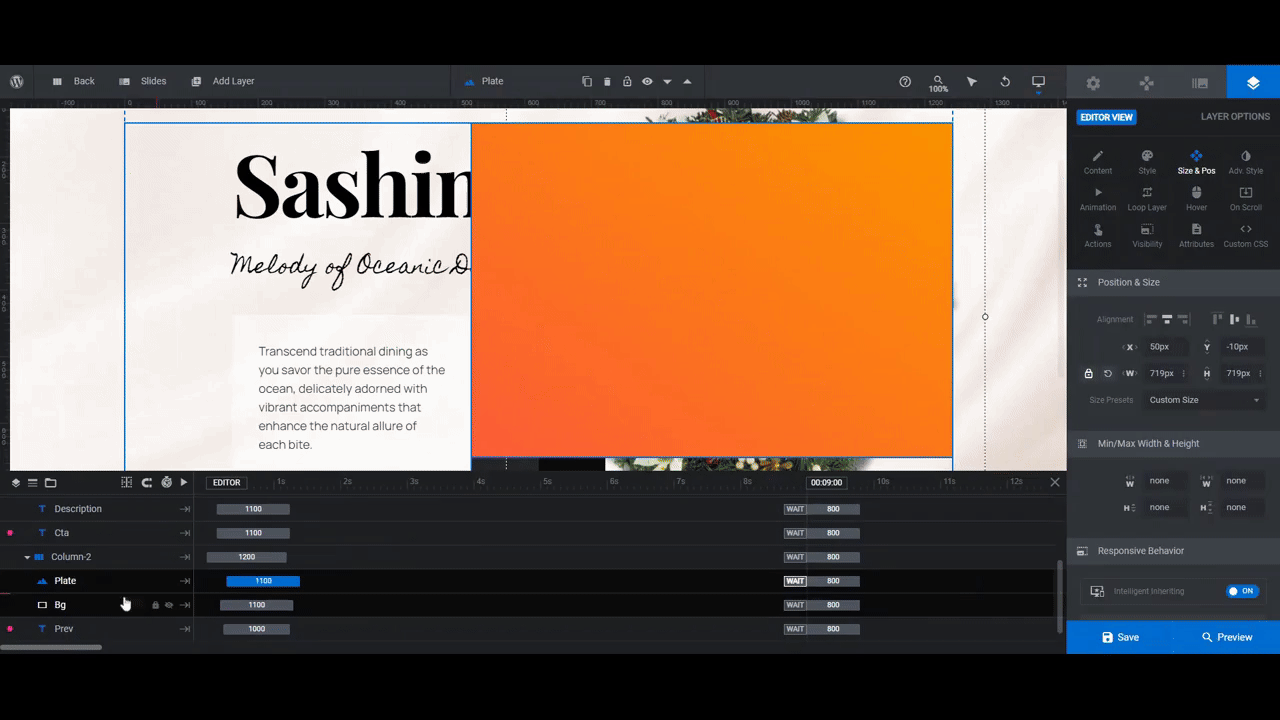
Go through each slide and repeat this process.Your gradients can be as drastic or subtle as you like. For a classier product slider design, though, aim for a gentler transition for your gradient.
Learn more:
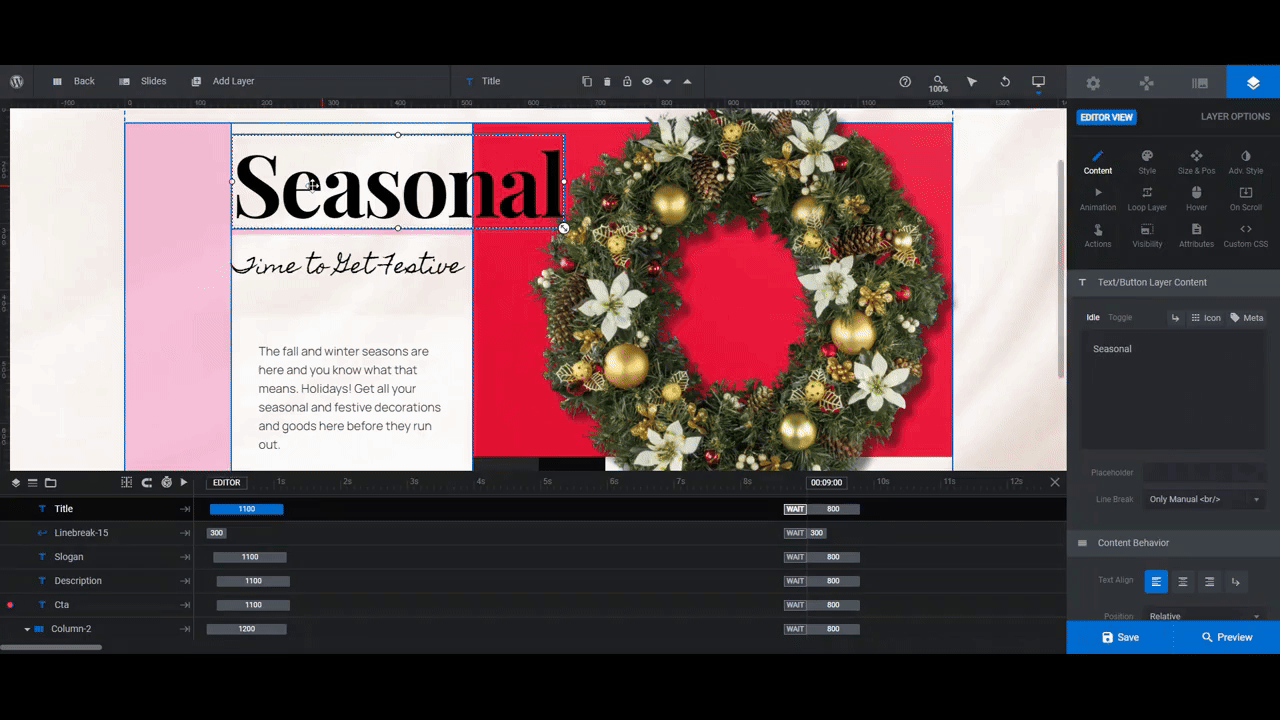
Step 5: Edit the text
There are three text layers in each slide:
- Title
- Slogan
- Description
To edit what each layer says, we’ll use “Content”. Enter your replacement text into the editor block.
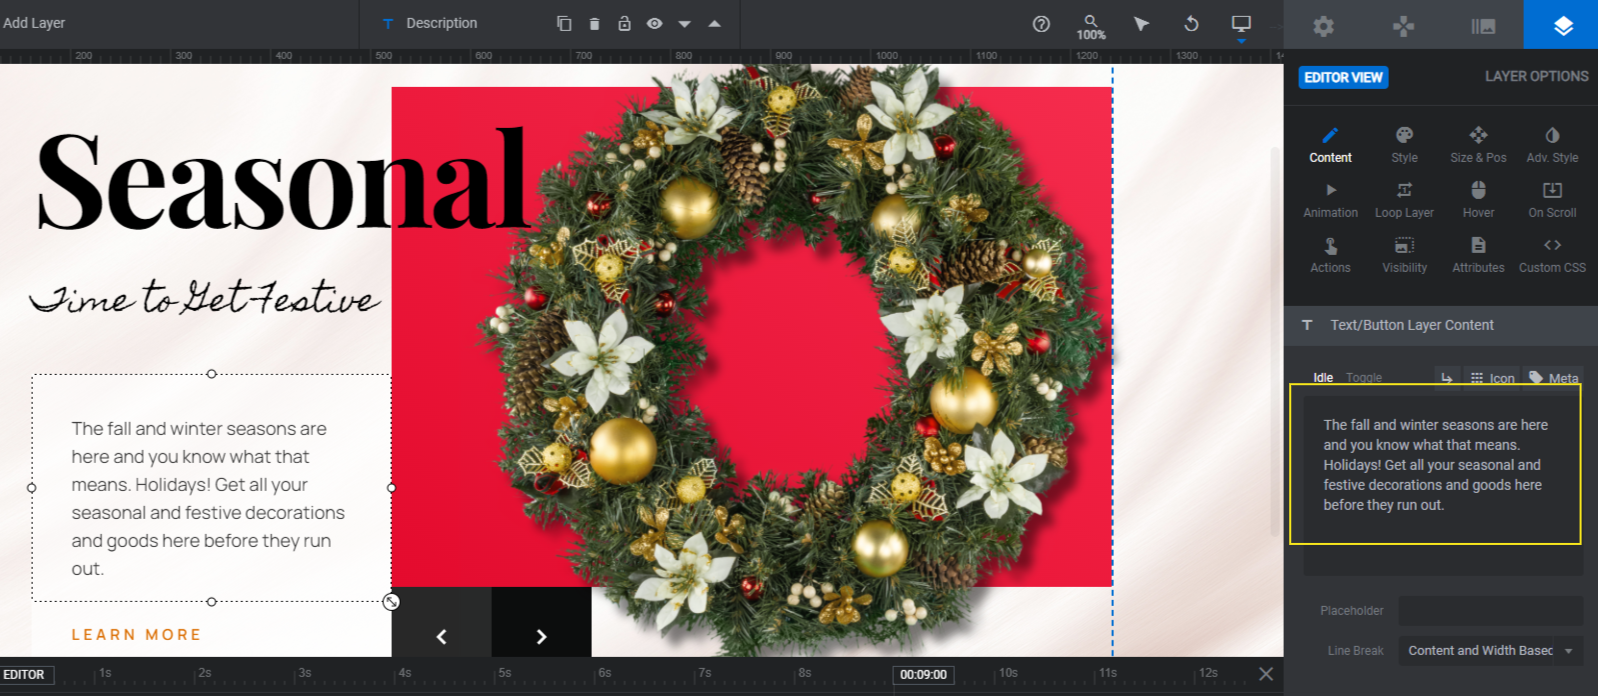
After you’ve edited all the text, customize the font under “Style”. If you’d like, you can also modify the font’s weight, size, color, and more.
Note: There is a semi-transparent block behind the Description layer so that it shows up clearly against the textured background. You can modify the color and/or opacity under “Style” and “Background”.
Go through each slide and apply the same stylistic changes to the text. If you make changes to the size or position of any of these layers, do another responsive check before you save your changes and move on.
Learn more:
Step 6: Edit the button
The last layer to edit is the Cta button. Use the same “Content” and “Style” settings to update the text, font, color, and general styling of the button’s words.
Another change you’ll have to make is to the button’s hover state. To access these settings go to “Hover”.
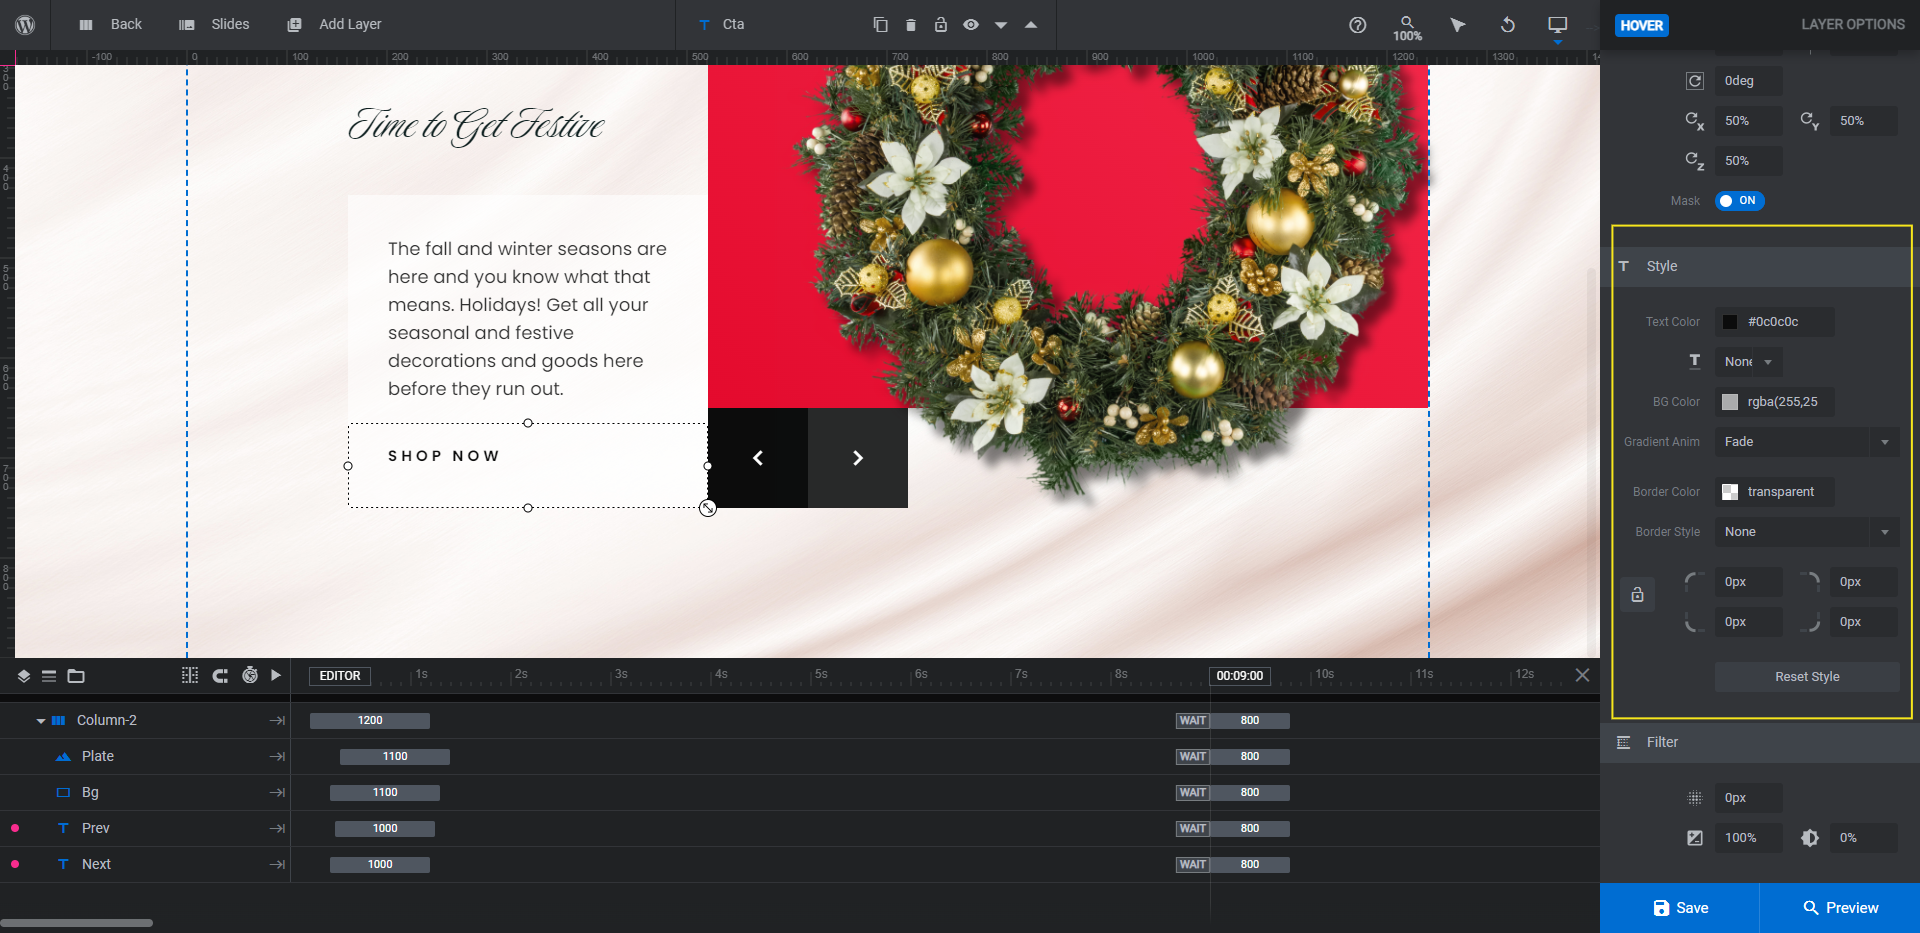
You can change the button, background, and border color along with other settings here. Whatever you do change, remember to make those same modifications to the buttons on the other slides.
The last piece to customize is the link, which you can update under “Actions”.
Currently, the links are set up to Scroll Below Slider. However, because this is a hero section slider, we want each slide to link out to the corresponding product category page.
To change the action, click Scroll Below Slider next to “Action Link”. Select Simple Link. Then fill in the custom URL for the page.

To save your changes, close the modal.
Open the Preview of your slider. If you’re happy with it, the last thing to do is embed it into your home page. You can do this by copying and using the shortcode under “Module Options”. Another way is to add the Slider Revolution widget in your page builder and then select this module.
Learn more:
Class up your ecommerce home page with an elegant product slider
When your store sells something like home decor, there’s a delicate balance you have to strike. While you want your website design to be eye-catching, you want it to exude the same amount of class as your products and brand do.
The Food Presentation Template Slider will give you a good start. The classy product slider design comes with a solid foundation and is easy to modify and make your own.

