
A slider is a great way to show off various products at the top of your home page. They might be your newest products. Or the most popular. Or if you’re just starting to market your drink products, the slider will be a way to give visitors an introduction to what varieties are available.
There are so many directions you can go with this. In the following tutorial, we’ll show you how to transform the Brewery Website Slider Template into a promotional slider for all-natural drink products.
Table of Contents:
- Step 1: Delete slide
- Step 2: Replace the drink images
- Step 3: Customize left-side imagery
- Step 4: Customize right-side colors
- Step 5: Edit the promotional text
- Step 6: Update global layers
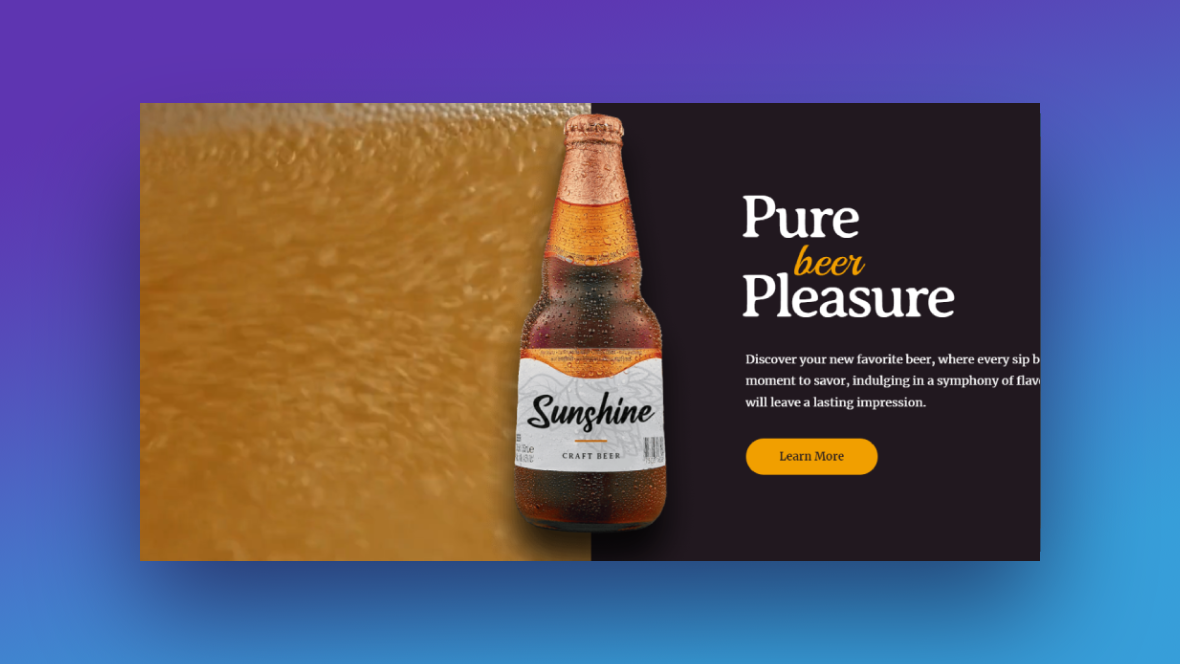
How to market your drink products with a great-looking slider
If you take a look at the Brewery Website Slider Template, you’ll find various ways to market your various drink products. You can pair them with drink-related imagery, atmosphere-setting photos or videos, complementary dishes, and more.
How you use this slider depends on what you’re selling. For a brewery, for instance, it makes sense to market the different beers using attractive beer and lifestyle imagery. To market drinks that are on the healthier side, you might want to go in the direction that we’ve taken with our redesigned slider:
Before we break down the steps we took to get there, take a moment to review these intro guides to Slider Revolution if you’re new to the slider plugin.
Step 1: Delete slide
There are four slides in this template. If you don’t want to include that many drink products in your slider, hover over “Slides” in the top toolbar. Then click the trash can icon that appears beside the slide you want to delete.
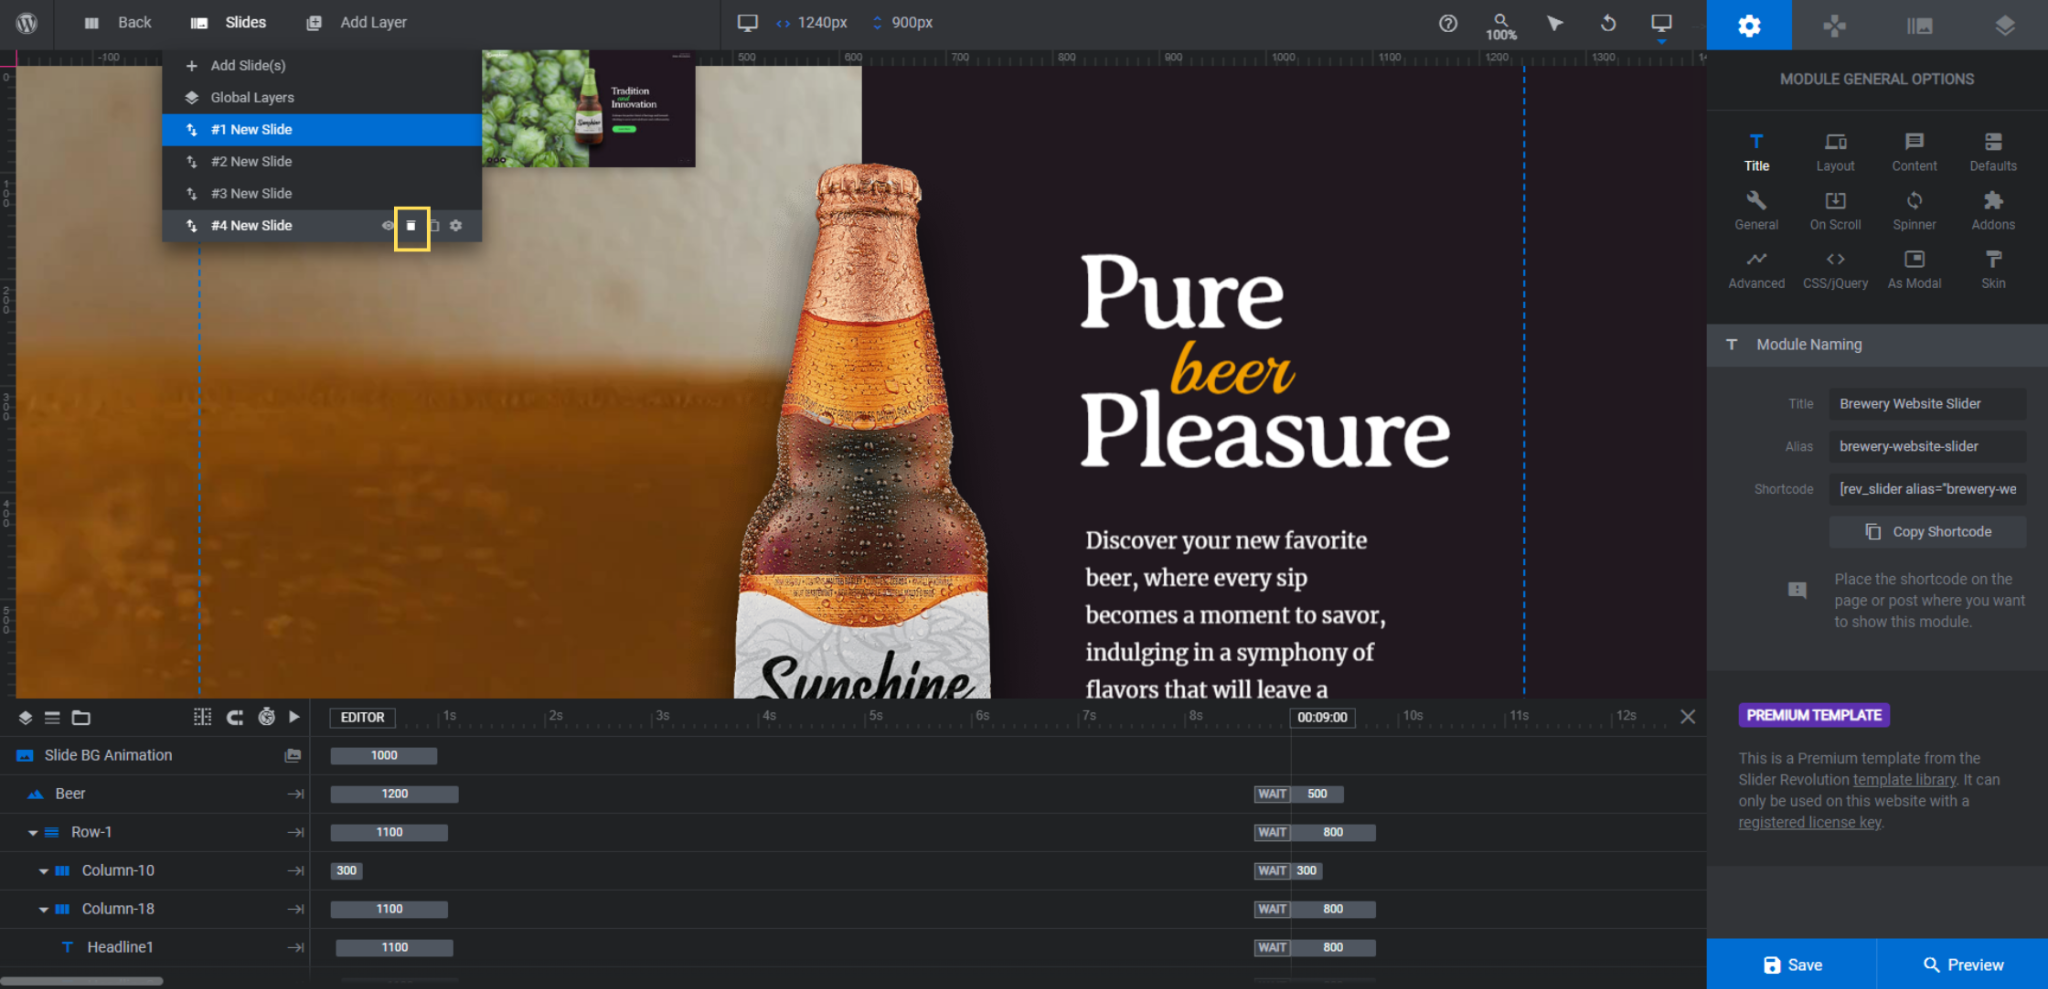
If you want to add a slide instead of delete one, click the copy/duplicate icon to the right of the trash can. Since all the slides are designed similarly, it doesn’t matter which ones you choose to delete or duplicate.
Learn more:
Step 2: Replace the drink images
To update the drink images, locate the Beer layer in each slide. Select it in the canvas or timeline. Then upload your new image to the media library to replace it.
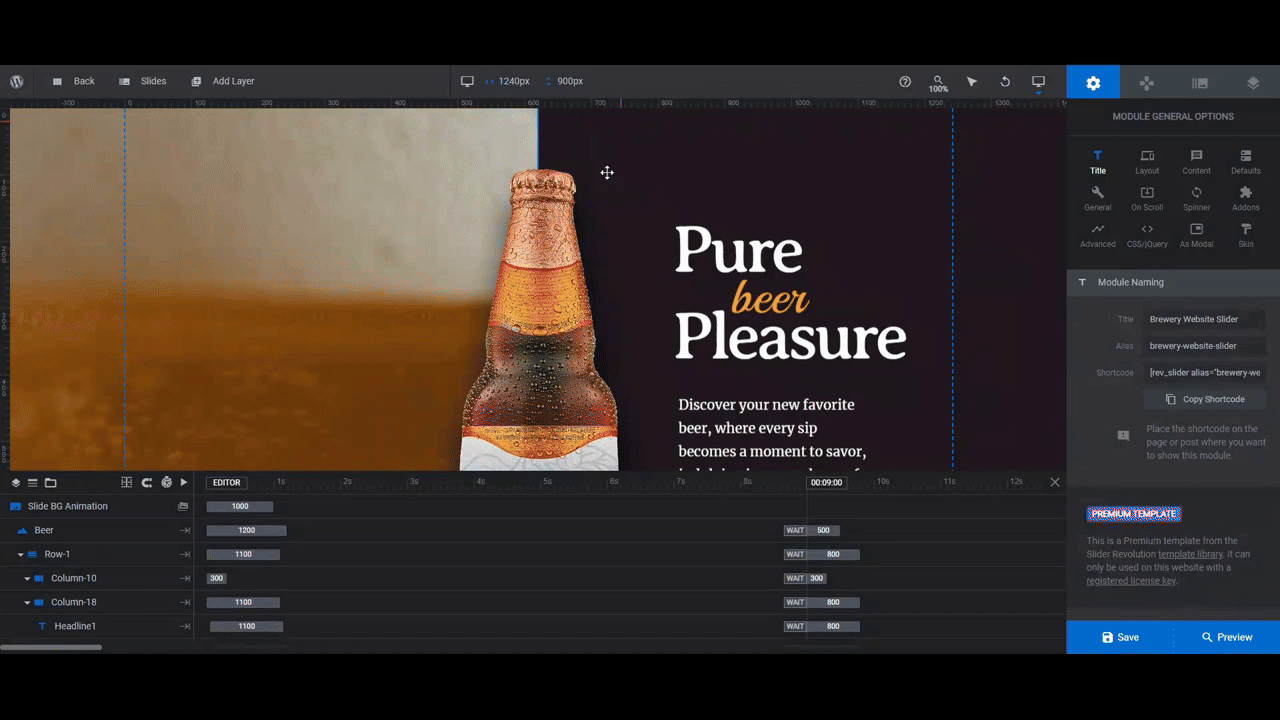
Note: The Beer layer is 361px by 788px and has a transparent background. To reduce the amount of editing you need to do in Slider Revolution, try to make your drink images similar in size.
Learn more:
Step 3: Customize left-side imagery
The split-screen look of this slide is created by uploading a photo or video (or photo/video combination) to the background of the slide. Then a solid color shape is applied to the right half.
To update the background (what visitors see on the left), go to “Slide Options” and “Background”. Click the dropdown next to Type. You’ll find different ways to populate the content of your slider. The ones we’re most interested in are Image and HTML5 Video.
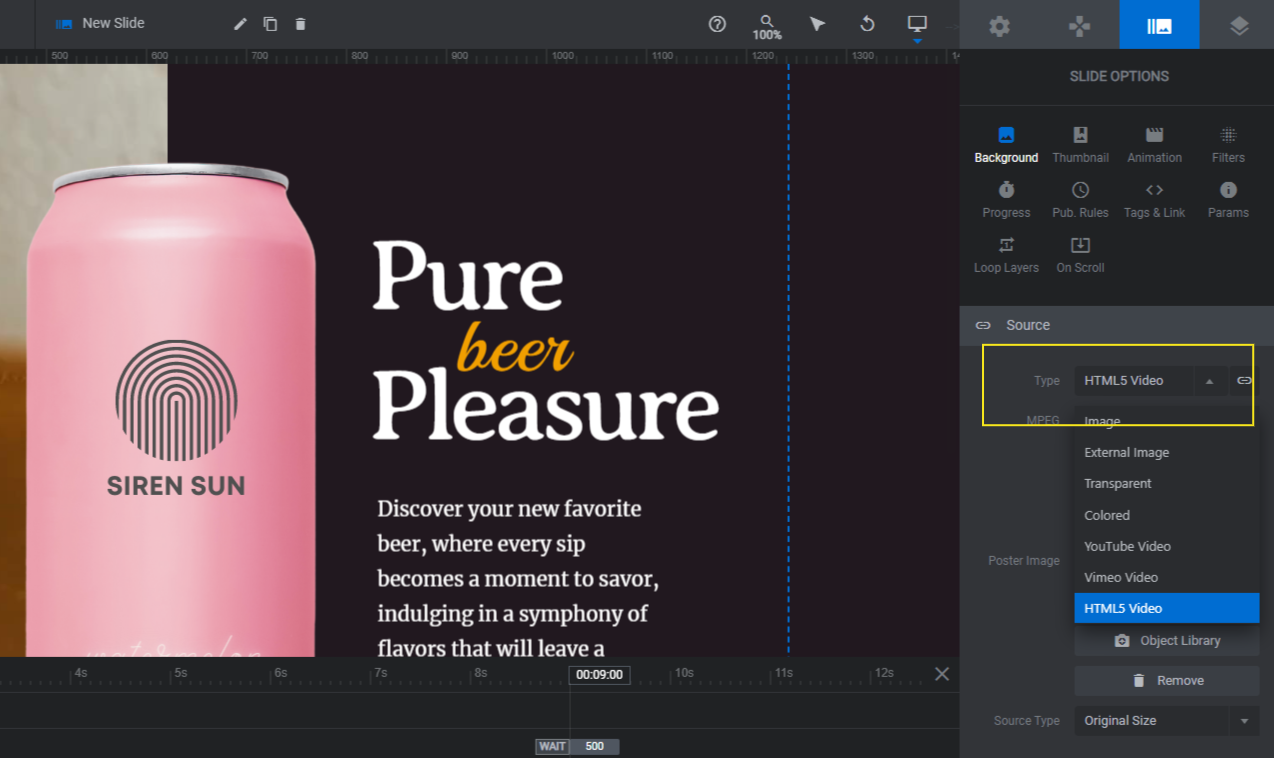
You can also use the YouTube Video and Vimeo Video options if you own the rights to videos hosted on those platforms.
Choose the file type you want to upload to the background. Then open the media library to upload it. For our purposes, we’re going to use photos.
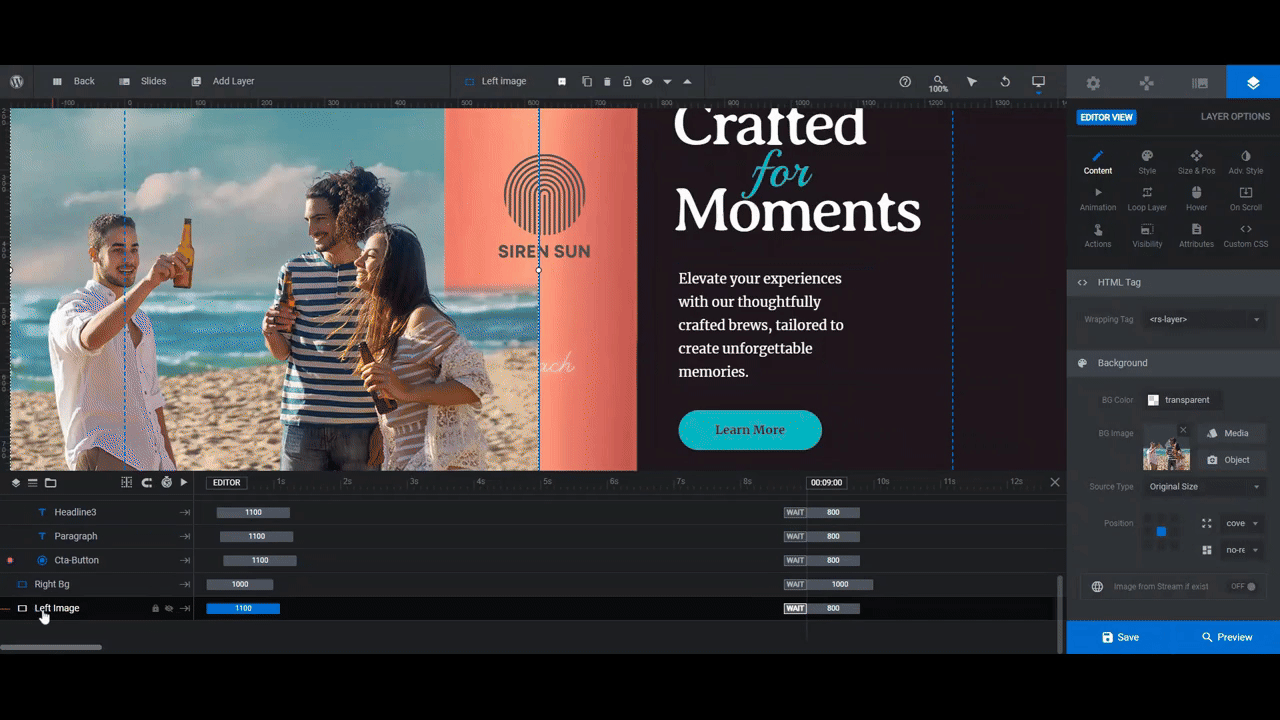
Note: When dealing with Slides 2 and 3, you’ll need to decide if you want to create layered scenes like the ones you see in these slides. Open up either of them and you’ll see an additional layer in the timeline editor called Left Image.
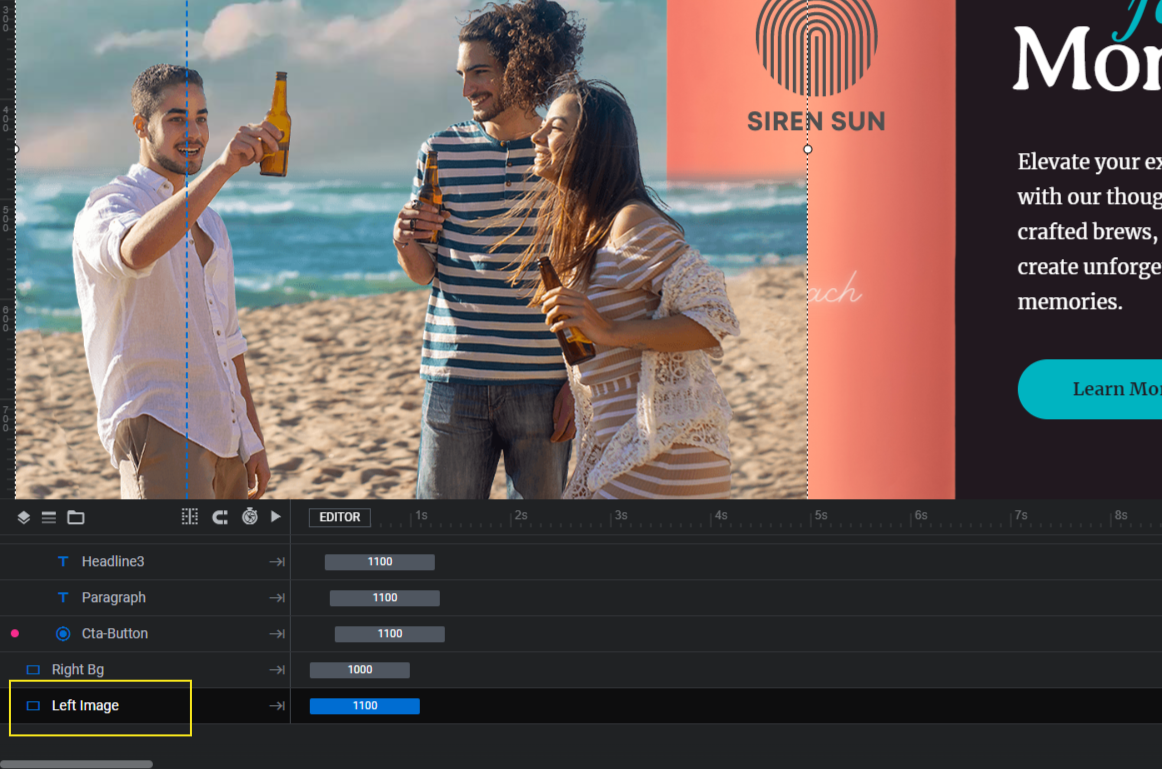
In Slide 2, this is the image of the people placed in front of the ocean video in the background. In Slide 3, this is the food in front of the gray wall background.
If you want to maintain this type of layering, then you’ll need to edit the Left Image layers. If you don’t, then select them from the timeline and hit the Backspace or delete key to remove them.
When you finish updating each slide, save your changes. Then move onto the next.
Learn more:
Step 4: Customize right-side colors
To customize the right half of the slide, locate a layer called Right Bg in the timeline. When clicked, you can update the color of this rectangular shape from the “Content” or “Style” panels.
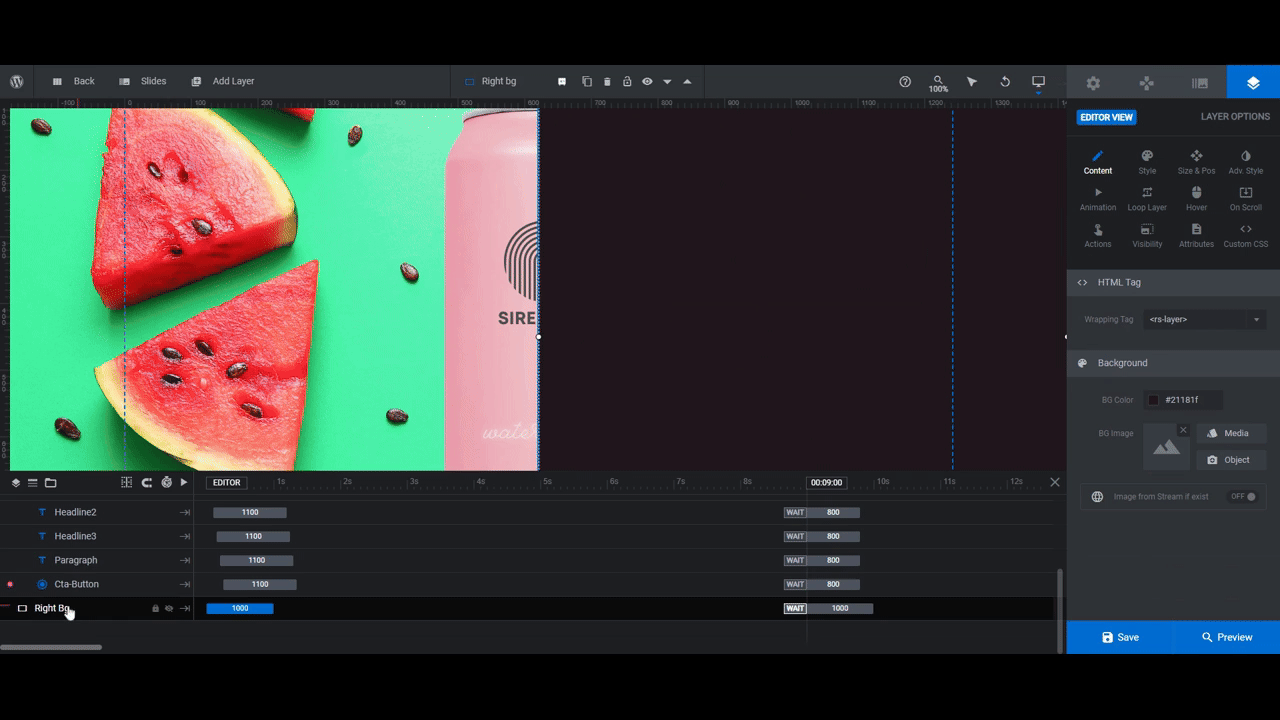
If you’re using a colorful image on the left, then keep the right side more muted color-wise. It’s also a good idea to choose a darker color so that lighter text and a brighter button show up well against it.
Before you wrap up this step, go to “Module Options” and “Layout”. Scroll down to the Module Background section. Set the background color to the same one you used in Slide 1.
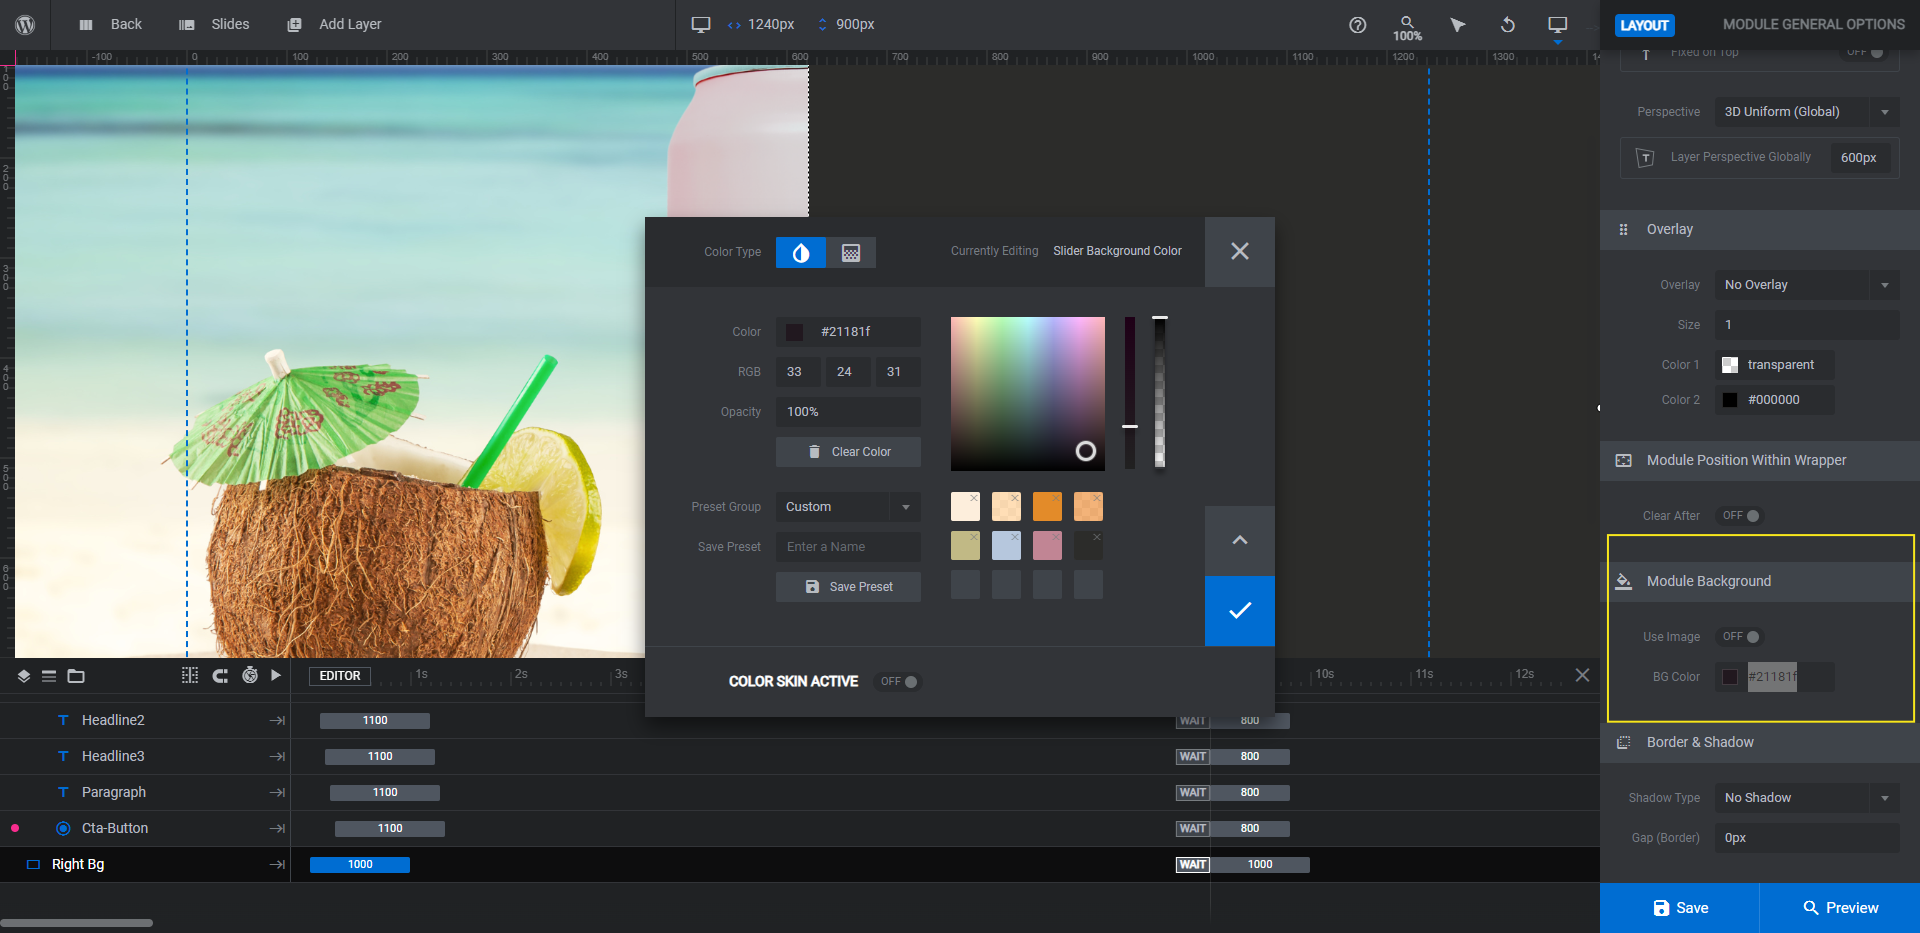
You won’t be able to see it in the canvas, but you’ll see it when you preview your slider. This is the color that appears before your slider content loads.
Learn more:
Step 5: Edit the promotional text
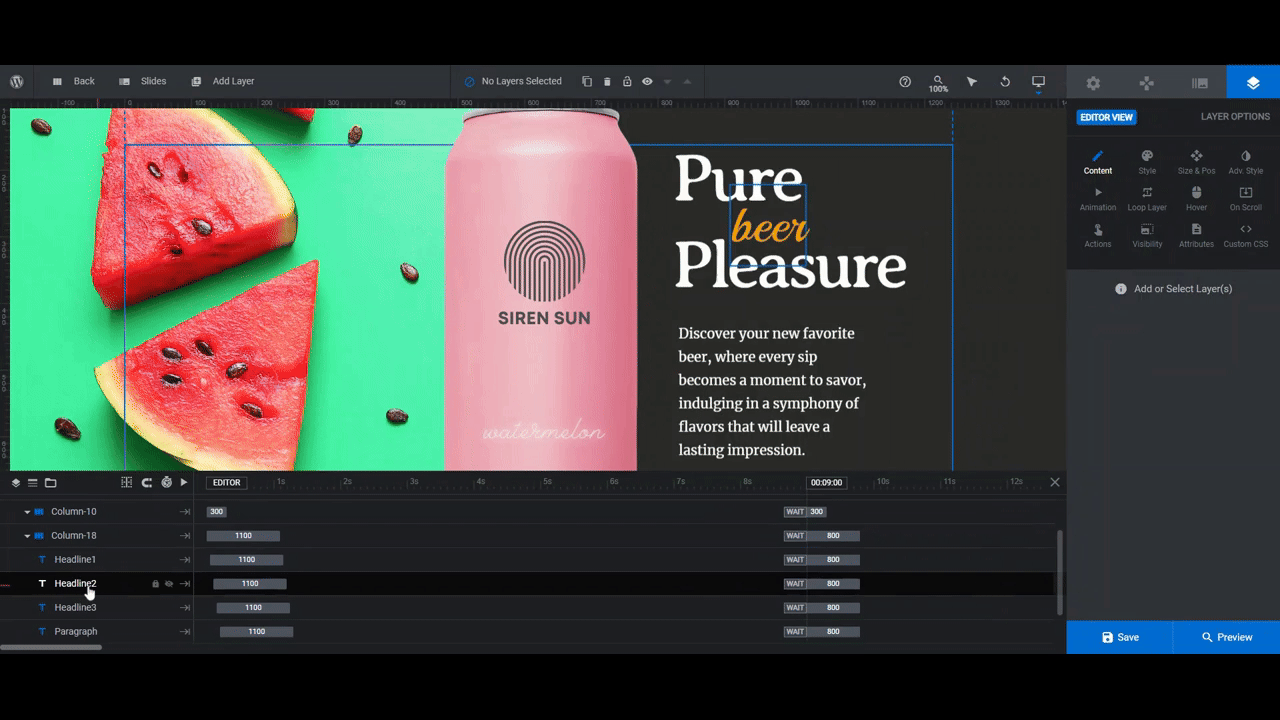
There are four text layers and one button layer to edit in this step. We’ll start by editing the Headline which is made up of three separate layers.
We’re not going to preserve the script text effect in the middle of the headline, so we’re going to delete Headline2 and Headline3 and use only the Headline1 to create our header. Then we’ll use “Content” to replace the text and “Style” to customize the font and how it looks.
Note: If you put all your text into Headline1, you may want to force a line break as the text won’t wrap automatically. To do this, you can manually insert <br />, click the return key above the text editor block, or hit the Enter or return key when typing out your headline.
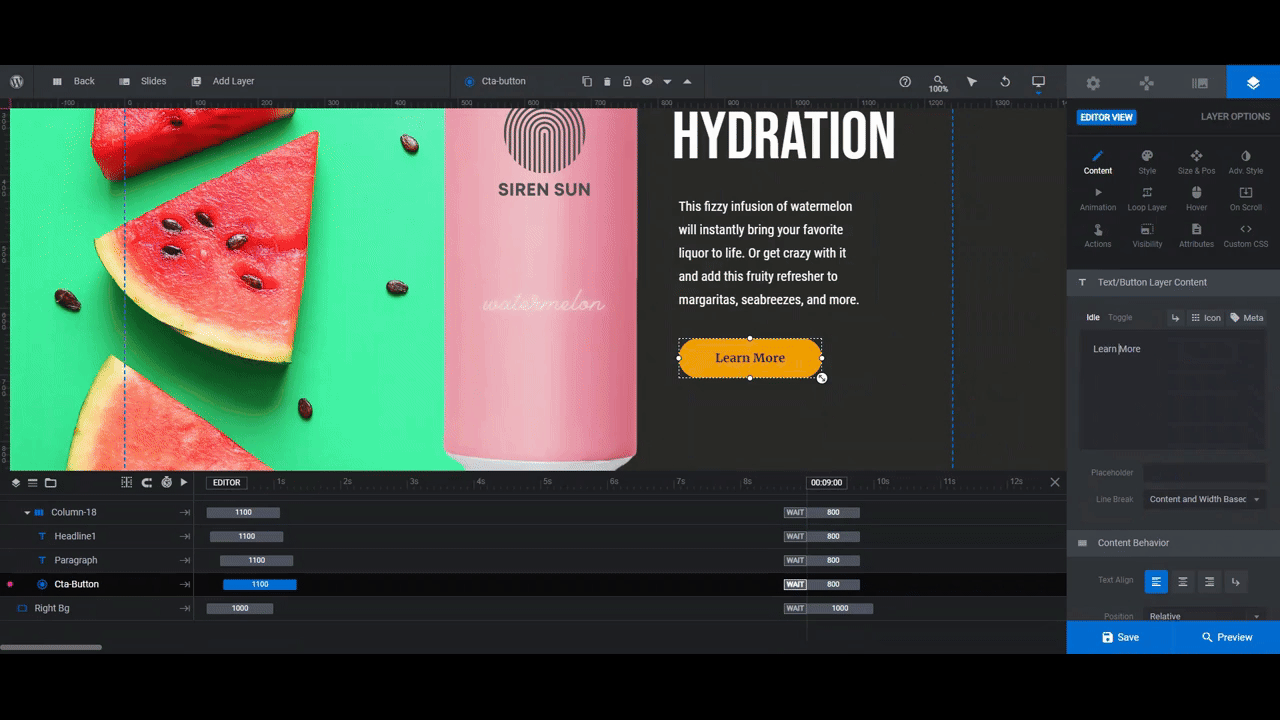
The product description or promotional text is a layer called Paragraph. Select it and then use “Content” and “Style” to customize it just as you did the headline.
The last component to customize is the Button.
Use “Content” to edit the button text and “Style” to customize the font. From “Style” you’ll also be able to modify the button background and border color and styling. Then go to “Hover” settings to alter the button’s appearance when someone hovers over it.
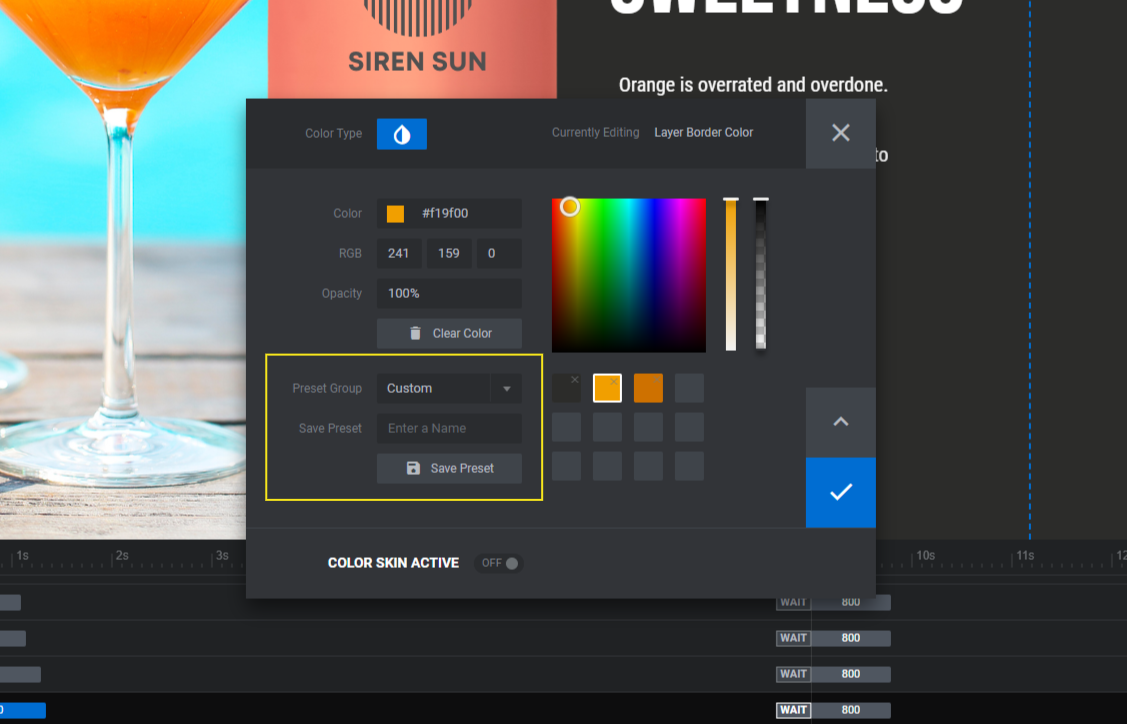
Pro tip: If you plan on using the same color for all of the buttons and hover effects, save the color to your custom palette. You’ll find this tool in the bottom-left corner of the color selection dialogue.
- Change the Preset Group to Custom.
- Create a unique name for the color or its purpose in the Enter a Name field.
- Click Save Preset when you’re done.
The color will now show up in your custom presets on the right.
The last thing to do is customize the hyperlink for each button in the slider.
With the Button layer selected, go to “Actions”. You’ll find that a Simple Link has already been created for you.

Enter the drink product page’s URL in the Enter Link field. Close the pop-up to save your changes.
Learn more:
Step 6: Update global layers
At this stage, the individual slide designs and content should be done. Now we need to deal with the layers that sit on top of the slider.
Go to “Slides” in the top toolbar and open the Global Layers. There are four sets of layers:
- Logo in the top-left
- Tagline in the top-right
- Social media icons in the bottom-left
- Navigation arrows in the bottom-right
We don’t need the branding in the top since our website header will have it. We also don’t need the social media icons since they’ll detract from our drink products. (They should also be in either the header or footer of our site.)
To delete these layers, hold down the Ctrl or command key. Then select Top Row and Copy Column-16. Hit your Backspace or delete key. This will remove all of these elements at once.
The only thing that should remain are the Prev and Next arrows in the bottom-right corner.
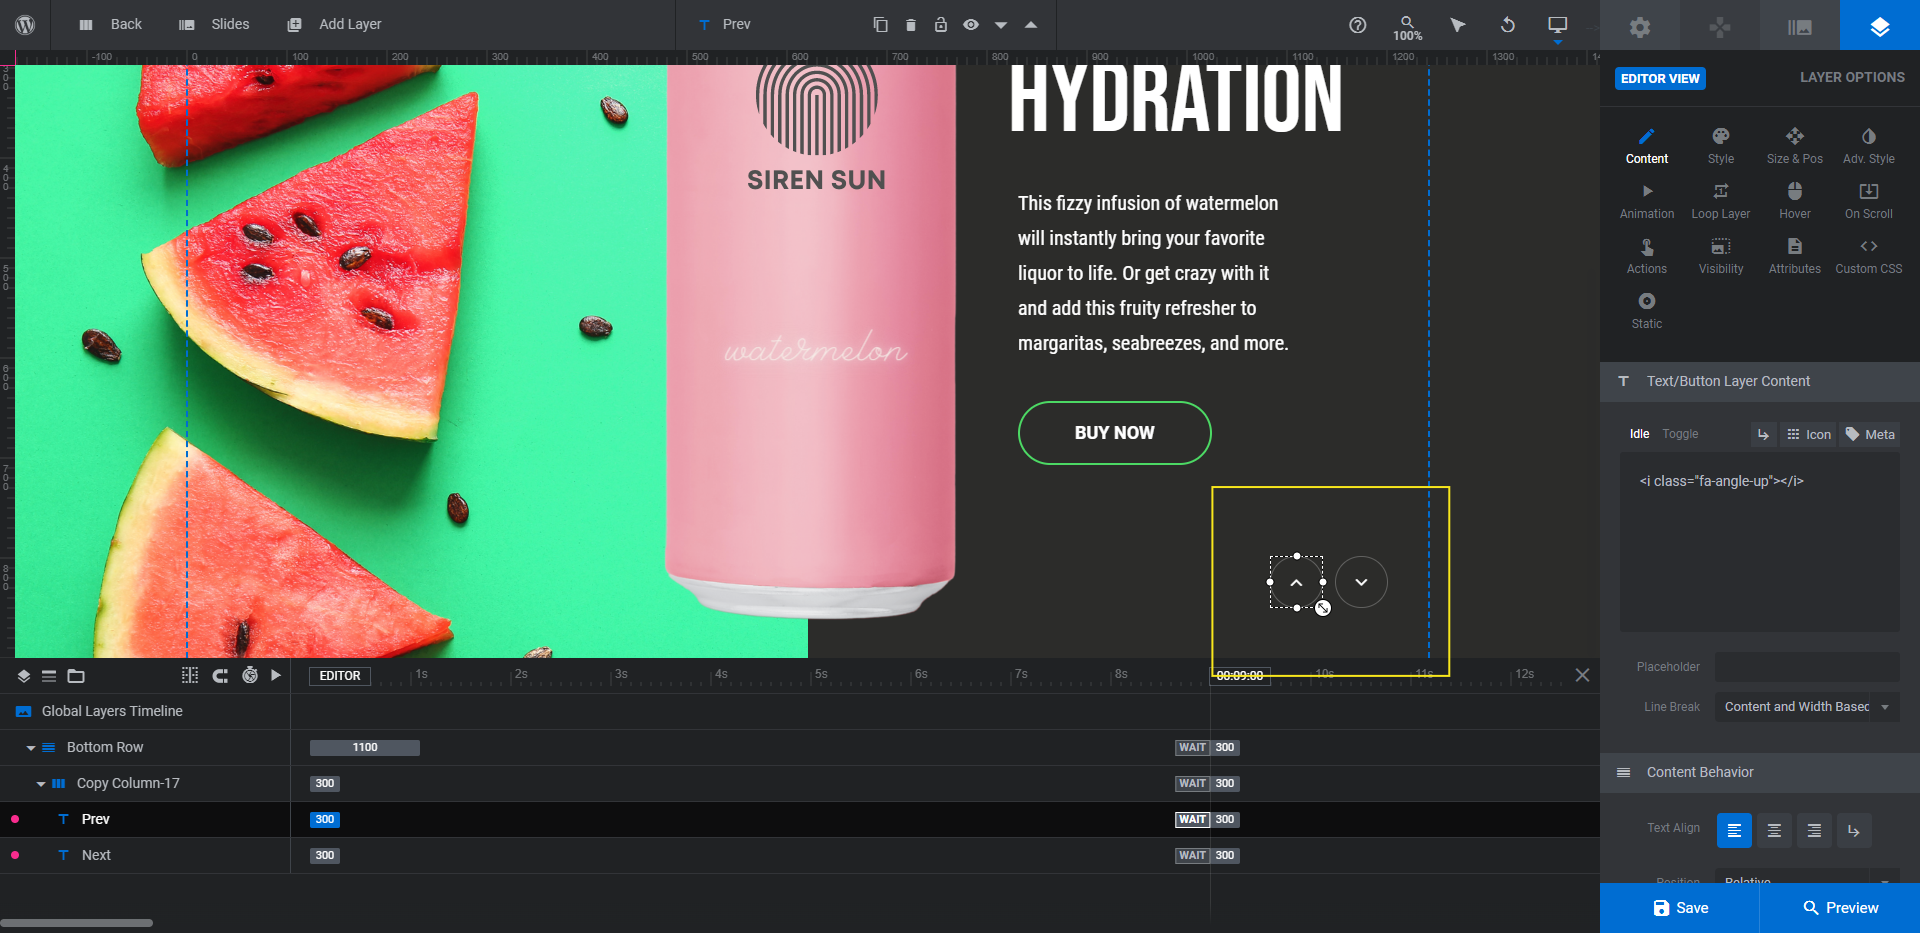
You may decide to customize the arrows if you chose a lighter background color or if the general style of the arrowheads doesn’t fit your new design.
In that case, use “Content” to change the arrowhead style. Because these are technically text layers, you’ll need to click the Icon tab above the text editor box and then search for the new arrow you want to use.
You can then use “Style” to change the fill or border/outline color of the buttons.
When you’re done, save your changes and preview your work. Make sure everything looks as you want it to. Then grab a copy of the shortcode and embed this product slider onto your home page. You can also use the Slide Revolution widget in your page builder to embed it.
Learn more:
Create a stylish slider that makes your drink products look tasty
Want to market your drink products so that they stand out against even the most popular of competitors? Give them a stylish introduction on your website with the Brewery Website Slider Template. All you need is some effective product imagery, super colorful promotional imagery, and high-impact copy to get your visitors’ mouths watering.

