

The concept of choose-your-own-adventure (CYOA) doesn’t just apply to children’s books or mobile games. This engaging storytelling approach can be used on websites as well. And it’s not just useful for telling stories.
In the following tutorial, we’re going to show you how to turn the Storytelling Website Template into an interactive support process and questionnaire for your website visitors.
Table of Contents:
- Step 1: Delete extra slides
- Step 2: Add a title to your support page
- Step 3: Update the slide imagery
- Step 4: Edit the intro slide
- Step 5: Delete the slide counters
- Step 6: Update the background color on the questionnaire slides
- Step 7: Edit the text for the questionnaire
- Step 8: Set up the buttons on the questionnaire slides
How to design an interactive support process and questionnaire with Slider Revolution
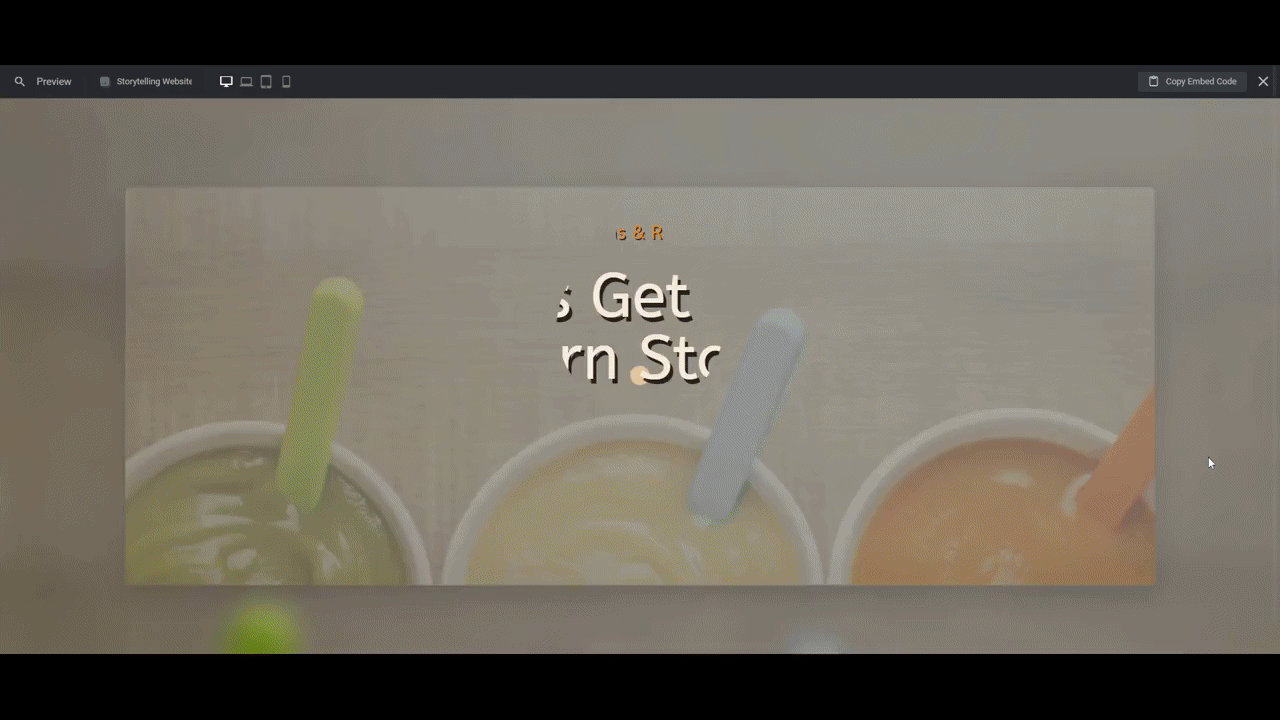
If you spend some time interacting with the Storytelling Website Template, you’ll find that it looks and feels like a CYOA video game.
Note: The previews seen below have been sped up slightly so you can see more of the template and redesign. If you click the template link in the section above, you’ll see it exactly as it would appear to your customers.

However, we can take this basic framework and execution and repurpose it for other uses. For instance, you could use it to creatively tell your company’s story on the About page.
Below, we’re going to go in a completely different direction. We’ll show you how to edit this template and create an interactive support questionnaire for your store or product with it.
If you’re new to Slider Revolution, here are some helpful resources to help you get started:
Step 1: Delete extra slides
Before you edit the template, come up with a rough draft of what each slide will say and the different options you want to present to your customers on those slides. This will help you determine how many slides you need to create.
When you’re ready to trim out the extra slides, go to “Slides” in the top toolbar. Then click the trash can icon that appears next to any slide you don’t need.
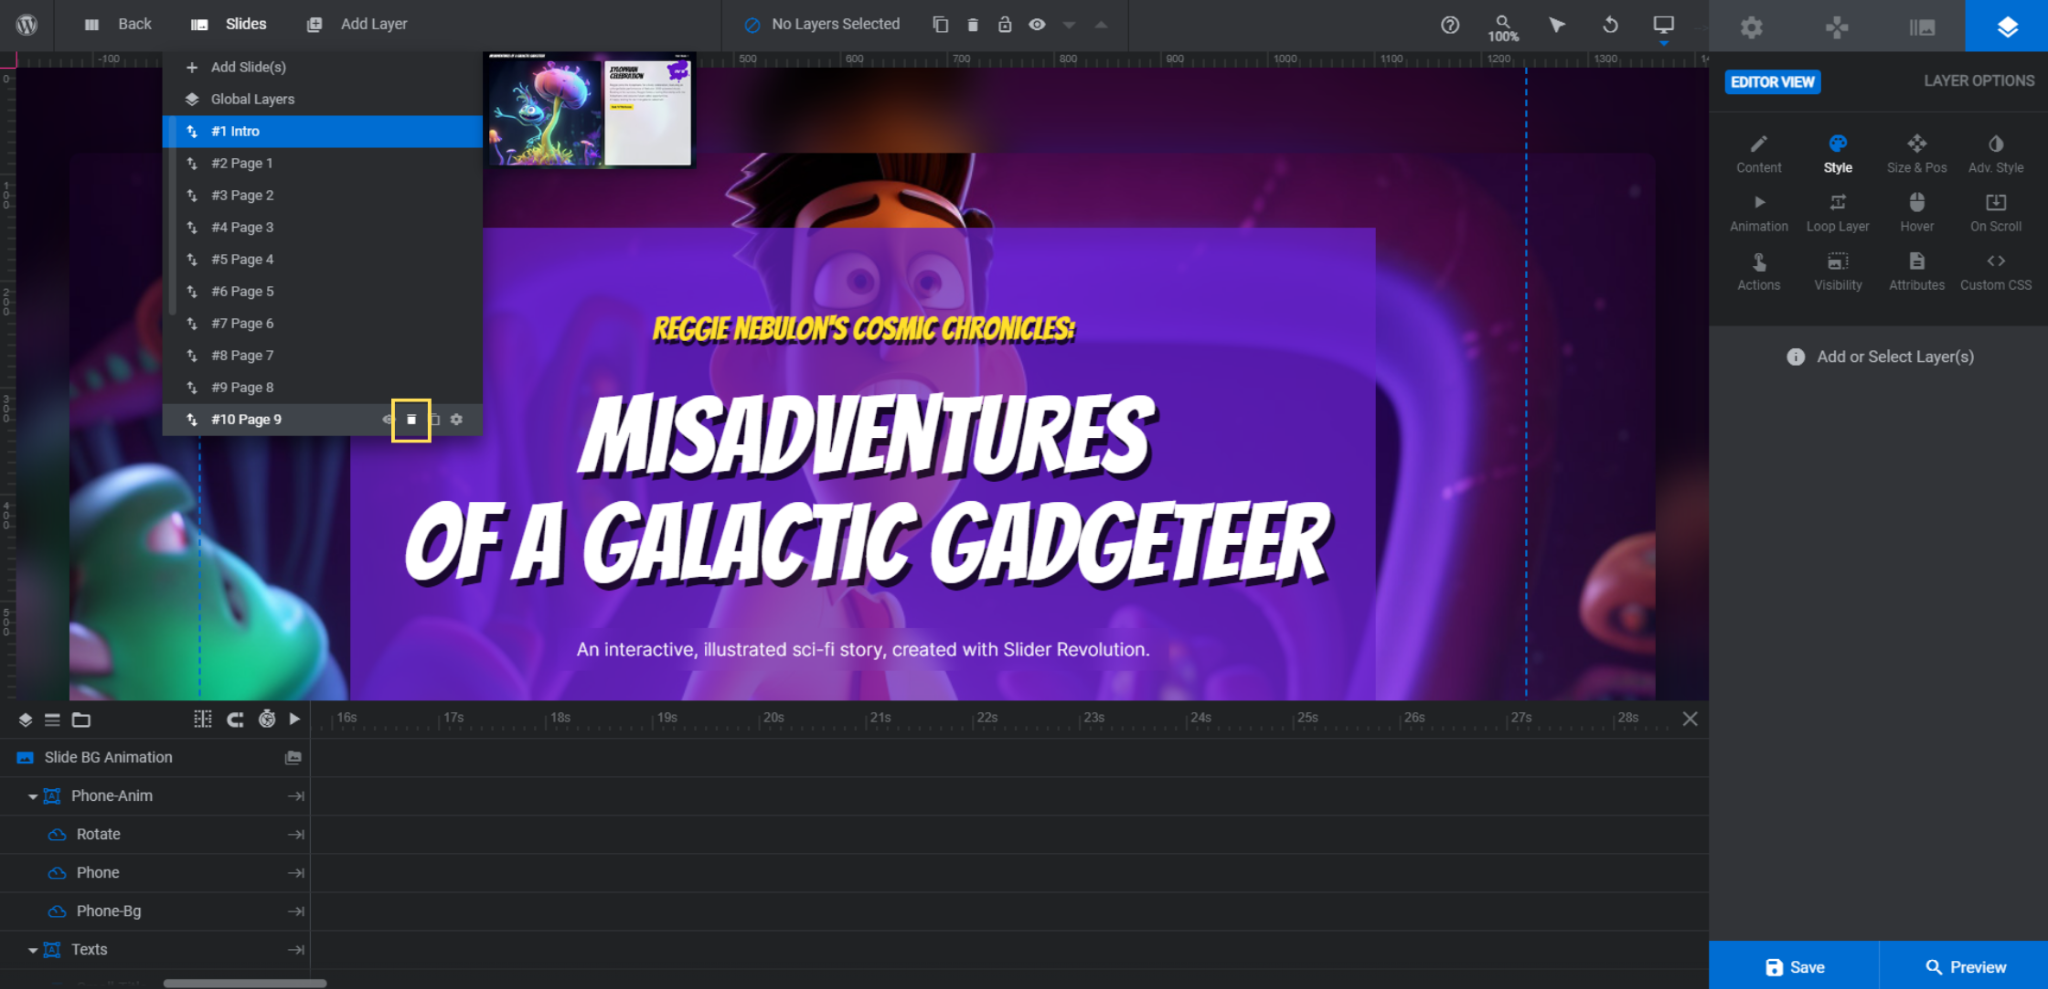
Note: It’s okay if you delete too many slides in this step. All of the slides except for Slide #1 are designed with the same layout, more or less. So if you find that you need additional slides later on, you can always duplicate an existing slide by using the copy/duplicate icon to the right of the trash icon.
Learn more:
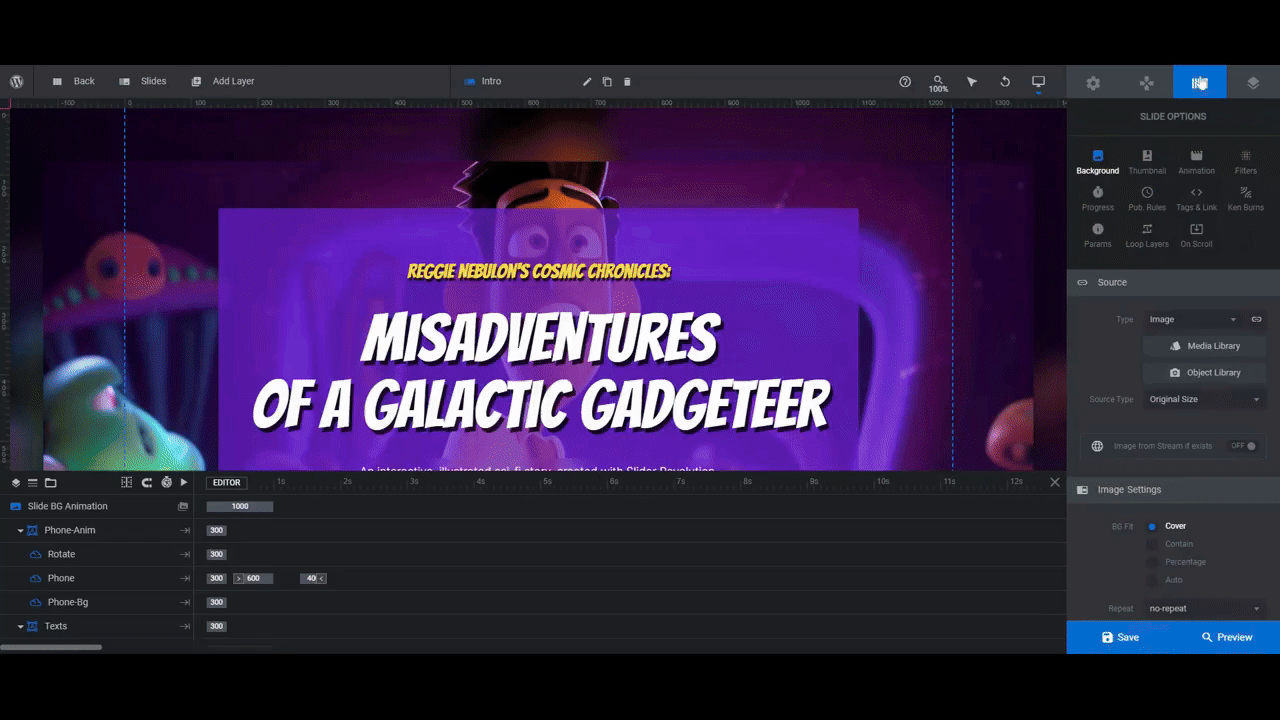
Step 2: Add a title to your support page
Open up the “Slides” dropdown again. This time, click on Global Layers. These are the layers that remain visible at all times as users scroll through the slider.
We’re not going to include music in our interactive support questionnaire, so we’ll delete the layers called Music-Button and Music-Player. To do the same, select them from the timeline editor or the canvas. Then hit the Backspace or delete key.
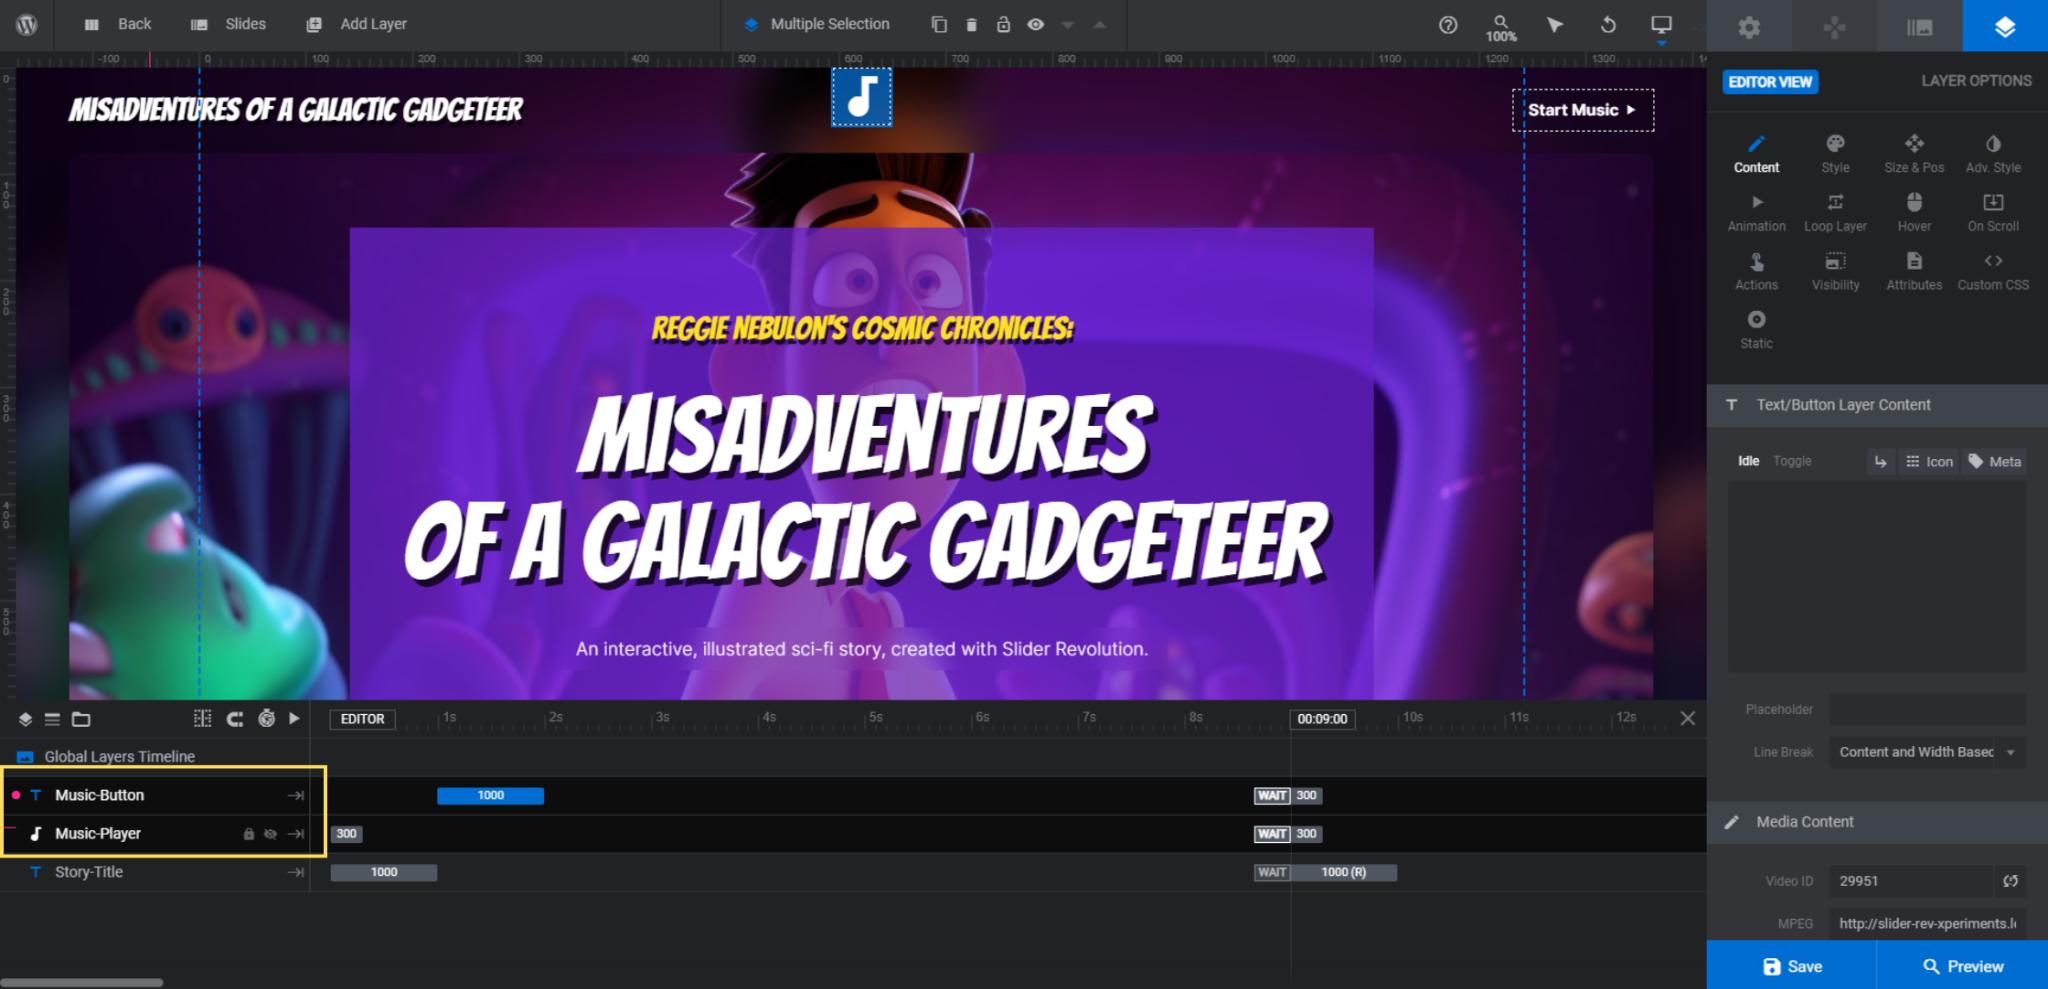
The Story-Title is the title in the top-left corner of the slider. There are a couple ways to handle this layer.
One option is to get rid of the first title slide and use Story-Title to spell out the type of issue and resolution that customers will find here. Another option is to use it to give your support forum a name. That’s what we’re going to do here.
To edit the Story-Title layer, select it from the canvas or timeline. Go to “Content” to change what the text says. Then go to “Style” to edit the font and styling.
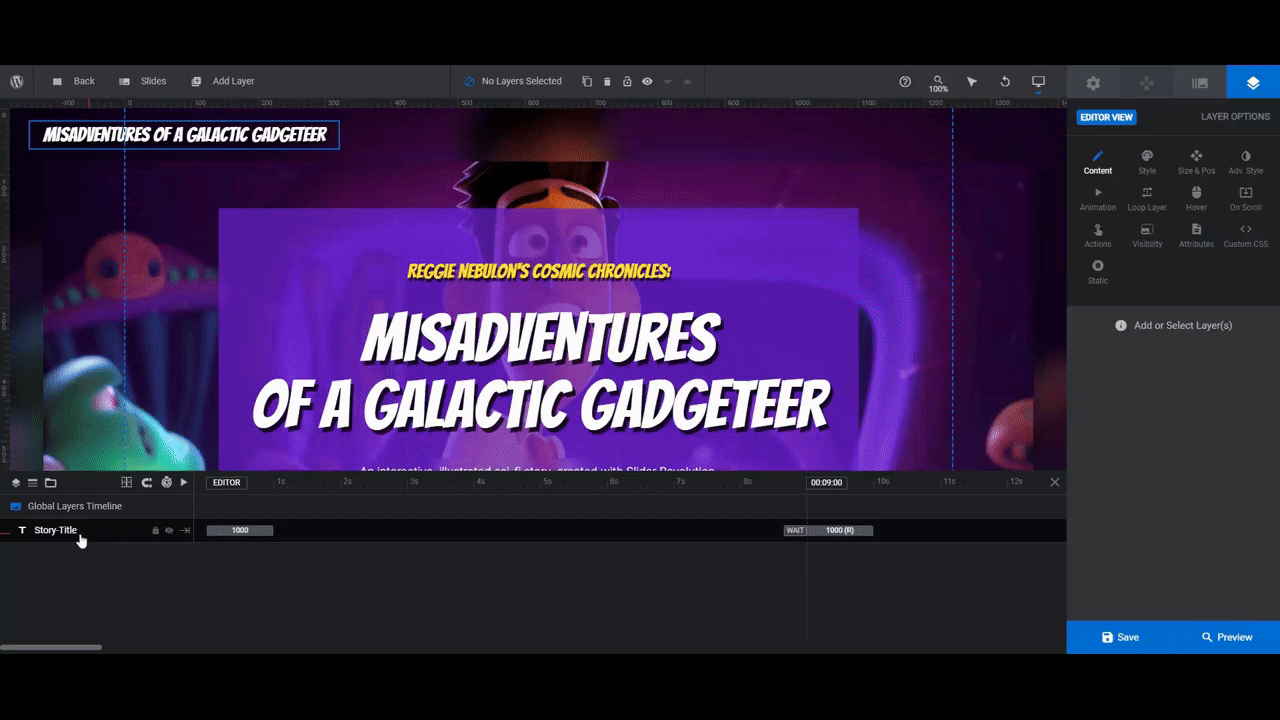
Save your changes. Then open up Slide #1.
Learn more:
Step 3: Update the slide imagery
There are two places to insert the main image for each slide — as the slide background and as the foreground image. For the best results, set the size for each of your images to 1024px by 1024px.
Go to “Slide Options” and “Background” click the Media Library button to upload the image for that slide. It will be applied to the blurred backdrop of the slide.
Next, locate the Main-Image layer in the slide. Click on it and then go to “Content” or “Style” to insert the same image you just uploaded to the background.
Check the placement of the image in the canvas. If you aren’t happy with its positioning, go to “Content” and use the square grid next to Position to move it into place.
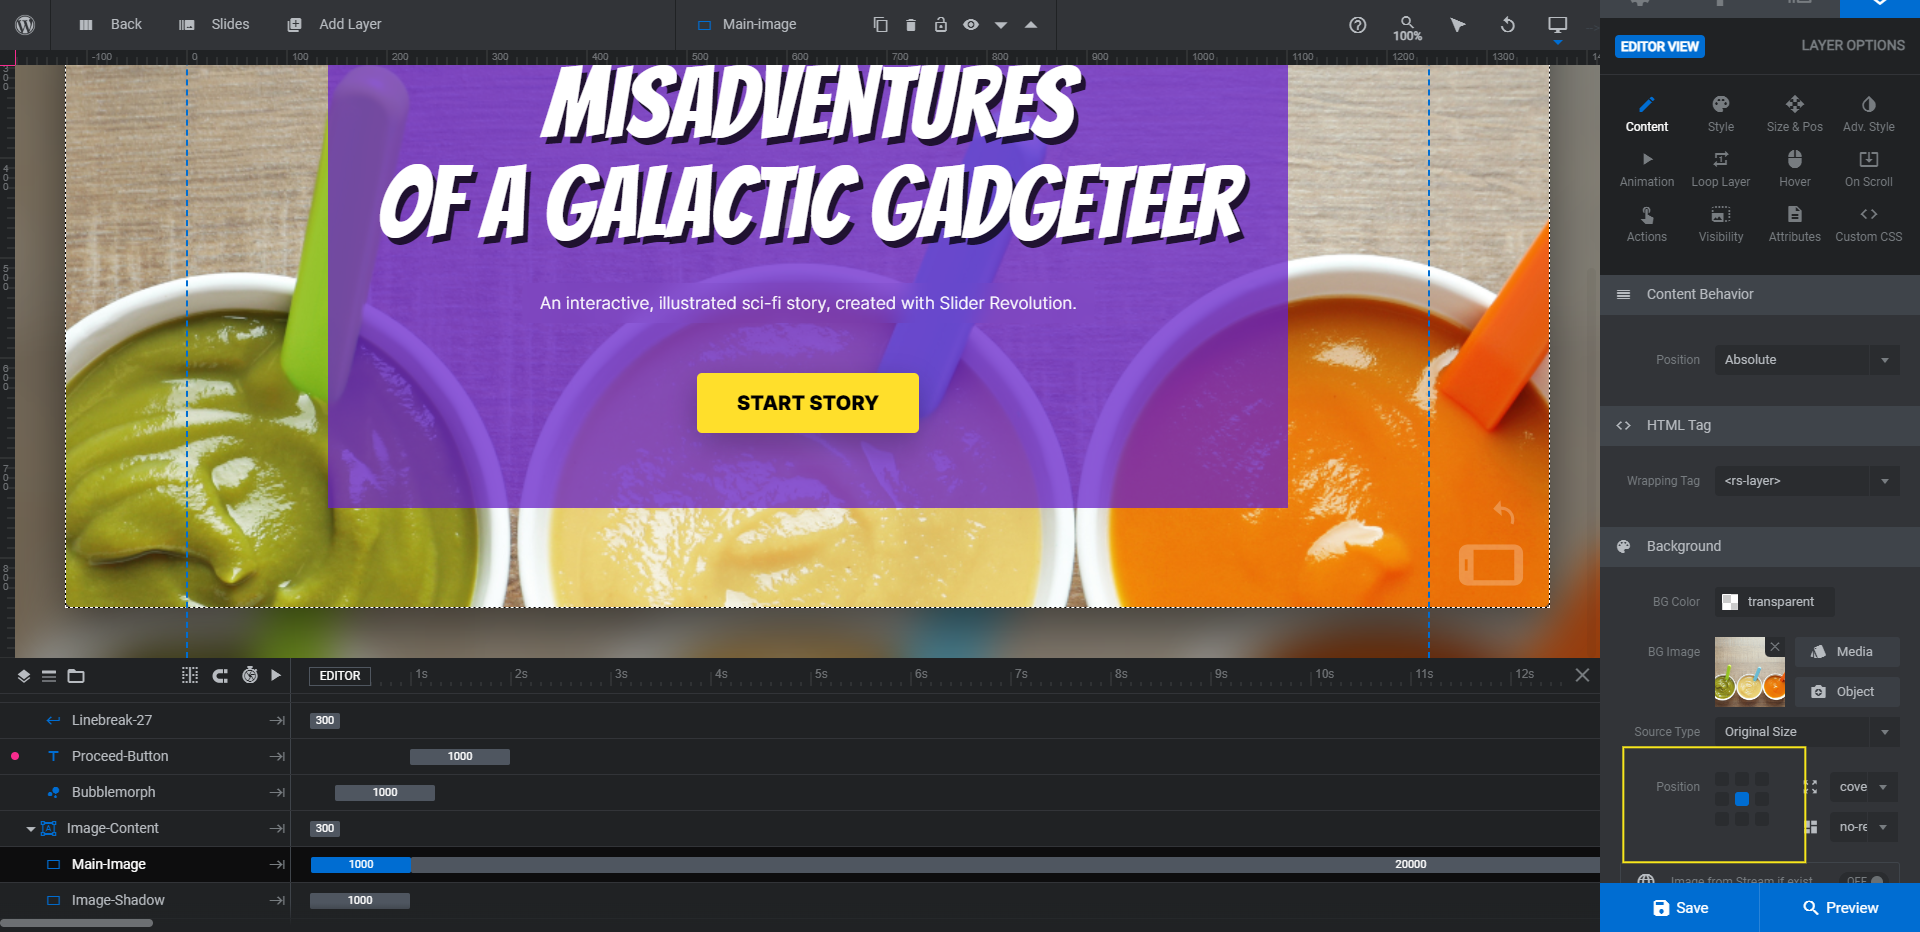
Repeat this process for all your slides.
Learn more:
Step 4: Edit the intro slide
The first slide in the template is a title card. If you want to jump right into the support process, you can skip this step. If you’d like to add a brief, personal message regarding the issue or question, use this card to do that.
Because this card is different from the others in this slider, we’re going to edit the entire thing at once. We’ll tackle the others in the remaining steps.
Pro tip: Make note of the styles you use in this slide. While the support questionnaire slides might look slightly different, you’ll be using the same fonts, colors, and styling in them.
Let’s start by customizing the text. We have three text layers and one button layer to edit:
- Small-Title
- Large-Title
- Small-Text
- Proceed-Button
Select the layers one at a time and then edit the text under “Content”.
To modify the font and styling of the text, go to the “Style” tab to do so. Additionally, you can use these settings to change the background color of the button.
Some other settings you’ll need can be found under “Adv Style”. The Small-Title and Large-Title have a text shadow effect applied to them that you can modify there. The Proceed-Button’s box shadow can be edited from that same panel.
Also, go to “Hover” to customize how the button looks when someone hovers over it.
There’s just one remaining element to customize and that’s the Bubblemorph layer. To edit the color of it, go to “Style” and update the BG Color there.
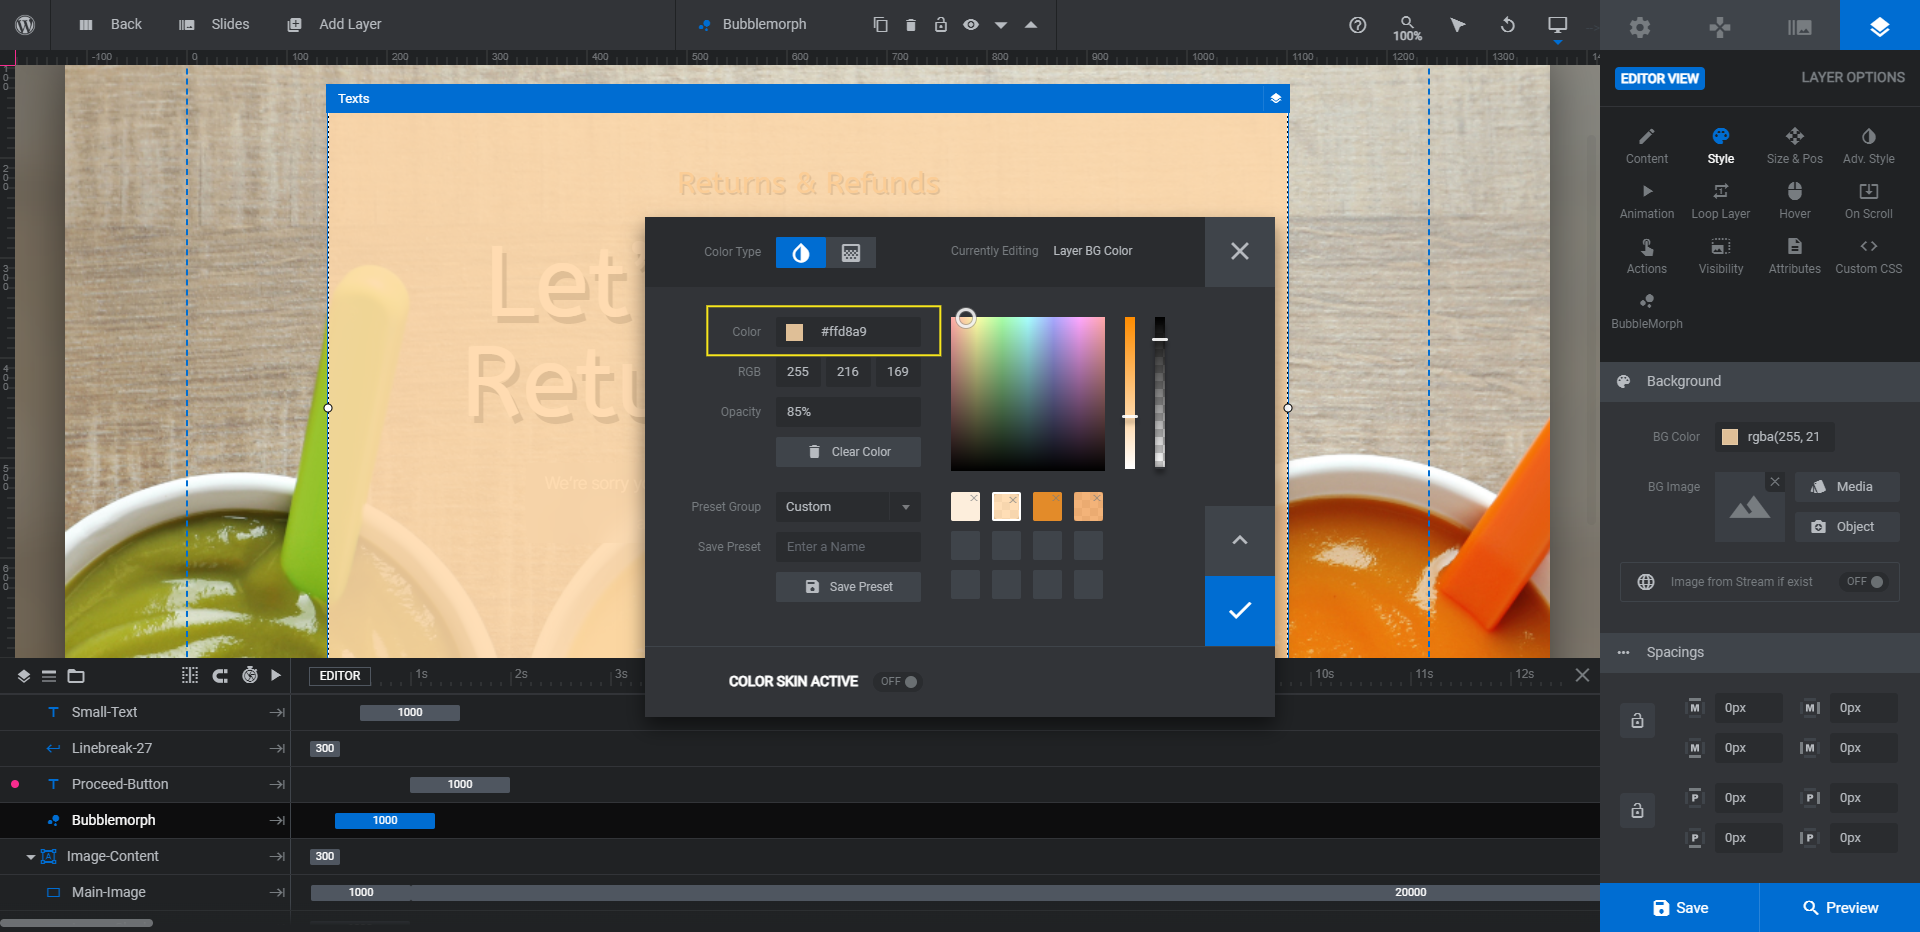
Note that the morph is not 100% opaque. So if you’d like to preserve the semi-transparent look, keep the value in the Opacity field below 100%.
You can also modify the bubble morph’s shape and movements under the Bubblemorph tab, if you’d like.
Learn more:
Step 5: Delete the slide counters
We’re going to delete the slide pagination in the top-right corner of each slide. These are helpful if you have a lengthy story to tell or process to take customers through. However, ours only has three questions, so the counter will just be a distraction for our users.
Two elements make up the counter: Pagination and Inkblot. Locate them in the timeline editor and delete them both.
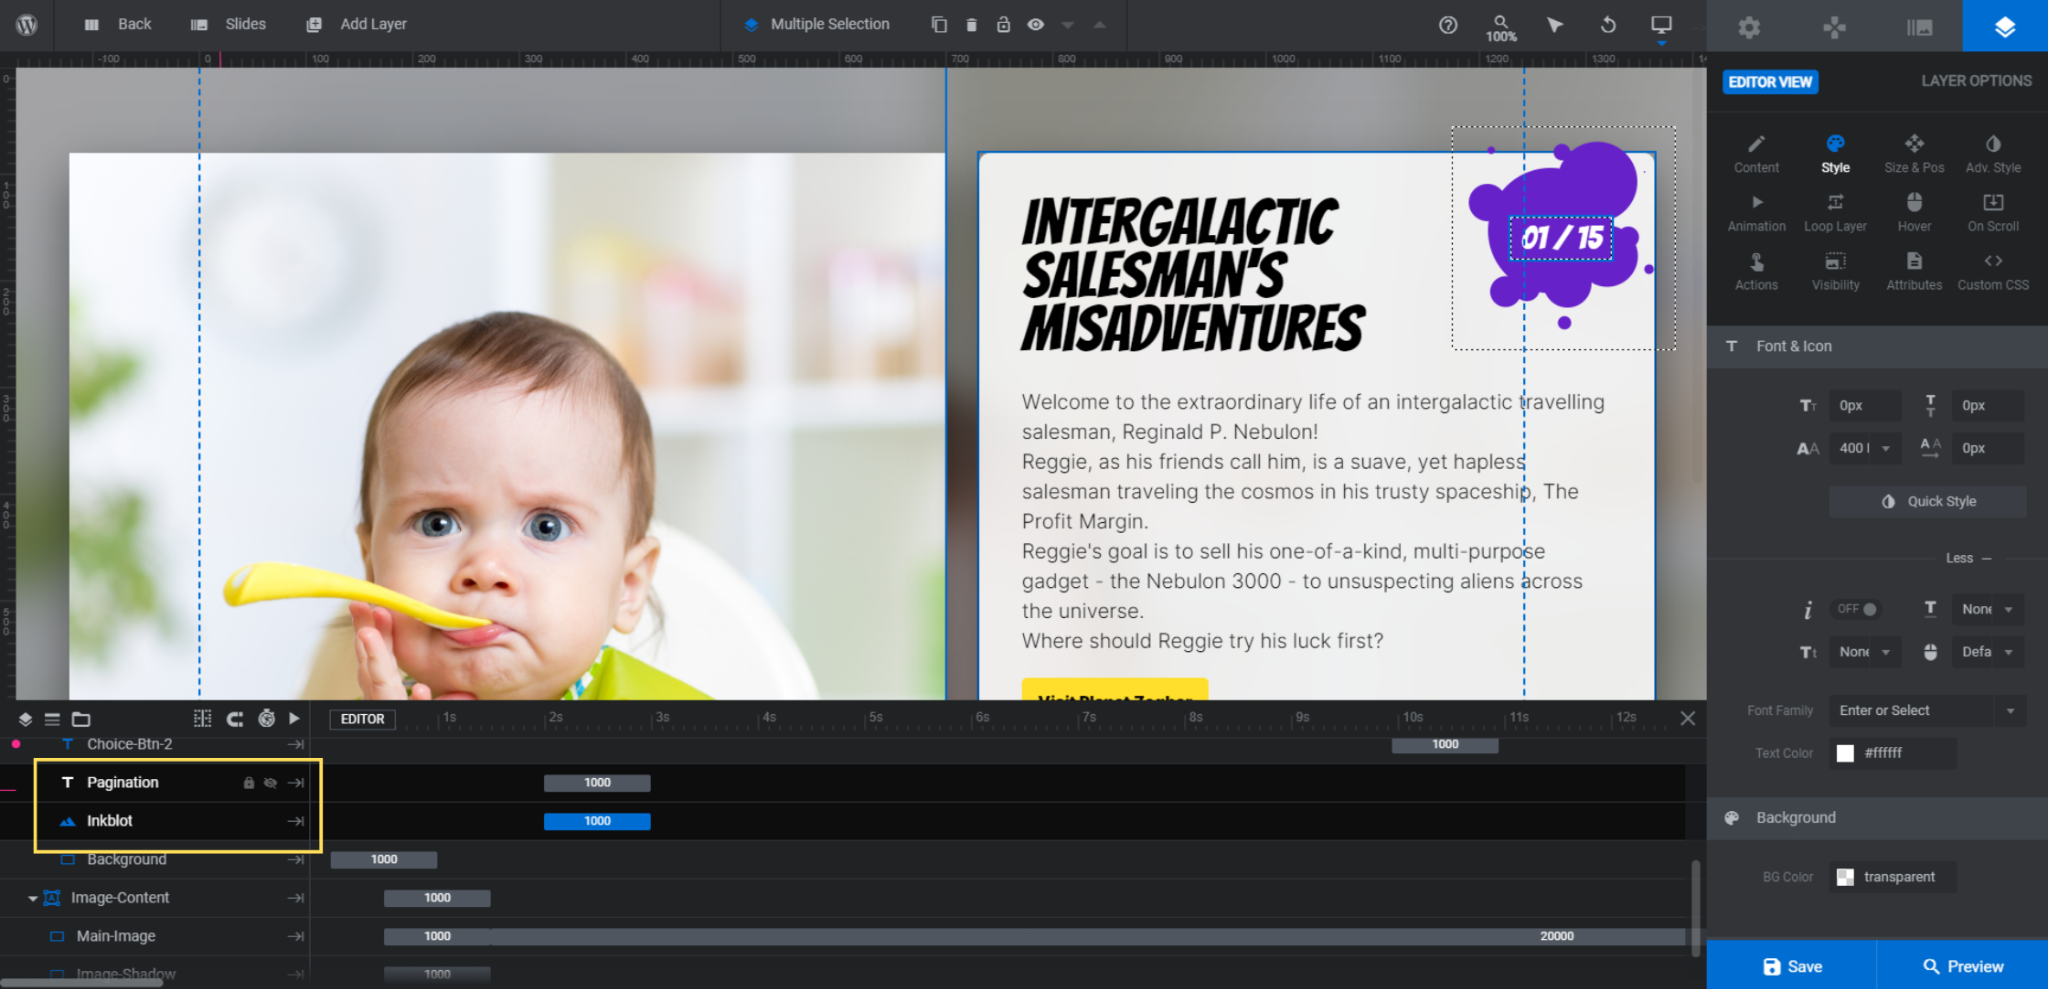
Repeat this process for each of the slides.
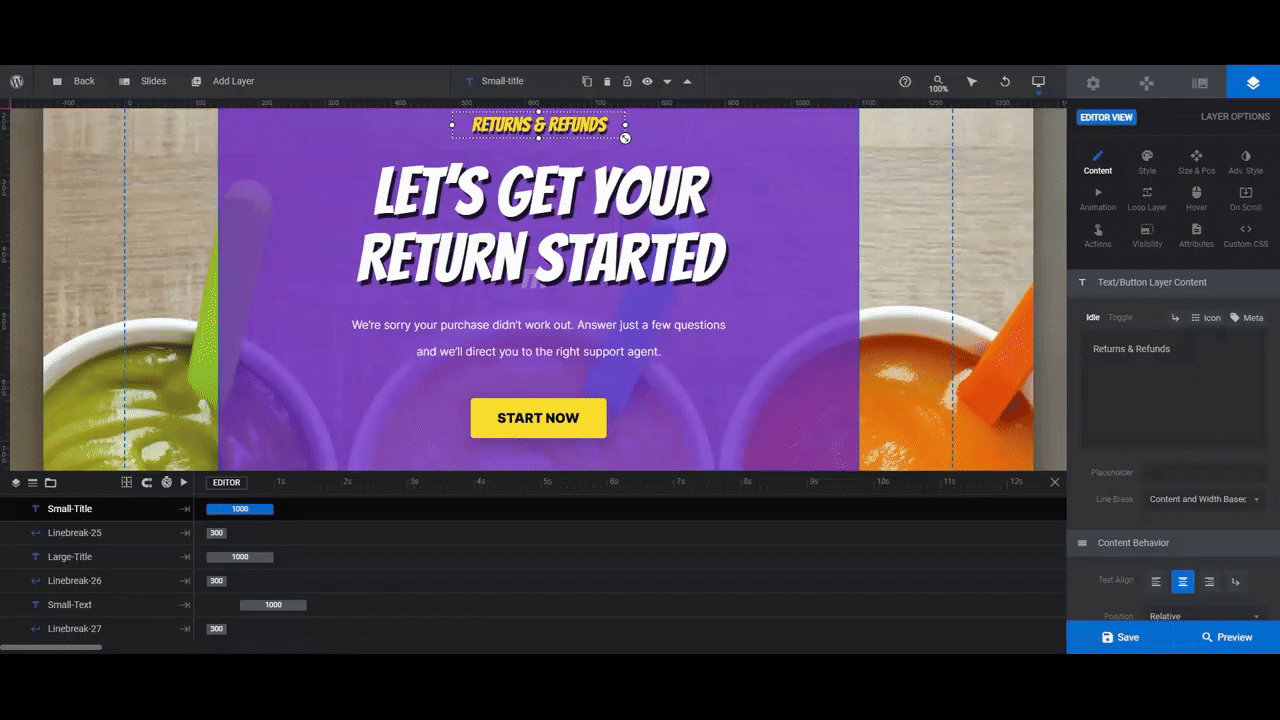
Step 6: Update the background color on the questionnaire slides
Next to the slide image is a rectangular block containing the question and answers.
To edit the block color, select the layer called Background. Then go to “Content” or “Style” to modify the BG Color.
Similar to the bubble morph on the first page, this block is semi-transparent. The original is set to 85%, so try to keep yours around that level if you’d like to preserve the effect.
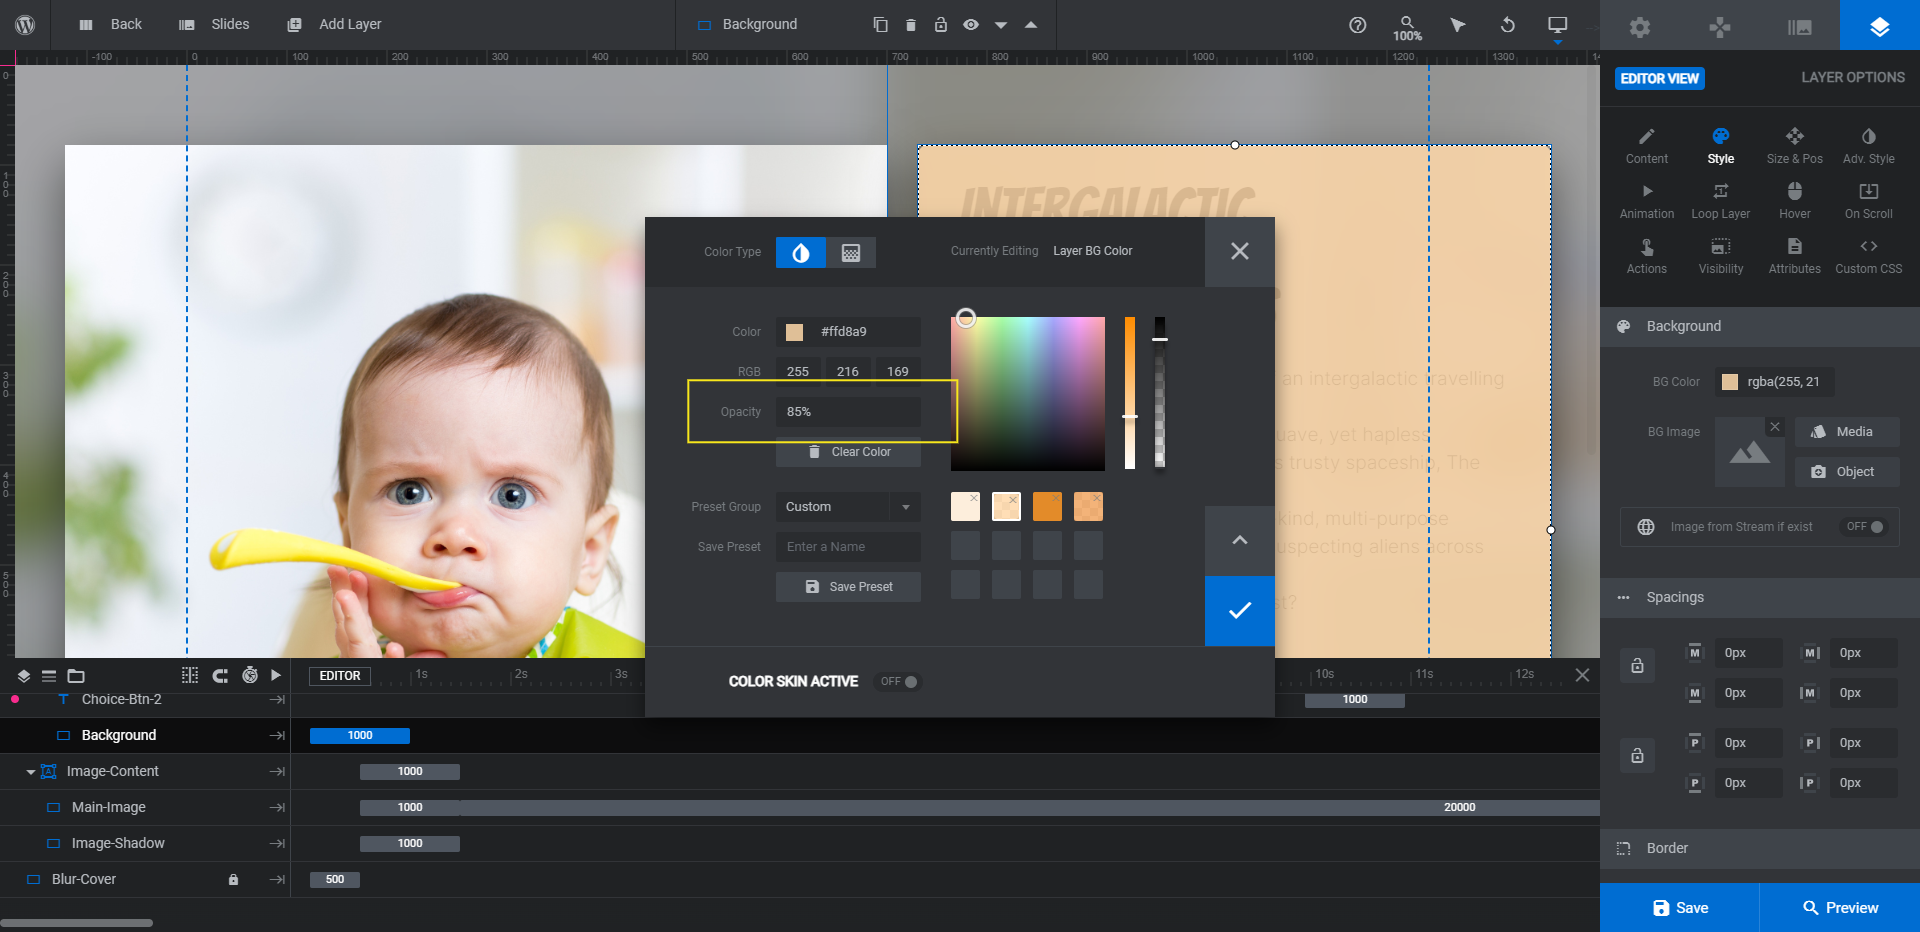
When you’re done, apply the same color and transparency to the Background layer for each slide.
Learn more:
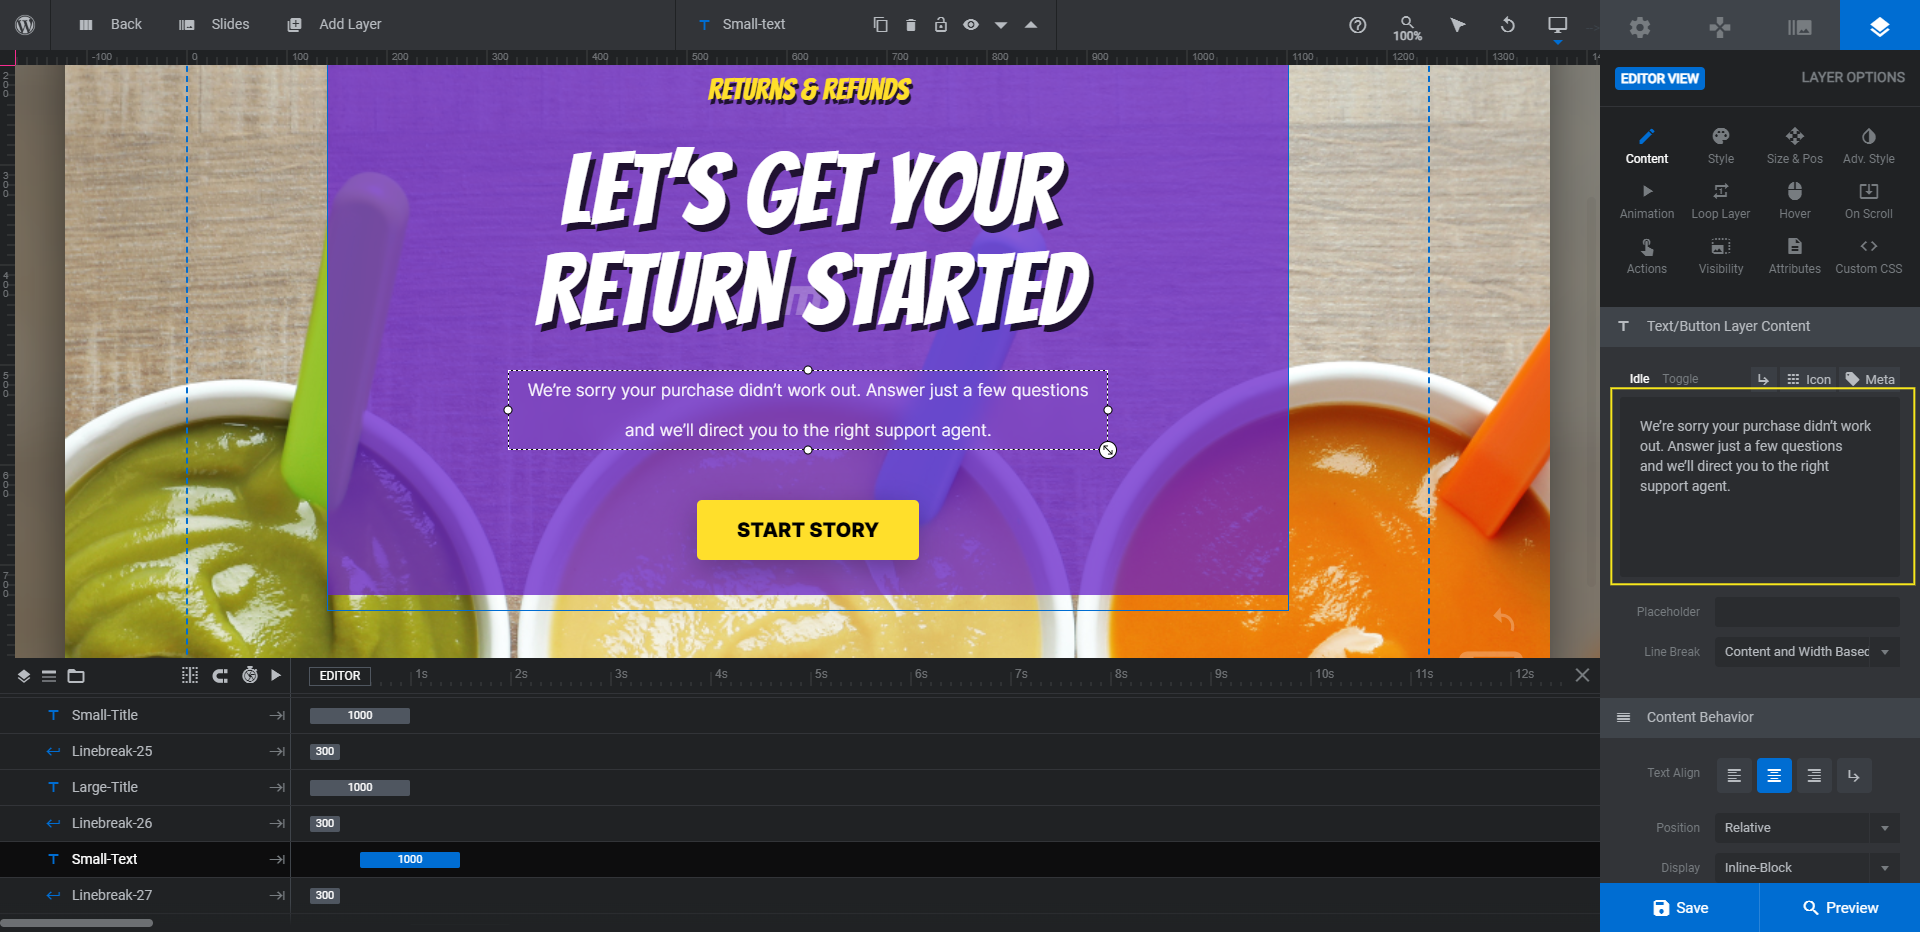
Step 7: Edit the text for the questionnaire
The Title layer serves as the question for your support process and Text will be an explanation of the issue. You’re going to edit this text the same way you did the intro slide.
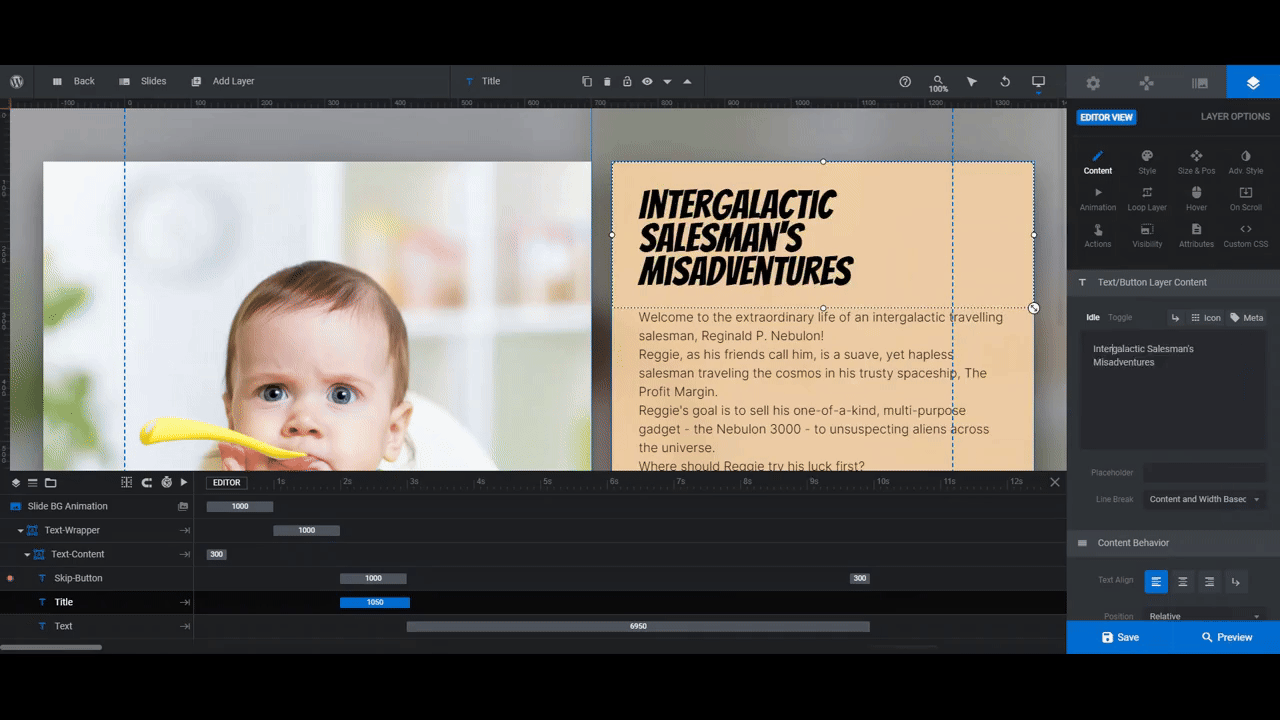
You don’t need to include a ton of text in order for your support questionnaire to be useful. In fact, it might be better if you include much less text than the template has.
To make it easier to read, you can hit your Enter or return key to force text to the next line. You can also add a hard break by hitting the return key above the text editor or by inserting <br /> at the breakpoint.
Note: The template is set up to type out the text fields similar to what it would look like if your customers were interacting with a support chatbot. If you want to disable this effect, go to “Animation” > “Advanced” and select the Word tab.
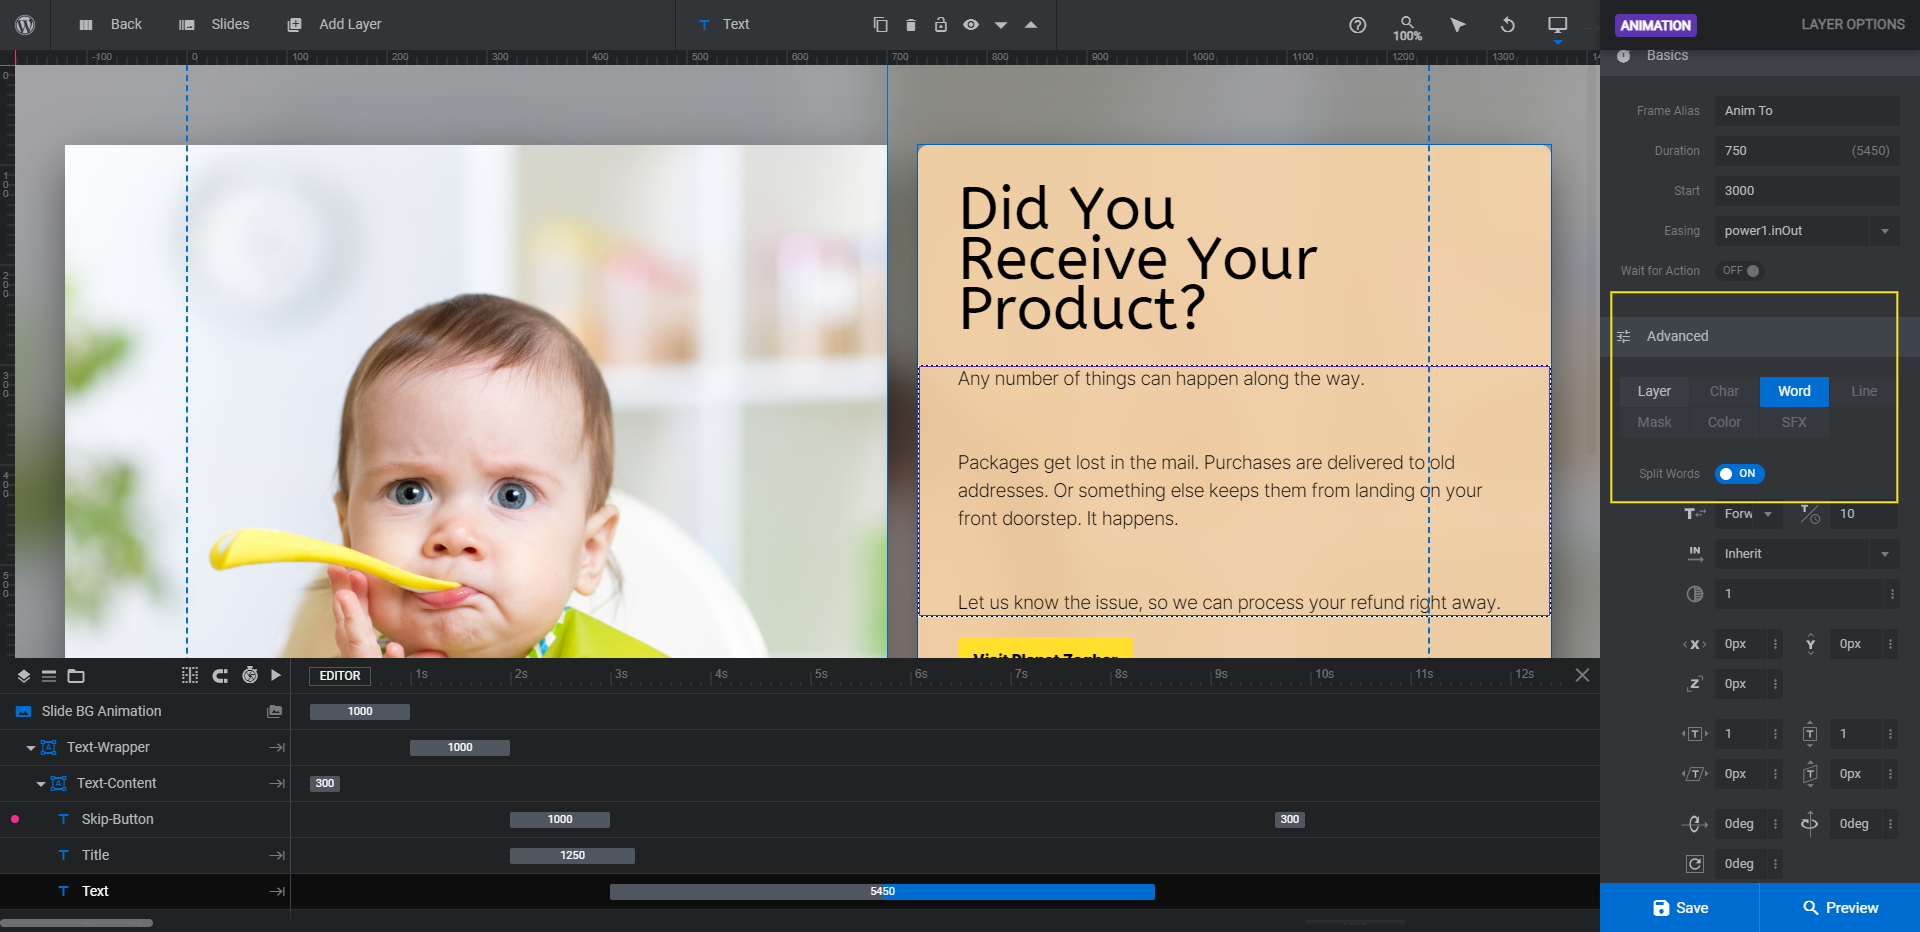
You can disable the setting or modify it here.
Go through each slide to customize the remaining text. Remember that you have to create a slide and response for each of the possible answers you provide in the CYOA questionnaire.
Learn more:
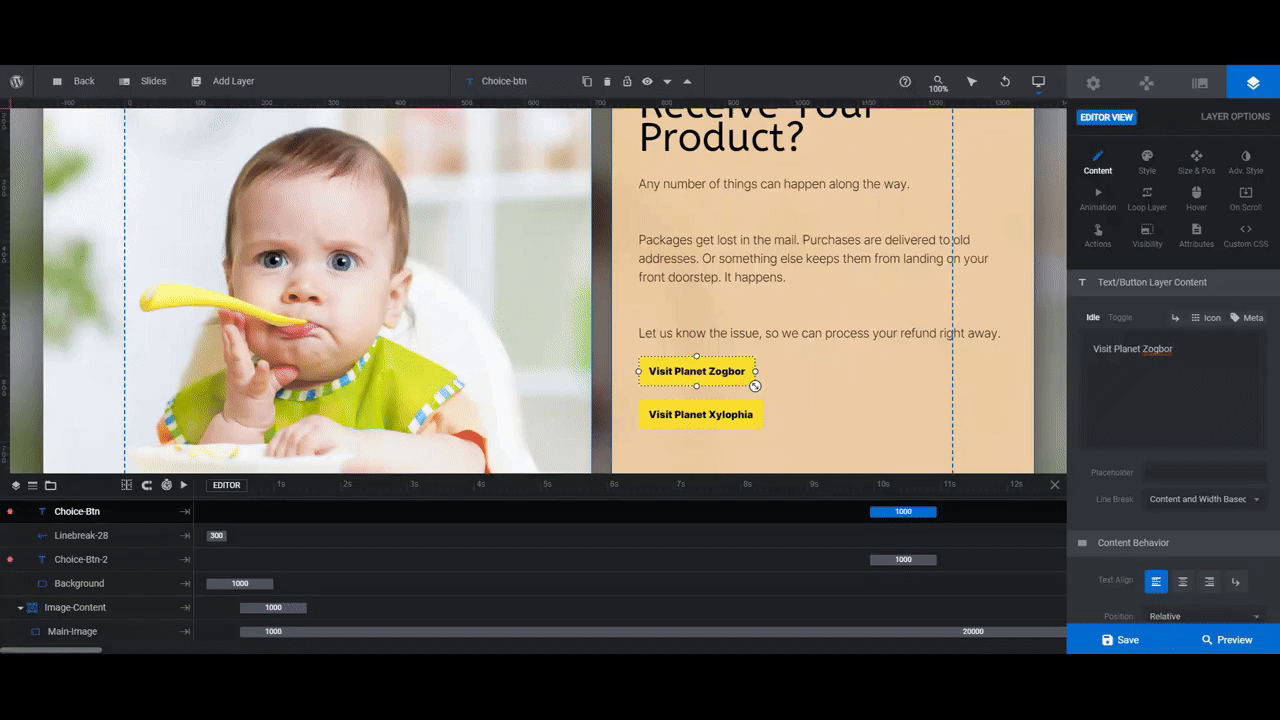
Step 8: Set up the buttons on the questionnaire slides
The last components to customize are the buttons.
The Choice-Btn and Choice-Btn-2 directs the user to the corresponding slide in their “adventure”. And the Skip-Button bypasses the typewriter effect and displays the entire message right away.
We’re going to use the Choice-Btn layers as they were originally designed. However, we’re going to change the purpose and function of the Skip-Button since our messages aren’t that long.
Let’s start with the basics. To edit the content and look of the buttons, start by changing the text from the “Content” panel.
Note: You can add icons to your button text by using the Icon tab above the text editor box.
Then go to “Style” to:
- Update the font.
- Change the text color.
- Change the button background color.
- Update the spacing and borders.
Lastly, go to “Hover” to edit the appearance of the buttons whenever someone hovers over them.
The last thing to do is program the buttons. You’ll use the “Actions” tab to do this.
Most of the Choice-Btn layers are pre-programmed to open a different slide, so you don’t need to create a new action. However, you will need to confirm that each button is set to open the correct slide/response.
Click on the button you want to edit and go to “Actions”. Click on the Jump to Slide action that’s in there. Make sure the slide/page number lines up with where your customer should go next.
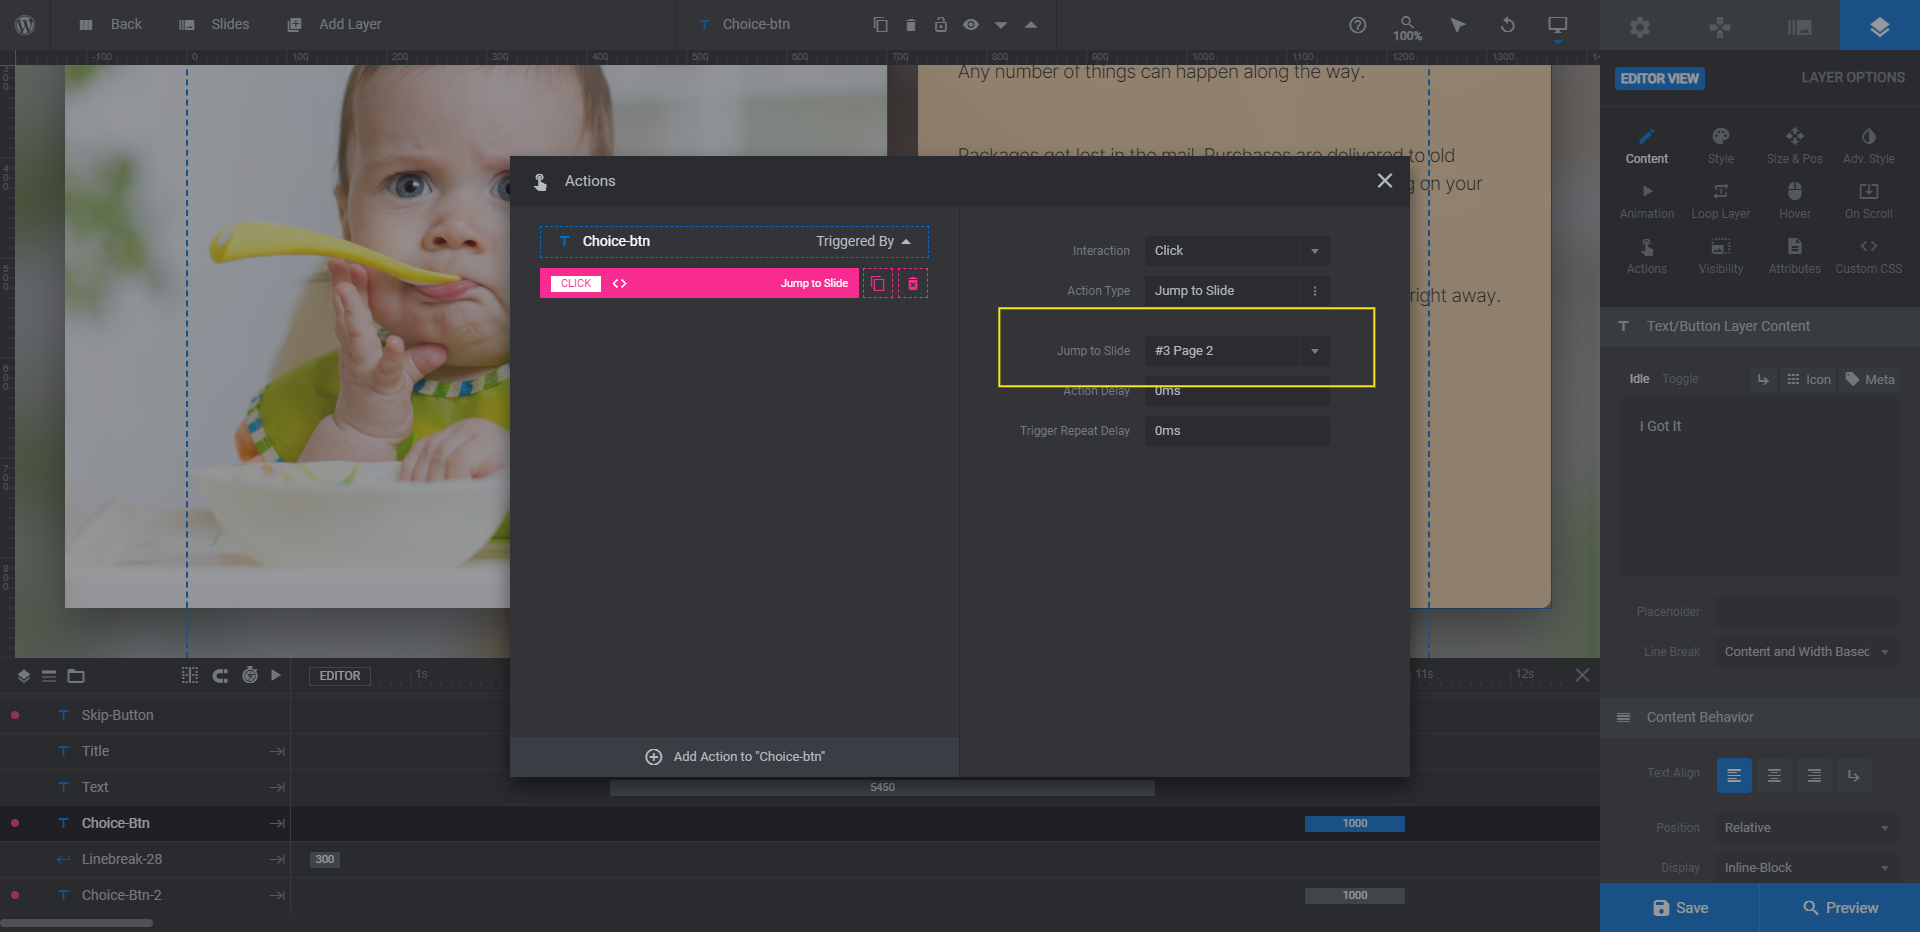
Once this is updated, click the “X” in the top-right corner to save your changes and close the pop-up.
When you’re done updating your questionnaire choices, turn your attention to the button at the bottom of the slide. (This also applies to the questionnaire choices towards the end of the slider that link out to other pages or perform other actions.)
Ours will allow customers to bypass the questionnaire entirely and talk immediately with a customer service agent. In order to set this up, our Skip-Button actions need to be heavily modified.
First, we’re going to delete the existing actions.
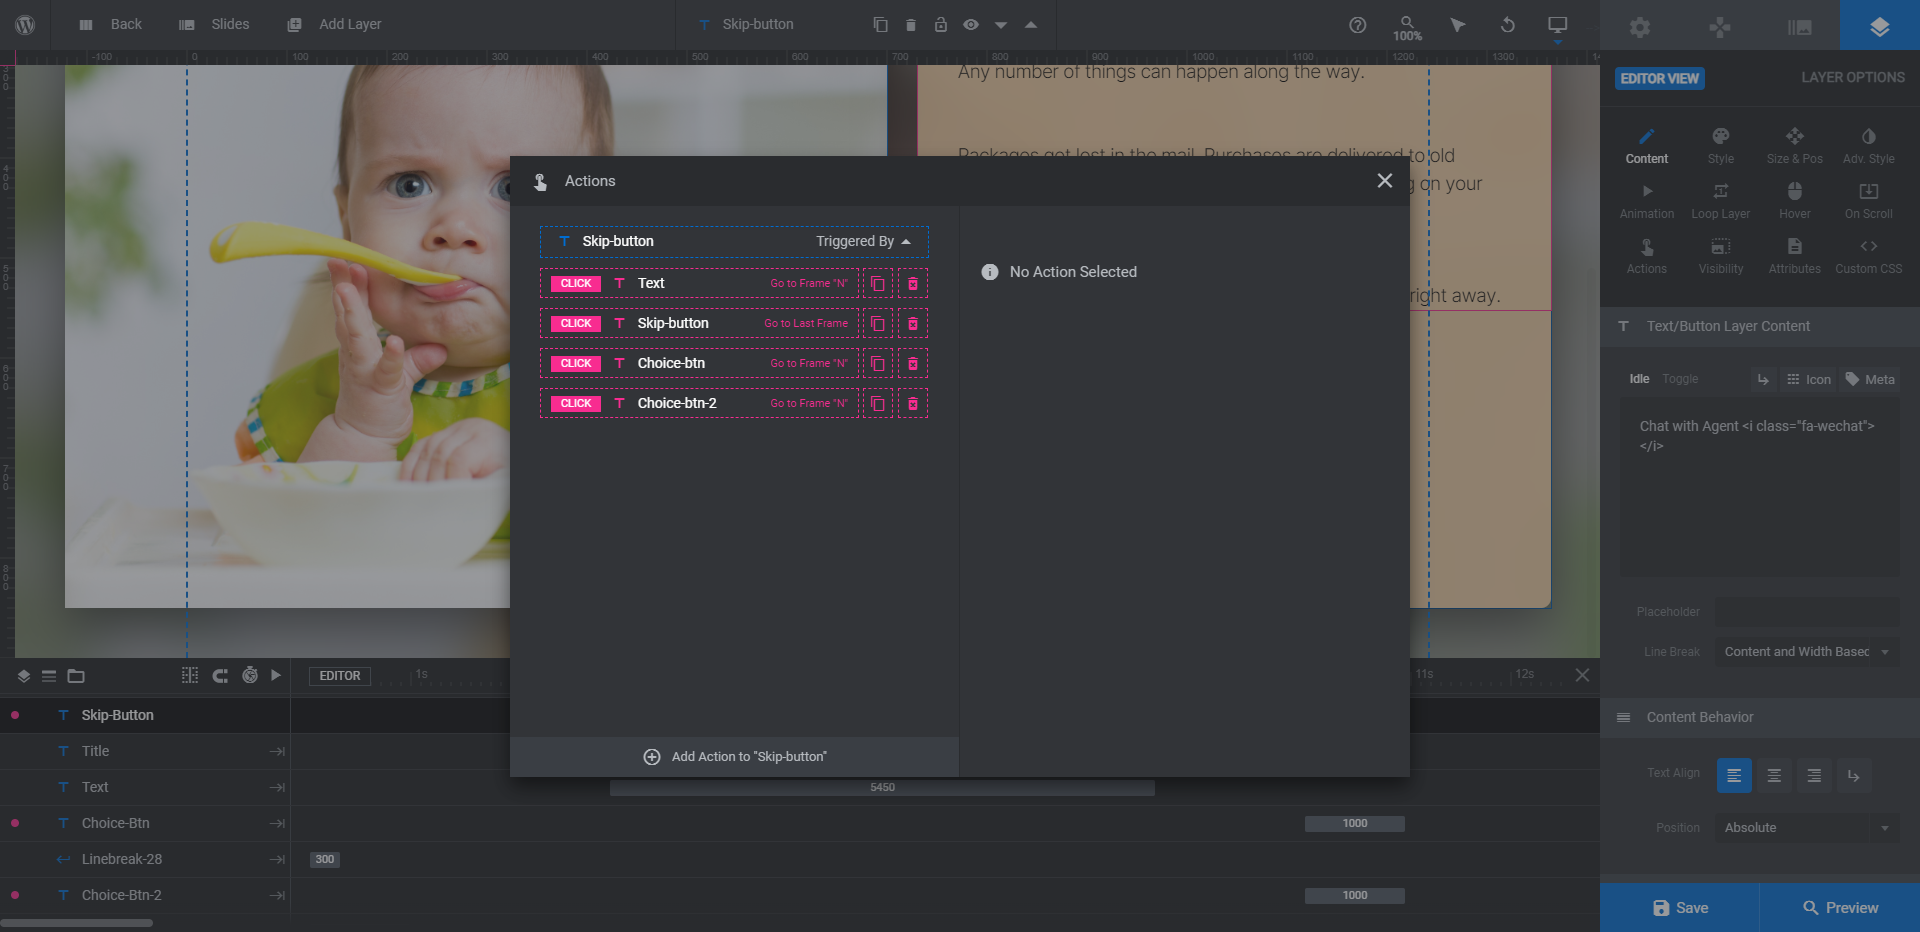
Then we’re going to add a new action.
Note: Which action you choose depends on how your chat plugin works. You’ll probably need to create a Call Back action and then add the JavaScript to open the chat widget. However, if your live chat has its own page, you can just add a Simple Link and do it that way.
The last thing to modify is the animation for the Skip-Button. Right now, this button disappears once the text above has finished typing out. We want to set up the button to behave just like our other buttons.
Go to “Animation”. Make sure OUT > Anim To is selected. Then scroll down to the Basics section. Set the Duration to 1000 and the Start value to 30000.
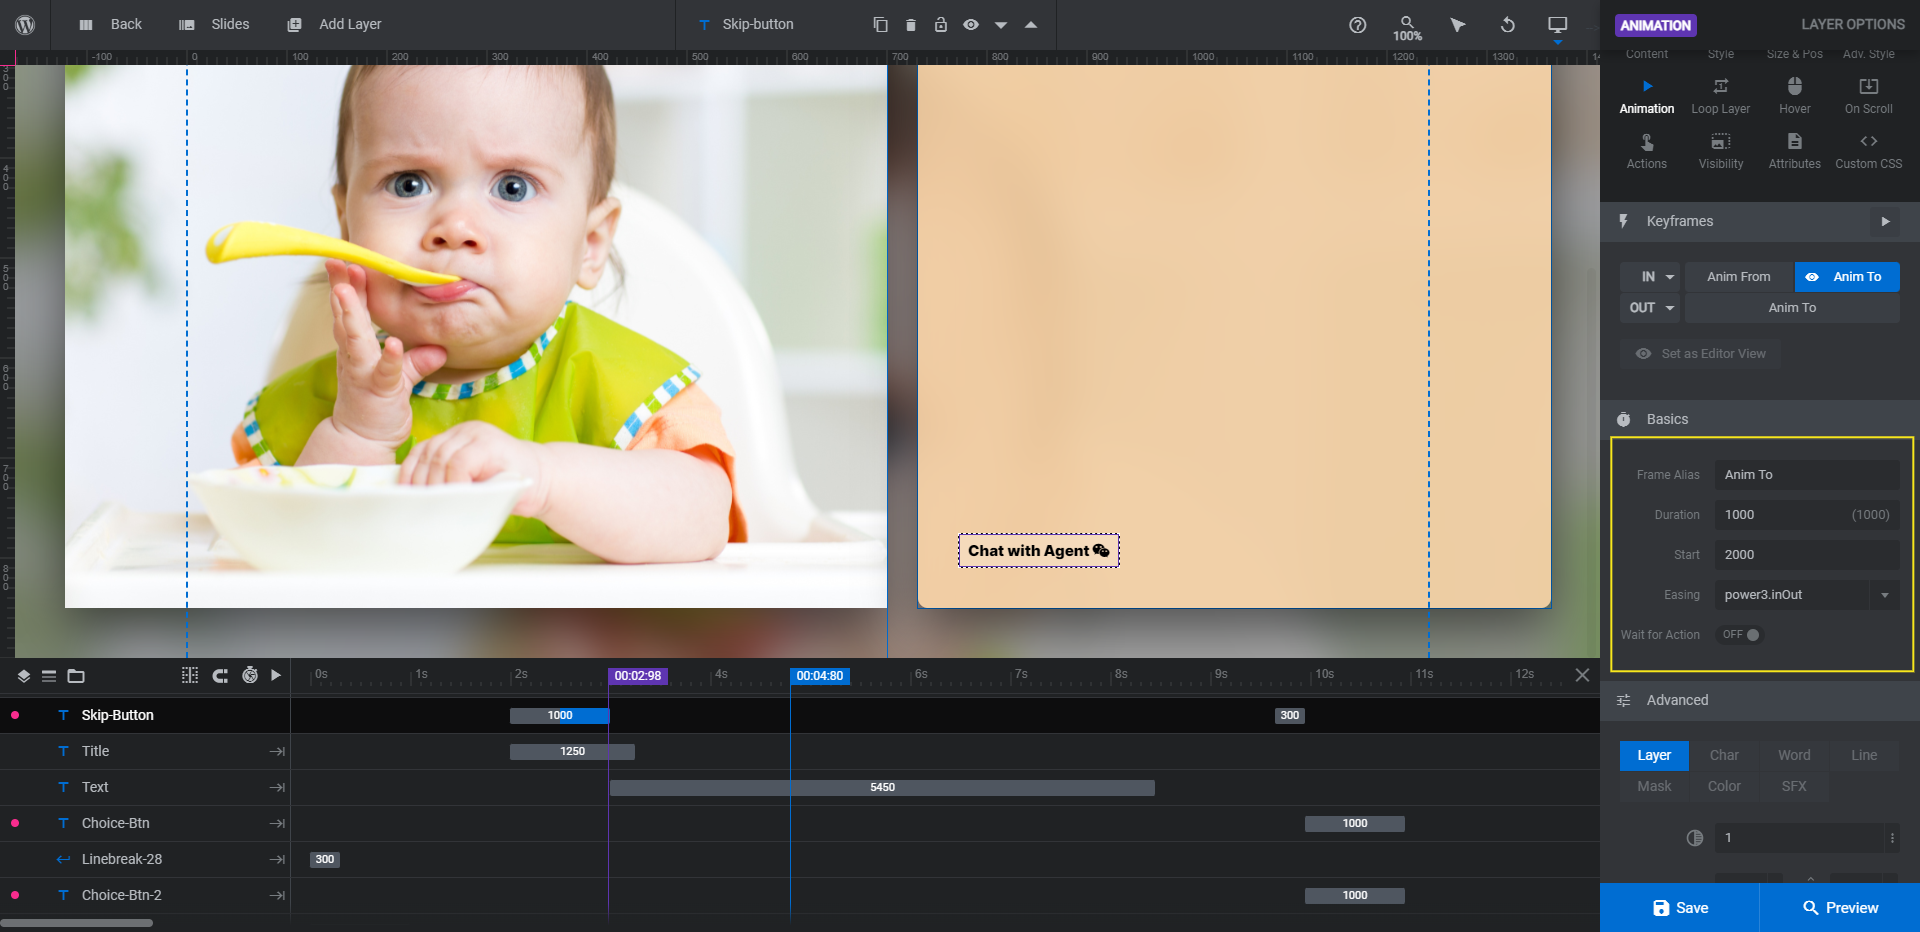
Then switch to IN > Anim To. Set the Start value to 9950. (You can also set the button to start later if you want to stagger when the options appear on the screen.)
The Skip-Button layer will now appear and disappear at the same time as the other buttons in the slide.
Save your changes and preview your work to make sure everything looks and works as planned. When you’re happy with your support questionnaire, you can add it to your support page or forum using the embed shortcode or the Slider Revolution page builder widget.
Learn more:
Build a conversational and interactive support process customers will love
Choose-your-own-adventure isn’t just useful on storytelling websites or apps. You can use the Storytelling Website Template to create a more engaging way to get customers through the support process. And if you have a youthful brand like our baby food company, the conversational and interactive support process will fit right in with your company’s style.

