
For businesses that sell products or services involving the outdoors, the imagery you use on your website is important. It’s the only way for prospective customers to get a good sense of what you offer without seeing it in person.
One thing you should do is use tons of high-energy photos and videos throughout your site. But the hero section is a different story. While you could create an eye-catching photo slider or background video reel, you might want to try something that other sites aren’t doing if your business is brand new.
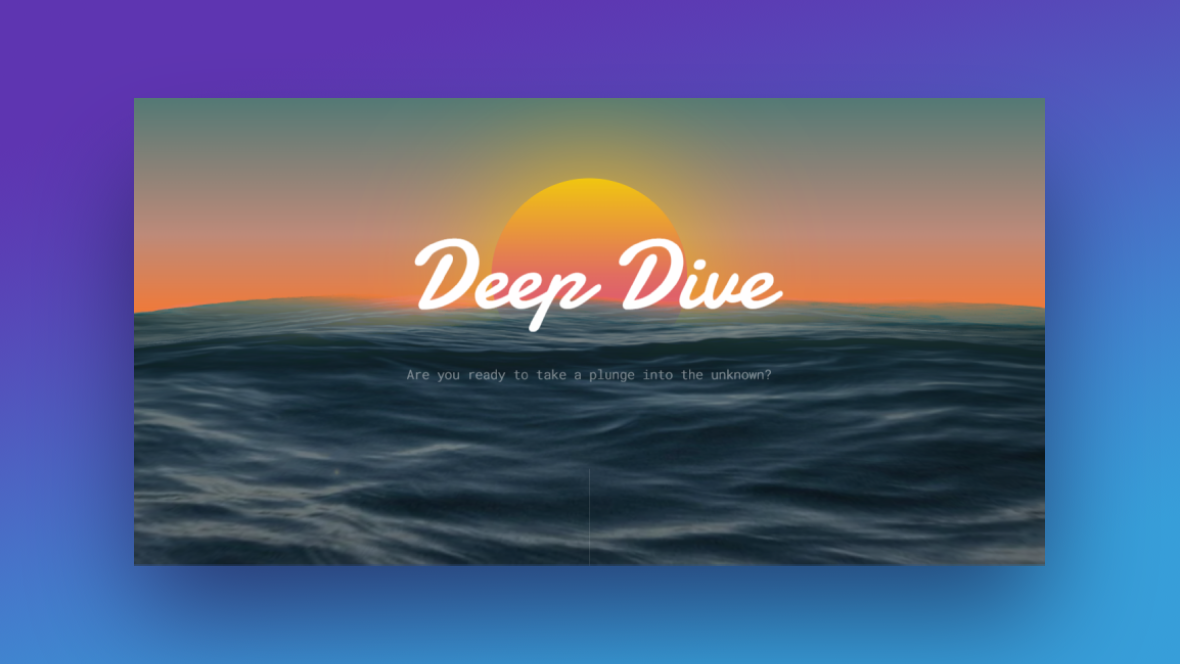
In this tutorial, we’re going to show you how to leave prospective customers with an unforgettable first impression. Below, we’ll demonstrate how to create an underwater scene using the Deep Dive Ocean Water Effect template.
Table of Contents:
- Step 1: Update particle wave image
- Step 2: Set background gradient colors
- Step 3: Update particle wave gradient
- Step 4: Delete sun shape
- Step 5: Customize the content above and below the water line
- Step 6: Update the button
How to create an underwater scene with Slider Revolution
The Deep Dive Ocean Water Effect template demonstrates one way to put this design to use — as an abstract metaphor for things lying under the surface.
In this tutorial, we’ll show you how to keep the basic structure of the template, customize the look of its components, and repurpose it for a local water sports business.
Here are some quick-start references to help you use Slider Revolution if it’s your first time:
Step 1: Update particle wave image
There are three particle wave layers in this hero section design. Pw-1 doesn’t look like the typical particle wave, however, because we’ve imported an image of ocean waters into it.
So before you do anything else, you’re going to need to find (or take) a water surface photo for your design.
Tip: Try to use a photo that mimics the same upward/outward slant as the original photo. There should also be light ripples or waves on the surface so it already appears that the water is in motion. This photo in Canva is a good example of what to look for:
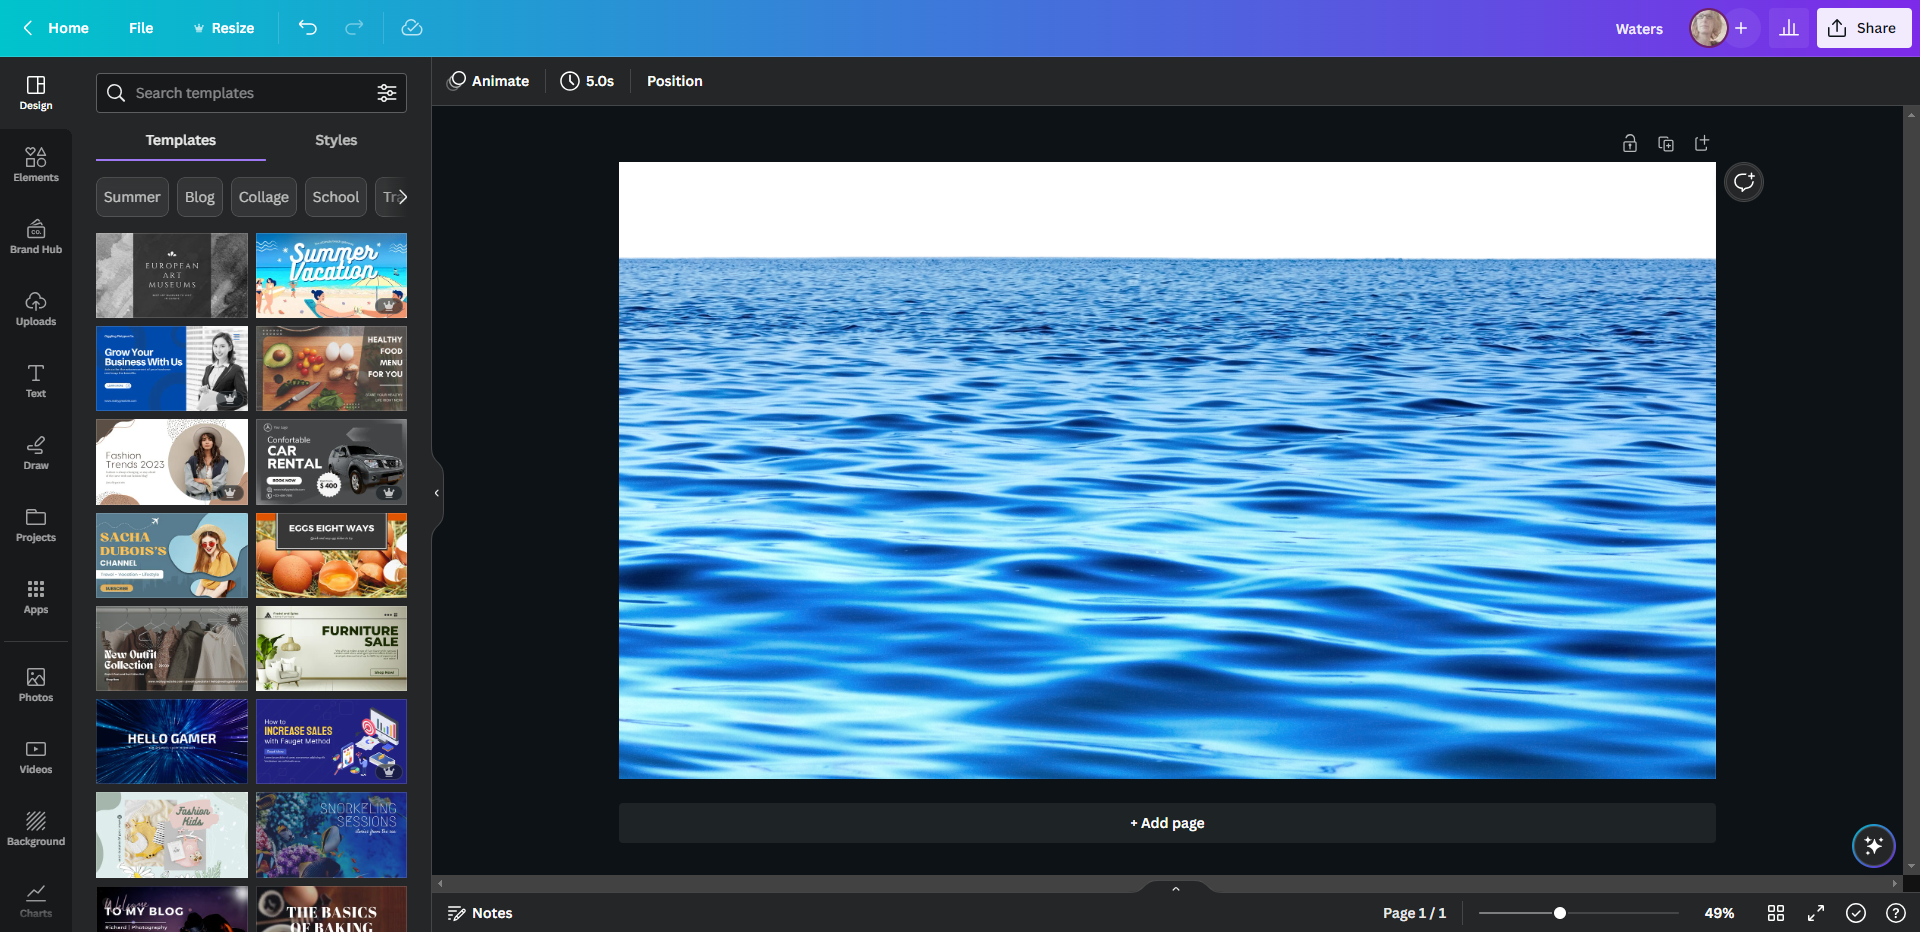
When sizing the image, aim for dimensions close to 2240px by 1260px. This will allow your image to fill the space in the template well.
Strip out any background in your image so that the photo ends at the water’s edge in the distance. Then export the image with a transparent background.
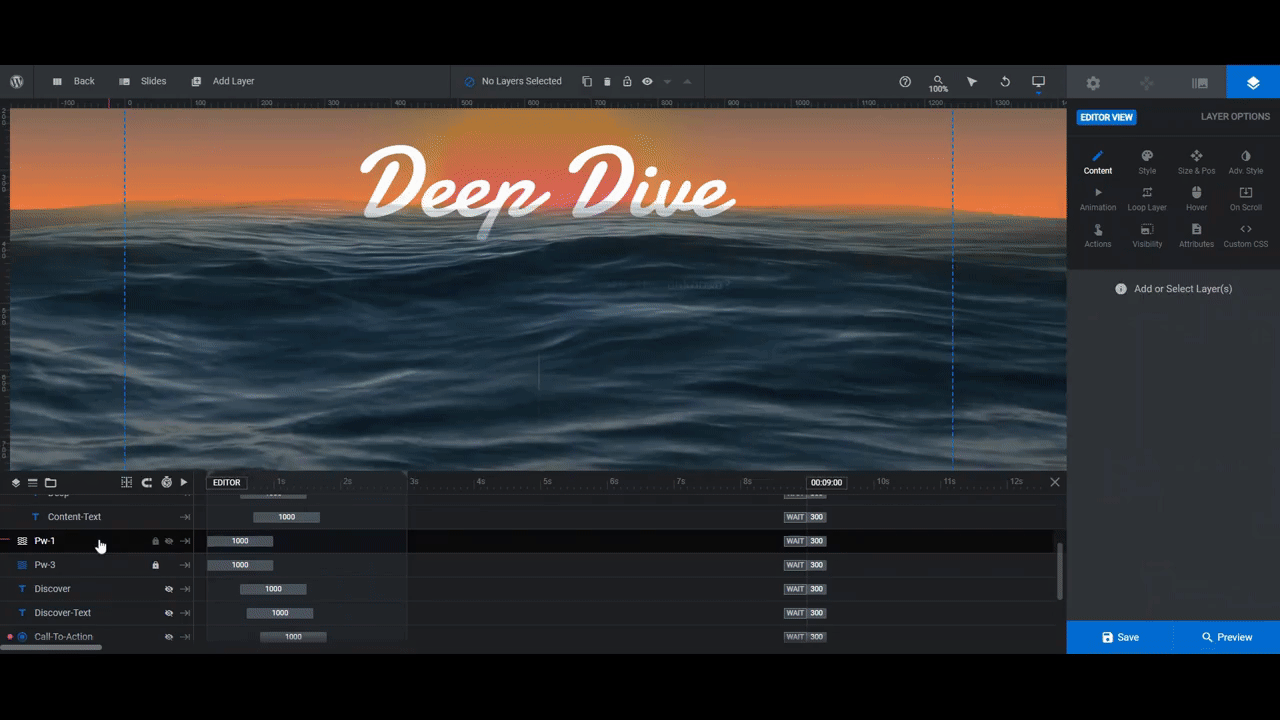
Back in Slider Revolution, locate the Pw-1 layer in the timeline editor. It’s currently locked so you can’t select the layer without first unlocking it. To do this, hover over the layer and click on the lock icon that appears to the right.
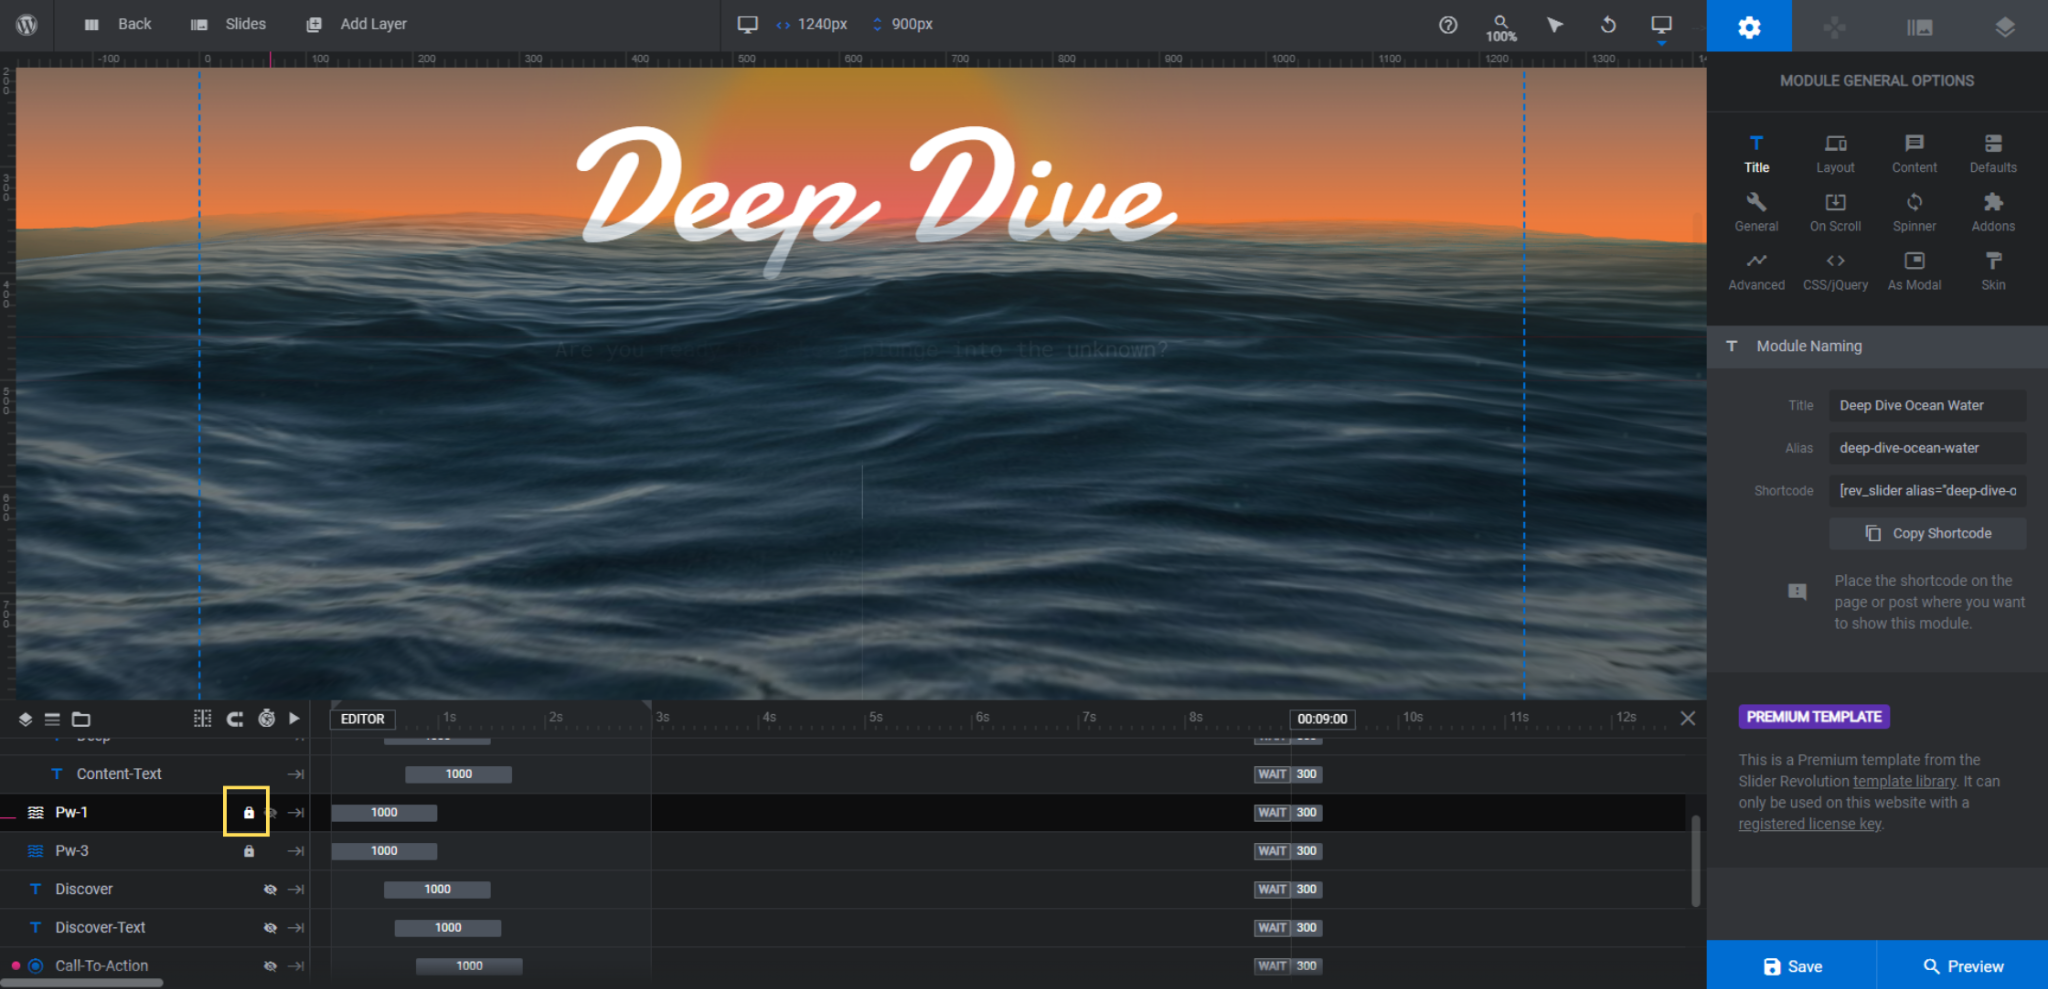
With the layer unlocked, you can now select it. Go to “Layer Options” and “Particle Wave”.
The only thing that needs to be updated is the image, which you’ll find under the Particles tab. Scroll down, click on the Image button beside the thumbnail, and upload your new image to the media library.
If you want to customize the movement or appearance of the particle wave photo, use the rest of the settings here. However, if you selected a photo with a similar style to the original, you shouldn’t need to.
Learn more:
Step 2: Set background gradient colors
Before we update the rest of the particle waves, let’s set up the background colors that make up our sky.
The first place to go is to “Slider Options” and “Background”. Click the block next to BG Color to edit the background sky gradient.
You can leave the transparency and directional settings as they are. Just edit the colors.
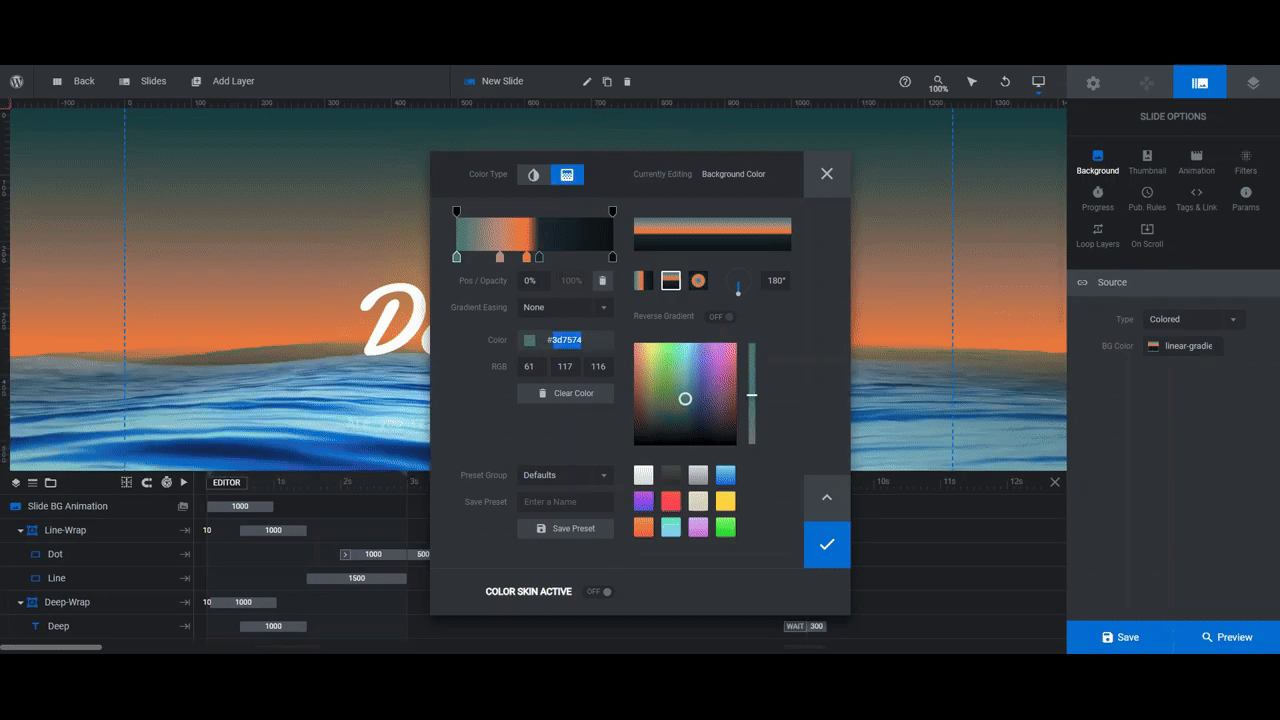
Tip: Find two or three colors you want to use to create your sky’s colors. Replace the first few colors along the gradient bar with these new ones. Leave the last two colors on the right end of the bar alone as they’ll create the backdrop for the underwater scene.
One other thing to do in this step is to unlock the Sky-Overlay layer. This is a semi-transparent gradient that sits over your custom sky gradient.
Select it in the timeline editor and then go to “Content” or “Style” to customize the colors.
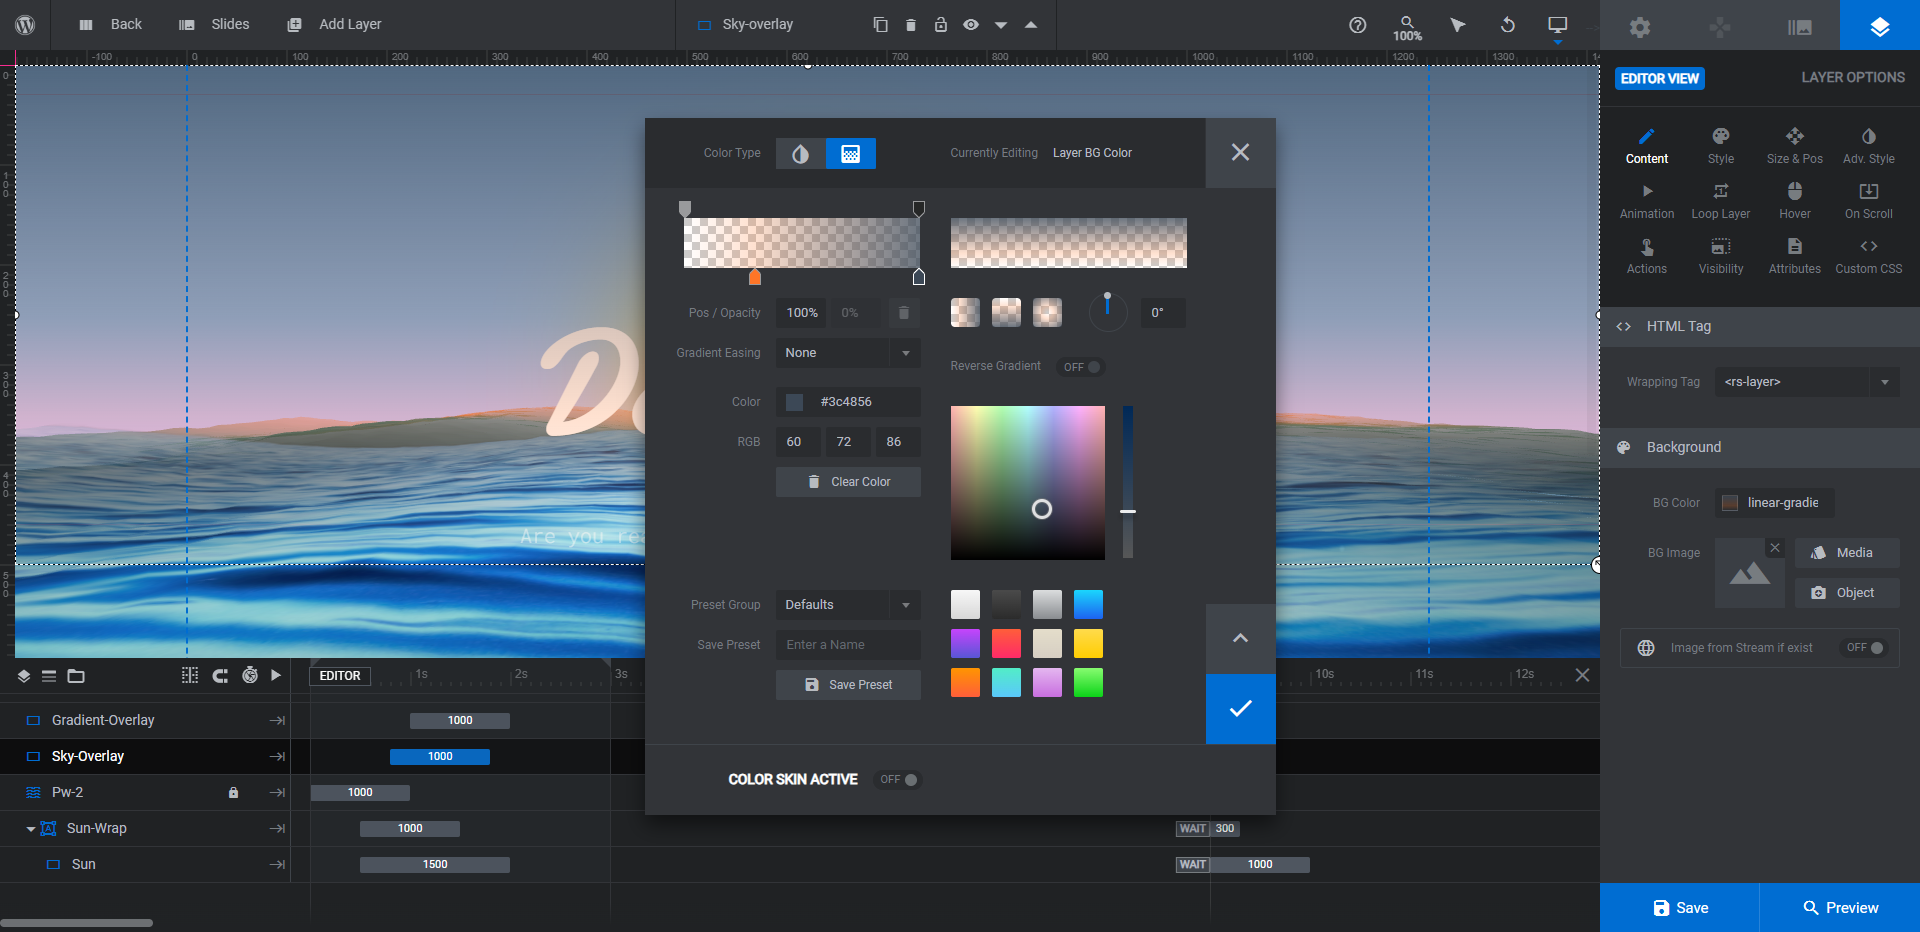
It’s a very subtle effect, so you might not need to change the colors all that much.
Learn more:
Step 3: Update particle wave gradient
There are two other particle waves in this template.
Pw-3 is more of what people think of when it comes to particle wave effects. The blurred white dots provide the bubbly look to our underwater scene. You can leave this particle wave layer alone if you’re satisfied with how it looks.
Pw-2 creates a powerful wave effect that blends in with our rolling ocean graphic.
To edit these colors, unlock Pw-2 in the timeline editor. Then go to “Particle Wave” settings and the Particles tab. You only need to customize the colors along the bottom of the gradient bar.
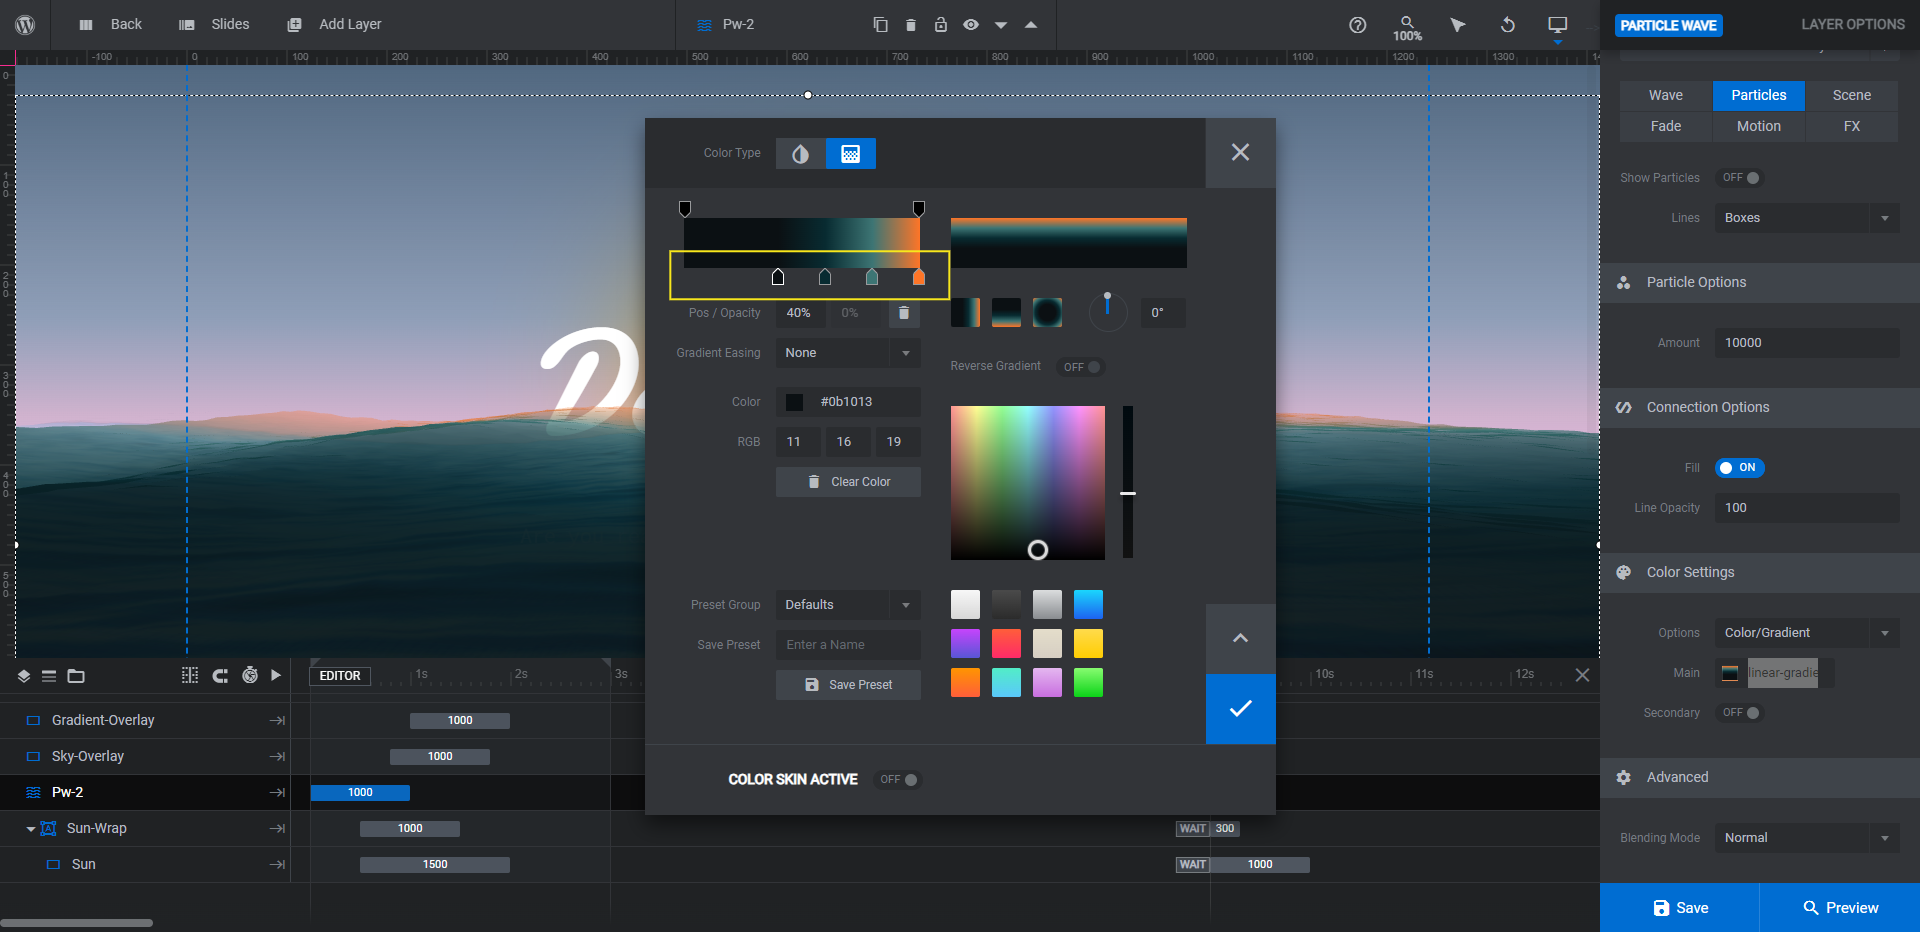
Note: Try to follow the same dark-to-light pattern of colors in the existing gradient. Also, incorporate colors similar to your sky gradient towards the far-end of the gradient, so it looks like the sky is reflecting off of the ocean and vice versa.
Check the frontend preview to ensure that you like the way your two particle wave layers blend together.
Learn more:
Step 4: Delete sun shape
If you’d like to keep the rising/setting sun shape, you can skip this step. Or you can use the same gradient-editing tips from above to customize the color of your Sun layer.
For our design, though, we’ll be deleting it. To do the same, select Sun-Wrap in the canvas or timeline editor. Then hit the Backspace or delete key.
Learn more:
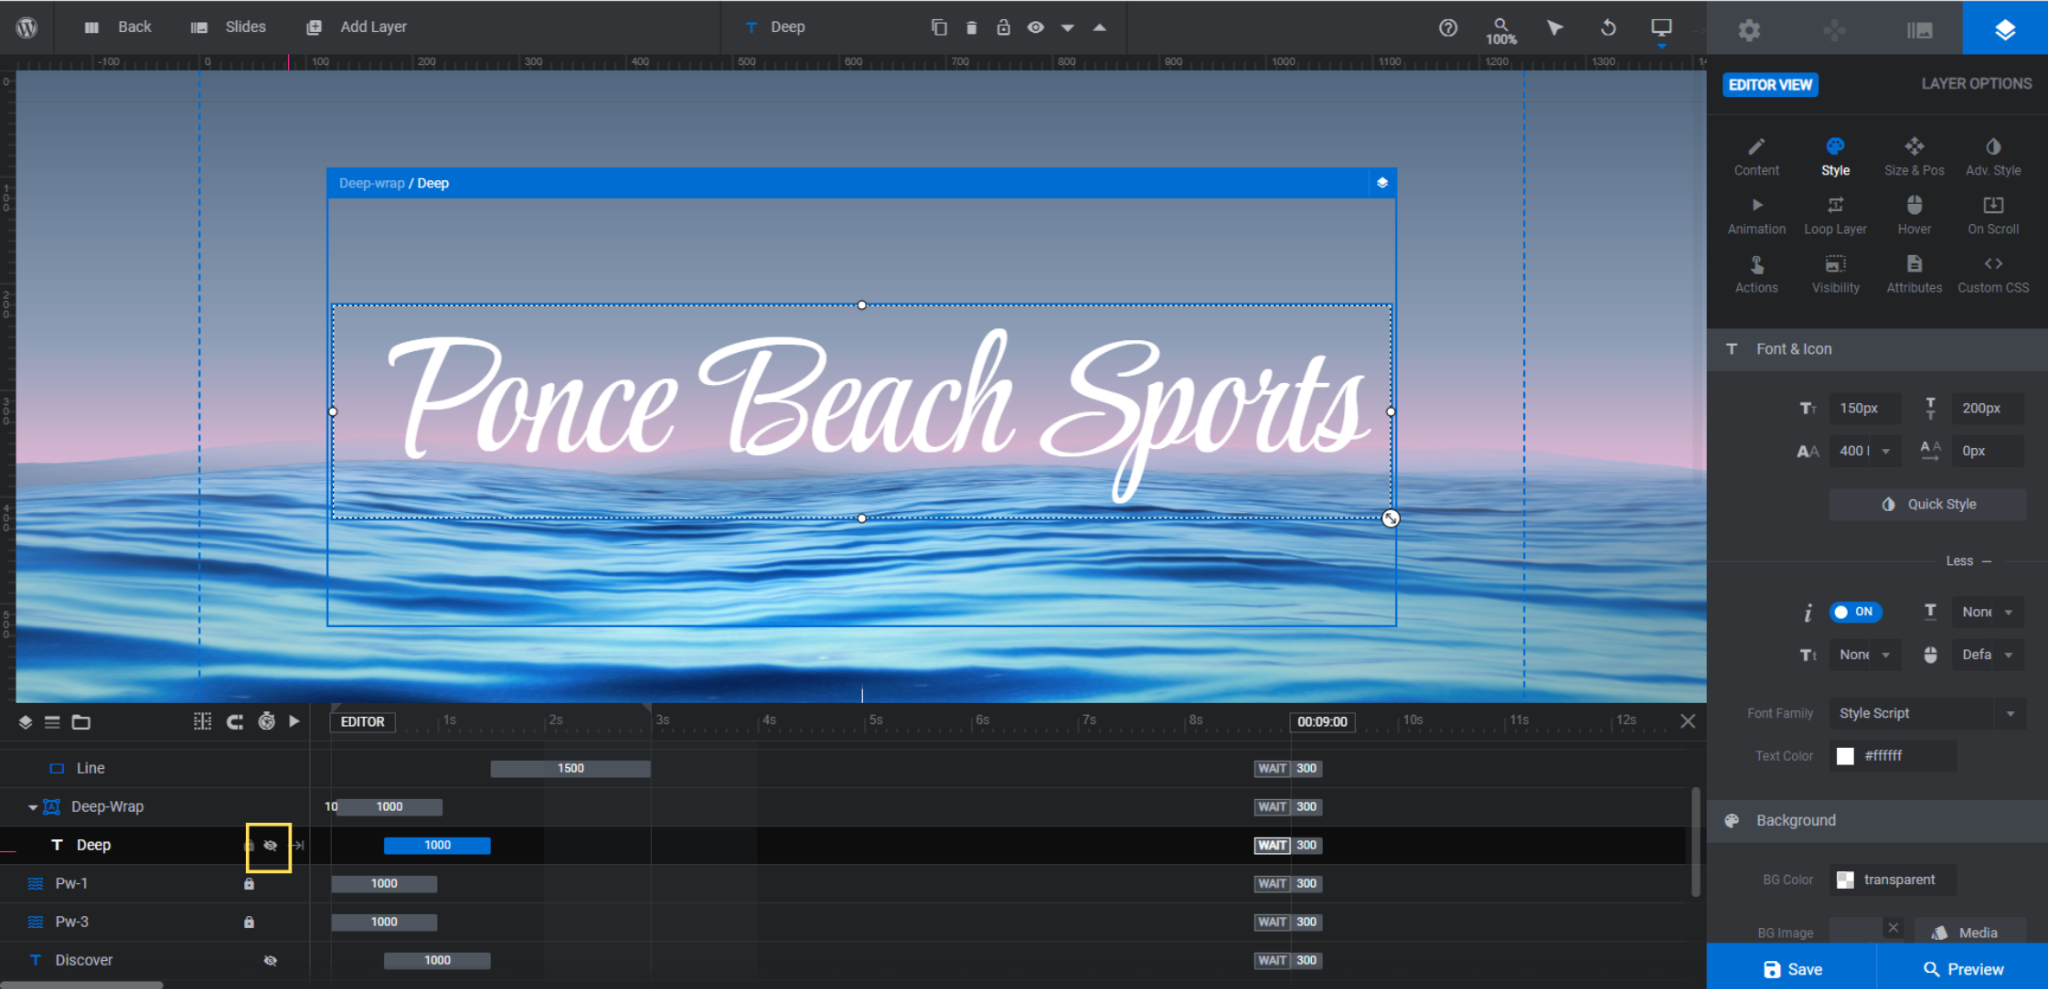
Step 5: Customize the content above and below the water line
There are four text layers that need editing. Let’s start with the layers above the water line within the Deep-Wrap group. Deep is the big headline and Content-Text is the description beneath it.
We’re going to delete Content-Text and use Deep to introduce people to our company’s name.
To edit what the headline says, go to “Layer Options” and “Content” to add your new text. To change the font, colors, size, or general styling of the text, go to the “Style” tab.

In order to make the canvas more reflective of what visitors see on the frontend of the site and easier for you to edit, we’ve hidden the underwater text layers.
To edit this next batch of text layers, hide the Deep layer from the canvas by clicking the crossed-out eyeball icon that appears to the right of it.
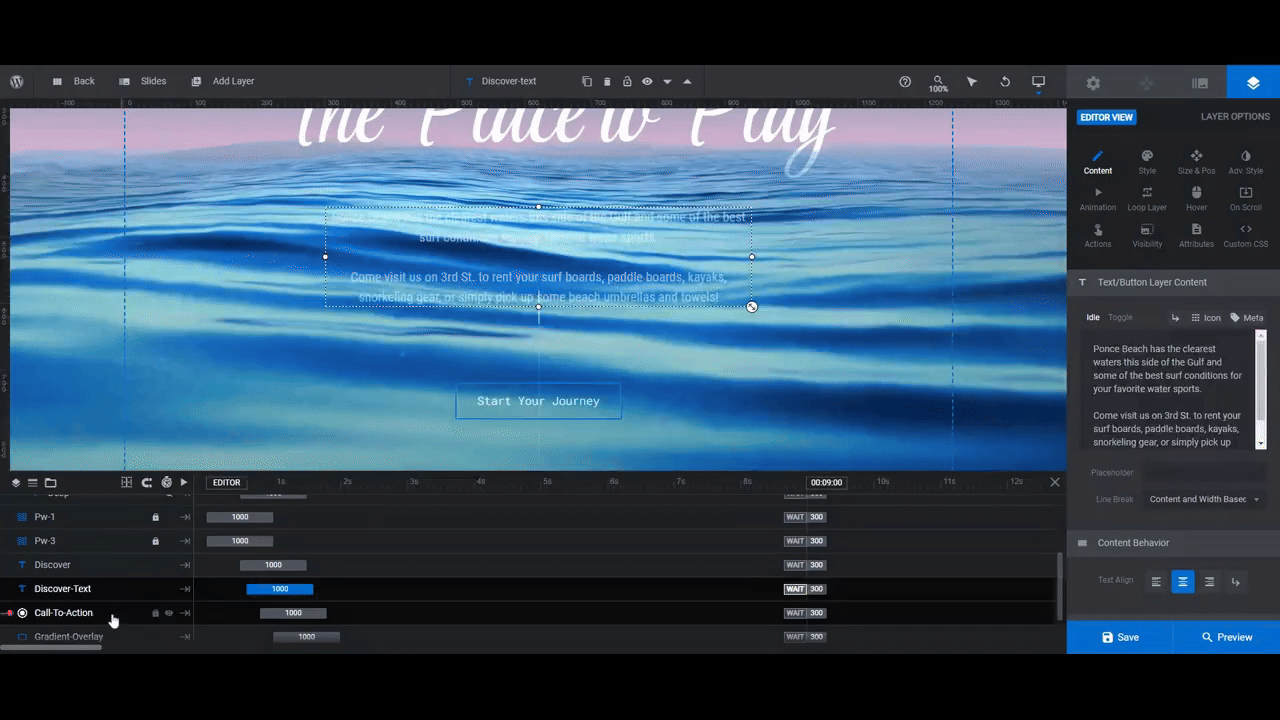
Go to the Discover and Discover-Text layers and click the eyeball icons so that they now appear in the canvas. This will make for a much easier editing experience.
Use the same “Content” and “Style” settings to modify these underwater text layers.
Note: It’s okay if the Discover-Text description doesn’t show up well in the canvas. This text will appear on top of the darker underwater backdrop. Open the Preview of your hero section to see it for yourself.
Learn more:
Step 6: Update the button
The last thing to edit is the Call-To-Action button. Just like the underwater text layers, this one is hidden from view in the canvas. Click the eyeball icon to make it editable.
Use “Content” to edit the button’s text label.
Use “Style” to change the font and styles of the text. You can also use these settings to change the appearance of the button’s outline or interior.
Use “Hover” to change how the font looks when someone hovers over it.
Before wrapping up, go to “Actions” to create a link for the button.
You can use the Simple Link that’s already in there and add a custom link for your visitors to go to.
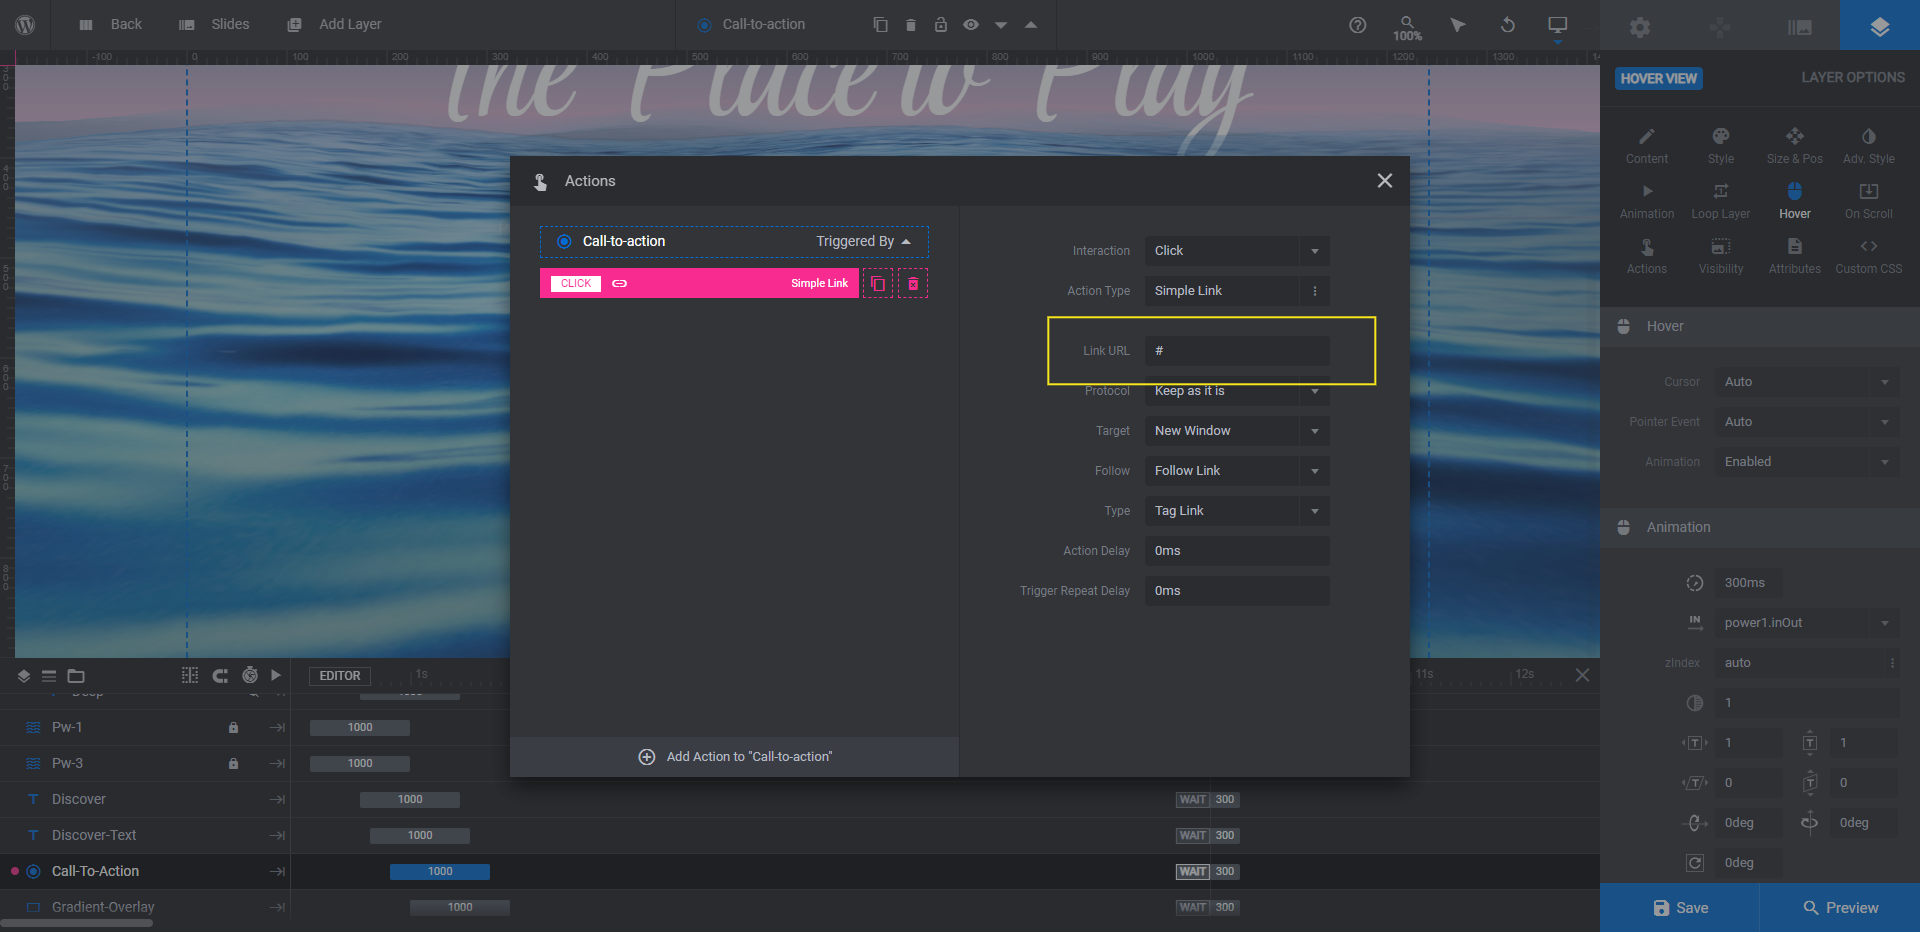
Another option is to delete the Simple Link (by clicking the trash can icon next to it) and set another type of action.
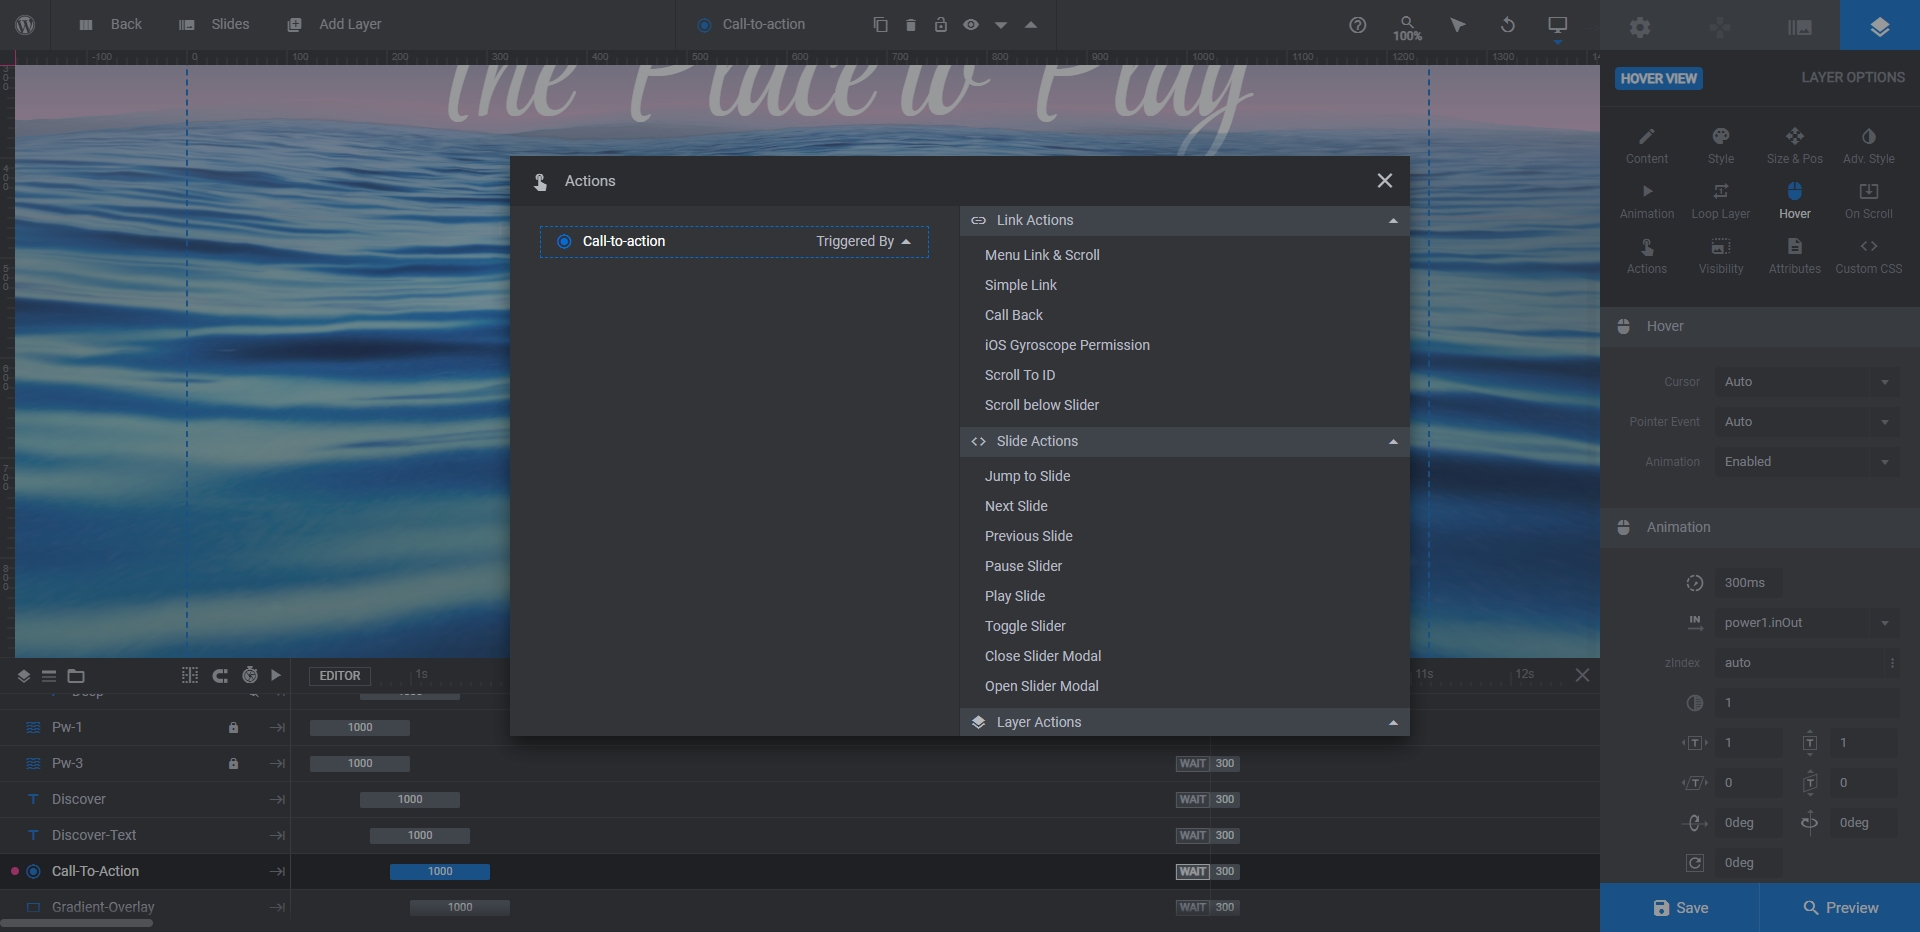
Scroll below Slider would be a good option as it would keep visitors going in that downward motion already established with this hero section. It all depends on what the goal of your site is.
When you’re done, open the preview to make sure you’re happy with all the changes you’ve made. When it’s good to go, save the module and embed this hero section into your home page using the shortcode or Slider Revolution widget in your page builder.
Learn more:
Create a cool, calming underwater effect for your home page
What’s neat about the Deep Dive Ocean Water Effect template is that you can make simple adjustments to colors and graphics and still create a unique underwater scene of your own. Then again, this template is completely customizable, so if you want to make your wave effects appear calmer or more turbulent, you could do that as well. There are many ways to put a unique touch on this design.

